Technique ideas
Preparation & baking
Brands
...Pen Blanks
Covering (with sheet, or with slices)
Templates
Reinserting ink cartridge
Air hole needed?
Other
methods
...thick clay tube for inserting ink cartridge only
...large,
thin clay tube for inserting whole pen
Pen
modifications & misc.
Pencils
Stands, pouches, etc.
Caps
Finishes
(sanding, buffing, sealing) + Carving
Selling
Websites & more examples
PENS, Pencils
(see the Covering page for covering all kinds of other items and materials such as glass, plastic, metal, etc.)
It's
probably best not to use Sculpey clay for covering
pens.
...I even gave two pens to my grandson to "test" for me (he is 4 years
old). Told him to "break" them. He had no problem breaking and cracking
the Sculpey
off the one pen, but couldn't do any damage to the Premo covered one. He
finally came to me and said "Grandma, I want a pen like this one (holding up the
Premo covered one), I can't break it. But this one (the Sculpey covered one) is
ca-ca." Judy
....baked Sculpey will be most breakable around the thinner
areas of the pen tip if it is used ...
Polypens,
a book by Linda Peterson, has many cute animal and people
pens, with many highly embellished or sculpted base stands, etc.
http://www.polkadotcreations.com/books/detail_gr9722.html
TECHNIQUE Ideas
Covering with: slices (squared, if desired), mokume gane, foil crackled, stamp/texture, sheets, crosswise or lengthwise divisions, sculptures, people/heads, marbling, anything!, etc.
It's possible to make
a curved image transfer (on an curved egg)
using Lazertran Silk paper (see Transfers/Color
Images):
Spray the image with 3M photo spray mount and apply to polyclay.
Allow to dry, wet backing paper and the image releases in 1 minute. This allows
the polyclay to be shaped after the image has transferred.
Mick
PREPARATION
Pens
can be covered as is (if handled carefully, clay won't stretch while
rolling) . . . but most people paint the barrel with a white-type glue.
Sobo brand is usually recommended but it tends to bead up on drying --I would
try thinning it. I liked the the Jewel-It glue I was forced to try on vacation
recently; apply all as thinly as possible.
....Other things to try might
be Liquid Sculpey, Future, etc.?).
... And/or pens can
also be sanded for tooth.
...(optional:)
regarding what do do with the brass-colored tip of Bic pens, I have
sanded them to give the surface more "tooth", then painted them with acrylic
paint to match the body of the pen. J
I use the Bic stik pens, make sure you remove the ink, using a pliers so you don't pull on the little rolling ball part ....also when putting the ink back in, use the pliers, don't push down on the little ball end. You could push it in and that might cause leaking. I haven't a clue why they would ooze from the top, but I have never put a hole into my pens. I have made oodles of these, maybe a couple hundred or more to sell at my craft shows. Jenny P
....also, when removing the cartridge with pliers, be sure not to slightly separate the cuff part by squeezing too tightly and pulling it slightly away from the ball??? DB
BAKING
You can bake most pens on an accordion folded sheet of paper or manilla envelope... this won't squash most things, but if desired, add a strip of batting in each accordion fold.
Annadara
suggested a cheap, metal bead loom for baking her beads on but looks
like they should work well for pens too... may have to shorten the space by bending
a bit, but these would hold the pens horizontally just off the surface (not too
high).... Diane B.
http://www.tandyleather.com/prodinfo.asp?number=5146000&variation=&aitem=8&mitem=8
Bunny's
wooden baking stand for sale... she nails/glues a short board with
several holes in it vertically, to the end a long horizontal board... dowels are
inserted into the holes so that when the pens are slipped onto them, they won't
be touching any surface (and the whole thing is short so it will fit in an oven)
http://www.thewildbunny.com/tools.htm
I
came up with another way . . . I filled a Dixie Cup (paper) with salt-dough
(but could use scrap clay), and stuck a wooden shish-ka-bob skewer through
it and baked it so it was hard enough to hold. Now whenever I finish a pen,
I just stick it on the skewer. It holds the pen up so that it doesn't get burnt.
Echo
... could also use this on its side? …would have to use a short
or cup to fit in toaster oven?...or maybe just cut the cup in half lengthwise
and add clay/skewer so it wouldn't be too tall?
Many types of pens can be used, but experiment first or use one of these:
Bic Round Stic --these are the white
ones, NOT the clear Bics which will melt in the oven!
(pkg of 10 for less than $2--black or blue--FOOLPROOF)
... however, parts
from the clear Bics can be used in the white Bic Stics:
........ the
collar on the ink cartridge is black (rather than
dirty brass of the Bic
Stics)
.........there are 4 new colors of ink for the clear Bics (where the
Stics come just in black, blue, and possibly red)
examples of
Bic Stic pens covered with clay in various
patterns by Flo
http://www.picturetrail.com/gallery/view?p=999&gid=11096896&uid=155794
(see
many more examples below in Websites)
The generic Office Depot pens do NOT work... they curl and crack. Nae
Penway brand.. look just like the Bic pens,
but cheaper ($0.75 for a dozen) ...Walgreens and Rite Aid
...the one problem
I have found with cheap pens is they sometimes don't write well. These are great.
Jean
Bic Soft Feel Stic
I prefer
Papermate Flexgrip pens because the tip is metal and a little
more finished looking than the plastic Bic Stic. Irene
....I
also use a non-click type of Papermate flex grip ultra. They
cost more, but that tip part is silver and unscrews... makes a nice straight
edge for your work and then just screw back on. Elaine
...Papermate
Flexigrips…work really well and look nice with the metal tip. Just be sure to
insert a dowel or couple of bamboo skewers while baking to ensure the pens
cool straight (they tend to curve otherwise) . . .I usually use 2 or 3 bamboo
skewers, and one time I apparently used 3 that were a bit fatter than others and
it put some pressure on the pen. When it bake, it stayed nice and straight, but
the barrell was warped by the pressure of the skewers on the softened plastic!
Live and learn... Vicki Vancouver
Pilot Bettergrip ( at Office Depot-12 for $5?) --these have a silver collar-may be best to bake these on a dowel, standing?, rather than laying them flat
CLICKERS
: PaperMate Flexgrip Ultra Retractable......... Bic Wide
Body (Retractable)..... Bic Soft Feel Retractable ....Bic
Wavelengths
...Heather's lesson on covering
. . . . plus caps, baking stands, etc.
http://www.polymerclayhaven.com/lessons/pen/lesson.htm
Flexigrip
Ultra Retractible Pens, by Papermate (newsgroup recommendation)
....They
come in many colors and widths (fine, medium); black, blue red,
pink, green, and teal.
...The grip is textured and the clay
loves it. . eileen-Gar'goils'
... the clip is molded plasic and
part of the cap. I don't have a package, I buy them by the handful at a local
paper store. The barrel starts out no thicker than a Bic.
....Cost
varies from store to store; but they are pricey- $.59 to $1.09, depending on where
you get them. . ...in the big package of 20 for $9.99 at Costco. I used to buy
a pkg. everytime I went shopping, now I can't find them. It worked out to about
.50 per pen. I did check several sites online today, but Costco had the best price
for 12 pens for $8.89, but when you add shpg. & hndlg. Marilyn . . . (3 for $1.50?,
Target, etc., )
...these pens have a nice metal screw on tip at the
pen point end, and a platic screw on tip at the other end. It is just fine
to cover the plastic tip and barrel. That will leave you with a nice looking metal
tip that can be unscrewed for refilling. . . The other bonus is that the ink tube
is sealed a tiny ways down the tube. I usually trim
the ink tube to just above that point because there apparently is a teeny
bit of shrinkage in the baking process and the ink tube will warp if you don't
cut it a bit…
....(I
use my Dremel with a coarse sanding drum to finish removing
the plastic from the Flexigrip clip after snapping off most of it.)
Sara Jane W.
...... 1) can the clicker
top be baked, and if so, what temp and how long? I tried ONE (since they were
$1 each) and the little button melted just enough
to make it unclickable. Boooo...
2) I know that some of you have painted
the clicker top rather than covering it with clay. How did you go about painting
it? And what type of paint and / or sealer did you use? I'm playing around, but
the results aren't what I was hoping for, you know??? Valarie
....When you
unscrew the top clicker/clip part you will see a threaded metal piece.
Pull and twist this piece out using pliers. Remove the clicker pieces. Replace
the metal part. Cover the top (the clip can be removed by a rotary tool
or craft knife) and cover the barrel separately. After all baking
is finished, replace the clicker pieces.
I forgot to say that
in the first pic, that pen has a "cap", a sleeve of clay over the clicker/clip
section of the pen that completely hides the plastic clicker. You make this just
as you would any pen cap after the rest of the pen has been finished. Super glue
holds the cap to the clicker and you simply "click" the pen with a slight push
and pull of the cap! Heather
Bic Wavelengths (4-5 for $2-3)--these are clickers (can remove the clip with saw or wire cutters or cover thinly keeping clip)--try to leave ink end as thin as possible (?). .
Rose Art's Great Grips (no.2029)... (oven safe)...retractable, barrels are rubberized, tip is silver.... so far, I've only seen these at Target. $1.99 a 5 pack...Maggie
I
just found a new type of pen to cover yesterday at Sam's. It is 'click-y'
and it is metal, so it bakes well. The whole inside comes
out.. . by Zebra and is called a F-301 ball point pen. I got 10
in a pac at Sam's for $10. Ruth R
... I am very upset.. I followed notes
to use the Zebra F -301 as recommended.. & the darn thing still
sagged :< any suggestions? I was using Premo & not baking it as hot as
usual.. I was at 225 patsy
pen
"BLANKS"
(fancier pens... come in several
component pieces which must be assembled)
Bunny's
pens made with Penn State forms?
http://www.thewildbunny.com/pens.htm
Apryl's pens made with component forms
http://www.heartofgold.org/gallery/pens.html
Linda Goff's pens made with component forms
http://www.lindagoff.com/pens1.html
(...click on all 3 pages)
pens made by wood turners
(kids & adults) with blanks, for shipping overseas to soldiers
http://www.freedompens.us/pens/pens_01.html
http://www.freedompens.org/pens/pens_001.jpg
Boston Clayworks' nicer pen blanks
(including fountain pen)
... plus the "assembly press"
squeezing tool for assembling tube type pens
....also, we will be carrying
a great new pen which needs no tools
to assemble- 24 kt gold plated (or satin) like our others ... can be assembled
by hand, just twisting the parts together!!
http://www.polymerclayprojects.com/Pens.htm
Penn State
Industries, pen blanks, http://www.pennstateind.com,
1-800-377-7297 . . . fancier ....mostly screw-out tips?
...WoodTurnings
sells Penn State blanks for a lot less and they are very nice to work with. Their
slimline prices are only $1.70. http://www.WoodTurningz.com.
Kris
...I
prefer Hut Products http://www.hutproducts.com
(for various kinds of nice pen blanks)...also carry the hard-to-find,
chrome pen/pencil parts, which Penn State doesn't. Service is always
zippy. I also think they're friendlier. Irene in western NC
..... (see Supply Sources for one more place)
turning
wood to make pens ... lessons, and suppliers, etc.
http://www.pennstateind.com/Merchant2/merchant.mv?Screen=CTGY&Category_Code=PCK
http://tinyurl.com/45ps3
simple
lessons showing a clay sheet being rolled around a pen
http://sculpey.com/Projects/projects_TieDyePen.htm
http://sculpey.com/Projects/PDF/Coneflower%20Pens.pdf
online
video lesson by craftygoat on covering a Bic Round Stic
pen with a clay sheet
... also shows twisting out the ink
cartridge with pliers, covering the barrel with liquid clay
http://youtube.com/watch?v=5giJu-i0atg
click
here for lessons on making various kinds of patterned
sheets (not just cane slices as below)
http://www.glassattic.com/polymer/Canes--general.htm#sheets
cutting
clay sheets evenly:
...to make parallel cuts for sheets
when covering pens, I've been using a sheet of graph paper stuck
under the back of my clear acrylic work surface.
Diane B.
...an Omnigrid
quilter's ruler is a good thing to work on when making measured, straight
or parallel cuts.... Mary used the (back side of the) 6 x 12" one
with bright yellow lines.
...(see more
gridded work surfaces in Tools
> Work Surfaces)
covering with an already-flattened SHEET
Create a sheet, and apply it:
----create a sheet of the desired pattern
thicker than #4-on (my) pasta machine; roll to smooth if very bumpy with drinking
glass, pasta machine, etc.
----roll through #4 on pasta machine
----place
on patty paper, plain paper or waxed paper
(----place template on top of clay
sheet and cut a little larger all around--optional)
---- cut one lengthwise
edge straight
----press the straight edge to pen, smoothing top of edge down
and toward pen
----press-roll (paper and) clay around pen slowly,
trying to avoid air bubbles
----make indentation in wrong side of clay with
clean edge, and cut (slightly longer?)
----press second edge to pen, butting
to first edge or slightly apart then pressing to close gap ends
----press
clay around writing tip end and cut off excess; smooth and shape with fingers;
bring clay to very edge of opening, then press in a pencil or the ink collar to
create rounded hole (make sure NO clay obstructs the hole)
----press
clay around back end of pen and shape with fingers, or cut 4-6 V shapes across
the (short) end and fit together for a smooth fit or where you want the pattern
more uniform
----roll pen with a stiff, smooth, flat, surface (piece of glass
or plastic is good) until smooth; pen should be parallel to edge of surface --so
angled to table; can actually roll glass sheet on corner of bottom surface
(PCE now carries a 9x3" lucite rectangle that would be perfect http://www.polymerclayexpress.com/tools.html)
Pinchy's
lesson on covering a pen with sheet of clay (ignore
parts about making a base sheet with rolled-in slices)
http://www.geocities.com/pinchyspolymerplace/pentutorial.htm
Donna
Kato's lesson on covering a pen with a sheet of clay, then adding
clay onlays (pen is a clickable pen, but could be any pen)
http://www.michaels.com/art/online/projectsheet?pid=e00916
more
lessons showing a clay sheet being rolled around a pen:
http://www.hgtv.com/hgtv/cr_clay_other/article/0,1789,HGTV_3239_1376361,00.html
(click esp.on fig. B)
http://sculpey.com/Projects/projects_TieDyePen.htm
http://sculpey.com/Projects/PDF/Coneflower%20Pens.pdf
I
made a few Natasha (patterns) too, but made them as thick sheets big
enough to be put around a pen! (lesson)
....Just make a large Natasha
bead-block --double or triple the size needed for a bead.
....Stretch it out if it's not quite long enough for the Bic pen.
...Then
cut lengthwise slices off of the two best sides of the natasha bead-block
like doing a regular Natasha bead (see Beads
>Symmetrical > Natasha). I try to pick the two best OPPOSITE sides
so I'm not cutting into the design of the other.
...Place those two cuts,
side by side, then roll them through the pasta machine (or brayer them) so they're
smooth and joined well. Marcella
I also made a beautiful pen by using
a Skinner blend jelly roll and used that as the core of the block.
...I've also made variations by incising the side of the block and inserting
slices of contrasting but complementary colors. It's another interesting way
to do the natasha blend. Marcella
covering with SLICES
Slices placed directly
on pen
-----place slices all over pen (with mokume gane, etc.--can overlap
where necessary) (the less bumpy it is in the application, the easier it is to
smooth it later! (see Canes--cutting for more info)
----if using cane
slices, it's easier to square them up (pinching the edges of the log sharply)
to butt together on the pen
(----stacking the canes together first to create
as large a "slice" as possible reduces the number of seams and can save time on
a sheet)
OR
----place slices (butted or randomly spaced) on a sheet which
is either on the pen OR on working surface (place sheet on pen if done separately
and)
--begin pressing directly down
on each slice with your fingers, trying to work it straight down into
the base clay
----keep doing this until the whole sheet is relatively uniform,
then begin gentle rolling
---finish rolling as described above with sheet
of glass or plastic (for smoothest results)
P.S.
I discovered a technique when I was making my pens for the swap that helped a
lot with the distortion. I had faces all over my pen, so it was impractical (seam-wise)
to put the slices on the slab of background clay first (at least nothing I could
figure out quickly). I put on a base layer with the background pattern I'd chosen.
Then, I added my face slices.
To keep the distortion of the slices down, I
didn't roll the pen, but rather used a little rectangle of glass (longer than
the pen) and PRESSED down on each cane slice--the full length of the pen--working
my way around the pen. *This embeds the slice into the background with its edges
intact.* Then I began rolling over the pen with the glass with strokes, or pressed
on it more with my fingers/hands first if it seemed to need it. This resulted
in a less-distorted, less bumpy pen to sand (or not) for me.
sculpey.com's
lesson on placing slices from a spiral cane on a pen, then
rolling to smooth (they use Bend and Bake clay, but certainly not necessary)
http://sculpey.com/Projects/projects_Nick_SpiralPens.htm
michaels.com
lesson on using units composed of 4 square cane slices (butted)
for wrapping around a pen (beginning at ink end, and placing each on till get
totop)
http://www.michaels.com/art/online/projectsheet?pid=e01646
To
create a sheet of slices:
--This
is the method that Donna Kato taught me at Ravensdale last year and wow, does
it work great for putting cane slices onto a sheet of clay:.
..... first cut
your slices very thin... put some of them down
on the clay sheet... roll the sheet with an acrylic roller six
different ways (end to end, side to side, and then both cattycorner
to avoid distortion).... then put down more slices and repeat....
continue until all your slices are done and rolled into the sheet of clay. . .
. use some pressure each time.
......then you can fit the sheet directly
onto whatever you wish to cover, or add a backing sheet for strength,
and cut whatever pieces you might need.
..... I had tried rolling the slices
in before, but had never done it this thoroughly,
and that is what makes the difference. I found I can completely eliminate
any lines around the cane slices. It's well worth the time spent doing
it. Dotty in CA
--I lay out a thin scrap sheet (or one that's the same color
as the outside of my cane), pinch the edges of my square
cane to make them somewhat pointy, then lay the (as equal thickness as
I can slice them) slices next to each other on the base sheet --or overlap them
if they're round. If I'm using square canes, I then press and wiggle
over any seams that gap. Then I roll gently with a large roller and put through
the pasta machine opened just a tad wider than the sheet (if it distorts too much
in one direction you can put it through a bit thinner setting after rotating it
90 degrees, but I try to avoid that).
.....If I've cut my slices very evenly
to begin with (a constant learning process!), I may be able to avoid the pasta
machine altogether. Then I'll just put a sheet of patty paper (or tracing,
regular parchment paper) over the sheet, and press straight down on any
lumps with my finger before rubbing vigorously back and forth over any
problem areas. Then I go over the whole paper with a wide roller. DB
If I want to put the slices directly on the bottle or the pen, after
laying them on I press *straight down* on any higher spots (so there's less distortion)
until I've gotten all the lumps about the same height. Now the next part may be
hard to describe but it's the most important. I make sure my work surface is placed
at the edge of the table. Then I place the pen or bottle parallel to the closest
edge of my work surface, and perhaps and inch or two away from the edge. Putting
a small sheet of acrylic (at least as long as my pen is) both on the pen and on
the edge of the work surface simultaneously --which means the sheet is kind of
diagonal-- I roll the acrylic sheet over the pen, *using the edge of the work
surface as a guide* to keep the rolling parallel. If you're using a clear acrylic
sheet, you can see exactly what's happening and whether you'll need to restraighten
the pen or press harder on one side, for example.
This makes for a very smooth
surface and avoids or keeps to a minimum any post-bake smoothing that has to be
done. I do this for most of my BOH because I would rather make more bottles than
futz over each one too long, and I did it with my kids' pens class because it
got rid of a multitude of sins quickly! DB
TEMPLATES (if wanted)
----use the template
given here, or make your own by using a strip of clay of the desired thickness
and wrapping it around the pen; butt ends and use as your wrap-around length;
graph paper is helpful
----if placement of the pattern is important, cut a
template from a clear overhead projection sheet or use something translucent like
waxed paper or tracing paper to allow you to see the pattern enclosed by the template;
or cut a frame to use instead.
First I made a template of the pen exterior with (graph) paper. The correct size can be estimated by wrapping the paper around the pen, then adding some for the thickness of the clay. Instead of paper, a better way would be to use something that's the same thickness as the clay you want to end up with, and wrap that around the pen. I put the template on an index card (lg.) and covered it with tape, or slid it under the clear acrylic of my working surface.
After pasta-rolling and cutting out the background piece, I laid the pen on the clay and pulled the edges up on the sides of the pen. The last part I did with my fingers, then butted the joint--it's better to have to push the clay together over a tiny gap than to have to correct a clay overlap from using too much clay. Usually I end up saying, ok cut the base clay a little longer/taller/shorter than the template next time for better fit. At this point, I added my (face) slices. . .
REINSERTING the INK CARTRIDGE
Pressing
down hard on the ball tip when reinserting the ink cartridge can damage
it, and the ink could have flowing problems sooner
or later. One easy way to avoid this is to use a special "tool" for helping
insert the cartridge. ...Drill (or find) a hole in a piece of wood (or in
something else) that's larger than the ball end of the cone-shaped "collar",
but smaller than the wider end, and use that to press the cartridge in
that final way so that you're not pressing on the ball itself. Try to use even
pressure too.
(OR, w/ the Bic Round Stics. . . an empty, unclayed, pen barrel
is just the right size to push the cartridge back in. Cella in SD)
AIR HOLE needed?
(some people are certain that an airhole is needed somewhere in the pen cover, but I’ve never used them with the Bic Stics –DB) (also see Preparation above)
If you can write with the pens with the tops in place, why do you need an airhole when you cover them with clay? I know the original bics had the hole on the side but the round ones don't.
Covering (fancier) Pen Blanks
Toika's
twist pen blanks & lesson on covering
http://members.aol.com/T2945/pcinst.htm#key
and http://members.aol.com/T2945/pcinst.htm
Jami's lesson on covering a Penn State pen blank http://www0.delphi.com/polymerclay/claypen.html
(.....see other examples above in "Pen Blanks"...)
thick clay tube for inserting ink cartridge only
You
can always make your own barrel from scratch and use just ink refills ....I
prefer to do this as it can result in much slimmer pens (but doesn't have
to).
.... I use a bamboo BBQ skewer to pierce the centre of a ball
of clay
... then lay it on its side, and roll on my board until
the clay lengthens all along the skewer (this is the same method as for
making the polyclay pencils described by Sue Heaser for
covering pencil leads --see Pencils below)
...after
trimming, decorating, and baking, slide the skewer out while the
clay is warm
.. then insert just a pen refill ... a dab
of glue just inside the business end holds it in. LynnDel
craftygoat's
similar online video lesson on making a pen barrel with a bamboo skewer
.....but
she adds an eyelet at the pointy end of the pen as a decorative collar
.....bakes
on the skewer with the eyelet in place (wide end in the clay)... removes skewer
after baking
... inserts an ink cartridge (trims off empty end of ink cartridge
if it's too long), then superglues the eyelet to the clay (around the writing
tip)
http://youtube.com/watch?v=QNByOteB-AM
for thinner inserts, a thinner dowel is a good other option
--also
thin metal tubes that you can get in model supply shops
...I bake with
the skewer or tube in place....then remove the skewer just after I take the pen
out of the oven - while it is still hot but not ouchy hot. It comes out really
easily, I find, with a little twist. . . . if necessary, I use a tiny
drop of glue - PVA (white glue) seems best, to hold the pen
in.
...... if you keep the drop tiny, then when the refill runs out,
you can simply hold the metal tip in your pliers, give it a tug, and out
it comes - insert new refill and the pen is everlasting... most of the time the
glue is not necessary, though - the fit is snug enough to hold it
at the hardware store I was buying those 12 inch copper tubes, cutting
them in pieces and putting pen refills in them because my husband
wanted pens that weren't so fat. These make really thin pens.
....I
tried a few with the alunimum tubes and they were
too soft (I will fill those with liquid polymer and make handles
to tools with them). The copper tubes are pretty and I think will cover just fine.
Gail
You
can also cover just the ink filler (metal only?),
making your own polyclay barrel for a nice slimline pen..... though most refills
are more expensive than Bic or Pilot pens!
....Perhaps one could buy Bic pens,
use the ink filler without the white barrel, and disguise the Bic-y
end by wrapping near the tip with decorative wire (?) LynnDel
Sharon's
pen with beads (animal head and patterned, in this case) strung on
the middle of the cartridge (so that there is clay on the top and
the bottom of the pen, but beads in the middle (she uses special pen blanks, but
by cutting out part of the Bic Stic barrel --and possibly placing a short
brass tube, wire or other armature over or next to the ink cartridge-- one might
be able to do something similar, then put the thing together (with glue?) at the
end??
http://www.smartassglass.com/Pens_cat_hat_JPEG.jpg
making a large, thin tube then insert a whole pen
I
made a couple of "dummy" pens to cover (out of what--just the barrel?) --after
baking, I let them cool for 5 min or so - and the "pop" out the dummy...
the entire barrel!
Now, just slip in a brand new, undisturbed
Bic Round Barrel pen - and it's ready to go and TOTALLY refillable...
no split pointy ends, no ink problems... Katie, (who DOES make caps)
stretch
an existing cane into a long, thin-walled tube by rolling
progressively larger implements (needle tool, skewer, knitting needle) in
the lengthwise middle of the cane and pressing down slightly as you roll
until the lengthwise hole is the diameter of the barrel (leave one end closed)
....remove
the final "roller"... insert a whole pen barrel and close clay
around pen, or slice lengthwise to the middle and insert barrel; roll till clay
has spread to the ends of the barrel
....another
way is to cut a lengthwise slit down an existing cane
........
roll center to widen, insert (cartridge?) and carefully butt back together??
Donna
Kato shortens her pens by removing the ink cartridge and black cuff and
cutting the Bic pen catridge where the B is; before reinserting the cartridge
after baking, she cuts the end of the ink cartidge itself over a garbage can.
I assume you mean the blue or black part at the tip . . . But, while you have
it off you can cut the tube (Kato recommends at the big B of the word Bic)
and then put the end back on. I know it is kind of tapered, so work with that
by cutting a little v out of the clay when you get there. I really enjoy making
the pens long or short. Elaine
....see also
Websites below, for Pinchy's lesson on shortening a Bic pen
I've also made some really mini pens using refills for those pens that have four colours - they are tiny metal refills, about 3" long in red, black, green and blue. They make such sweet little pens - good for a key chain or to fit in a tiny diary or purse.
Susan
W's short pens with wire embedded in back end with a bead placed
on it
......... then the rest of the wire is formed into a spiral
....
she also has dangles from the end http://www.polymerclaycentral.com/pcc/swappen2001.html
...
also many pens from 2 PCC pen swaps
http://www.polymerclaycentral.com/penswap_2004.html
I
bought some Bics with colored cartridges yesterday (pink, lime, purple,
turquoise)... they're called Cristal (sic) Grip Colors, and are
NOT the pens that are good for covering (they
will melt!!)... but the ink cartridges can be removed and then used
in the regular Bic Stics.
. . .the collars of the cartridges are
also the colors mentioned above instead of that dirty brass
color...! Diane B.
You can fine-sand and paint the dirty brass metal tip on the Bic Stics by sanding & painting them....
One batch of
my pens split at the end of the point side when I was trying to jam the
ink back in. It seemed like the hole had shrunk. Others were no problem. Does
anybody know why this is?
A couple of things may help (if you're not willing
to switch to a stronger clay, or at least mix your Sculpey with
something stronger):
--make sure the clay at the very end doesn't get too
thin when it's being shaped; it can easily get that way if you're trying to
create a sloped shape.
--make sure the hole in the writing end is
big enough; I usually go back with a skewer or something larger and rotate it
around in the hole until I'm sure no clay is even touching the edge; you can actually
cut/remove any clay from the edge, leaving a ring if that doesn't work well enough.
--as someone else said, try inserting the ink at different cooling stages.
Are you putting any stress on the end while inserting? Diane B.
Take an old, empty ink cartridge and pull the plastic tube away from the insert part holding the writing head. Insert this into the pen before you bake it.. . . or find a nail, etc. that will fit inside the hole, and insert that before baking. Chuck
Let's say you have covered
a glass Christmas ball or pen with pretty cane slices or a nice marbised sheet
of clay. Once you have it smoothed, pour some ultra fine glitter into the
palm of your hand and roll the ball around in your hands to stick a light coating
of glitter all over. The idea is to press it into the clay so that the surface
is quite smooth. Now bake it and when it's cool, give it a couple of coats of
Future or Flecto Varathane. Jody Bishel (DB: or use Pearl-Ex???)
example of
this on a pen at Kim's page
http://www.tlcnet.com/~polyclay/canes2.html
I have covered a raw clay pen with bold(?) Beedz --tiny (glass) holeless beads http://www.polymerclayprojects.com/Beadlets.htm --and Pearl Ex & translucent Premo... brushed in some opal-ish Pearl-ex on the Premo and rolled the pen in it..... I then rolled the clay-covered pen in the Beedz, and rolled and rolled to get them in deeply.... After curing, I applied two coats of Future, and still no color change or bead loss. Deb (more on these beads in Mixing Media > Beads)
Sue Heaser's beveled pens (as
if turned on a lathe)
http://images.amazon.com/images/P/1581801394.01.LZZZZZZZ.jpg
.....There
will be a how-to article on making polymer clay pens, turned on
a wood lathe, in the next issue (summer? 2004) of Woodturning
Design magazine. Here's a link to the magazine's website: http://www.woodturningdesign.com
...Ed
There are several ways to end up with a polymer pencil:
Most mechanical pencils will melt or warp...
I found a mechanical pencil that can be covered (the
whole inside comes out, leaving only a tube), but I baked all 3
that I got and forgot to look at what the name was!! . . . .It had a blue barrel
with white eraser, and a clear blue point cover (also bought from Sam's?). Ruth
R.|
...I finally happened upon the "Zebra M-301 Ultra" which work most
of the time. You have to take it apart and only cover the barrel (you can get
them at Wal-Mart or Staples or places like that)
http://www.epinions.com/offc-Supplies-All-Zebra_M-301_Ultra_Mechanical_Pencil_Black_Barrel_5mm_Lead_Refillable
...the
two brands of mechanical pencils I tried didn't work
I have found some Pentel pens that when you unscrew the bottom the whole thing comes out of the barrel. Someone described this kind of pencil on GlassAttic so I thought I would try them. Lisa
If you really want to cover
a whole pencil, either find a skinny one, or I guess an outer
layer could be sanded off of a regular pencil to give enough room for the
clay covering (so it would still fit in a pencil sharpener.... otherwise, you'll
have to sharpen it the old fashioned way by whittling)
...I have both
painted (with acrylic paint or glue?) and baked pencils with polyclay and
put them in the oven.
...Yes, you can bake the entire pencil with the eraser
on it, but I found the eraser tends to
harden a bit and doesn't work quite as well. . . .
....For pencils that
I either painted or covered entirely with polyclay (yes,
you can cover the whole pencil with a thin layer, but it is a little harder to
sharpen it than normal), I pull the eraser end right off the
pencil, cover and bake, then put the eraser end back on. Depending on the
pencil, you can either pull the whole metal band off along with the eraser, or
just pop the eraser right out of the metal band. Just be careful you don't break
the eraser right off! :) Vicki in Vancouver
Sue
Heaser covers a pencil lead to make her pencils
...Sue's
examples: http://www.bpcg.org.uk/tutorials/pencilpic.htm
...Sue's
lesson on covering a pencil lead http://www.bpcg.org.uk/tutorials/pencils.htm
...Sue's
lesson on enlarging bead to cover a rod http://polymerclaycentral.com/orntrees1.html
...I make a ball, lay it on the
table and pierce downwards through the dead centre with the lead - as though
I am piercing a bead. Then I lay it on its side and start rolling. The
only snag is that occasionally, the hole that the lead is in gets a bit too big
as you are rolling it into the pencil shape. I then stop, pinch the clay all along
the log to squish it back onto the lead, continue (where is the rest?)
...It was awfully hard to get the lead
exactly down the middle of the barrel..
I found
if you pierce the lead through the exact centre to start with, it
stays exactly central. Sue
...use artists" (and engineers') pencil
leads--they cost around 50 cents or more apiece, and usually come in a dozen;
my art supply store has them, maybe others; buy a slightly harder lead so that
it will last longer; put any fancy canes or bits at the back end,
so they won't get ground off with the first sharpenings
......these
leads should come in a box of a dozen for around $4.00, in any hardness
level you'd like (2H being the standard #2 we're used to). I might suggest
going to a harder lead, such as a 4H, so the pencil doesn't get used up as quickly.
These leads are shorter than regular pencils (one from my stash is 6 inches long),
but I would probably extend the difference in clay.
…...our local Office
Depot, has these leads in the 'art and drafting' supply aisle…
Could
also use another insert method with the lead
... or roll the lead up into a
sheet of clay, like a jellyroll (spiral) --Skinner-blended?, etc.
Could break the leads in half and make short pencils
SHARPENING
covered-pencil-lead pencils:
...These covered pencil-lead
pencils are sharpenable ... if you want to be able to use a sharpener though,
be sure to taper the end, and also make the pen thin enough to fit
into a sharpener!!
(could use sharpenings as an inclusion
in clay too... or in other ways)
...some clays seem to sharpen better
than others !
...I find a make-up (eyebrow pencil?) pencil sharpener
is the best as it caters for wider pencils, or I whittle with a penknife
for a rustic look.
...No problem with chipping at the edges - but you
need to bake a good long time for maximum hardness. I used
Fimo, Cernit but not regular Sculpey.
The
sharpened area can actually *be* part of the decoration
if you layer colours and wrap before extending them along the lead.
...I
am now experimenting with making a short fat cane, piercing with the lead and
then reducing the cane around the lead - when you sharpen you get glimpses of
images - great fun! A Kaleidoscope cane could be terrific!
...Also,
if you press the pencil into a rounded triangular shape, it still sharpens
well and, with patterning inside you get an effect like chevron beads.
...Or indent the pencil all round, longitudinally, with a knitting
pin (then reroll?) ...(like a chrysanthemum cane...see Canes
>Translucent-Opaque)
....and you
can use a length of flower or geometric cane - pierce down the centre
of a section of that and then proceed. Sue?
...try
making jellyrolls with foil plus your color of choice, and place
the jellyrolls around your lead center as if you were building a cane.....theoretically,
when you sharpen, you should have a flower effect.
...You
can put slices of the cane on the outside
The
sharpenings from these pencils are gorgeous...must be a use for them? Sue
(inclusions, etc.?)
Fimo's
Granite clay (no longer made --boohoo, but could create faux
granite) works a treat - granite pencils!
...Fimo's
Art Translucent clay was awful - far too fragile. So the amount
of translucent in the mokume gane didn't affect it's fragility?
...I
used Fimo's Transparent/Opaque which is a stronger translucent and wrapped
it round a pencil that I had made (on the thin side) using white. The pencil I
made using Mokume Gane and just Art Translucent crumbled when I sharpened it and
broke up when I tried to write!
baked
sleeves... esp. for non-bakable pencils
...Another idea might
be to create a sleeve (or sleeve-with-a-bottom) of clay on a tube of the
exact size as the pencil barrel you decide on (a rolled-paper tube
should suffice if it's several layers thick)
...
remove from the paper after baking and slip over the real barrel with a
bit of glue (probably easiest if you do it while warm if snug). Diane B.
Here something I've done for pencil toppers so I could bake them without having to bake the actual pencils: I chopped a pencil into about 4 pieces, stuck the pieces into a hunk of clay, and baked to make a little holder stand. Then I formed the toppers on these pieces and baked. This way the polyclay fits perfectly on top of the pencil (and there was no problem with the erasers). Vicki In Van.
STANDS
& TETHERS
...&. BOXES-POUCHES....
ergonomics, etc.
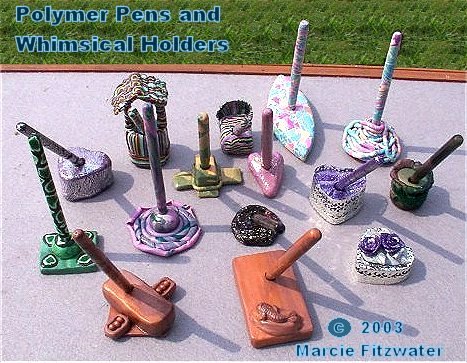
Marcie F's many pen stands (even boxes, and wood board base with molded
onlay and faux wood pen)
http://members.tripod.com/Artistree4/pens-holders.jpg
Elizabeth's
various pen stands, made by covering lumps of clay with cane
slices... occas. onlays ...(+one matching box)
http://thepolyparrot.com/pens3.html
(bottom of page)
Jan-Ohio's sculpture
pens, stands (and notebooks)
http://www.jjacksondesigns.homestead.com/Pens.html
Joan's rose & leaves pen
& stand
http://www.zing.com/album/pictures.html?id=4293174575
Terry's chrysanthemum cane pen in Balinese filigree stand
http://www.cerridwencreations.com/art/xmas%20gifts/pen_in_holder.JPG
antkar's graphically colored pens and pen stands (website
gone)
Claire's pens with stands (website
gone)
Tricia
D's feather-ended pens in block stands reminiscent of trophy bases
http://ntpcg.org/Tricia%20Dewey/w_feather%20topped%20pens.htm
Ocelyn's
pen holder bases which are mostly the torso part of a crazy animal
with the heads attached to the tops of the pens, legs extra
. . . also
ladybug and turtle where whole body is covered glass ball ornament,
and pen covering matches skin ...pen is put in ornament hole
http://www.whimsicalclaycreations.com/WhimsicalToo.html
Marie R's lesson on making a dragon
"stand" for pens... dragon stands on all fours, and has holes in
it's back for holding 3-4 pens vertically ... she uses a 7/8" dia. wood dowel,
five 2" headed nails, and a 90 degree screw-in hook for the head... the holes
are large enough for (uncovered pens), but could be larger...4 legs, a tail, and
neck/head are made from clay and placed over the nails, etc..... (she paints
the body rather than covering it with clay, but could be covered instead)
http://www.sculpey.com/Projects/projects_PenPalDarrel.htm
Cute idea from Lylse for a "frog" pen... cover a pen with frog canes, top with a tiny frog sculpture.... then create a "rock" stand for the frog pen to rest in
Ruth's dog and moose pens
(long necks) with bodies as stands... moose also has sign Gone Fishin"
and fish hanging from antlers
http://albums.photo.epson.com/j/ViewPhoto?u=4218486&a=31279335&p=68441886
Ruth's
tree pens with leaves, flowers, in stand of mounded earth
http://albums.photo.epson.com/j/ViewPhoto?u=4218486&a=31279335&p=68441985
...the tree pens were actually an evolution... I started with a wood grain...
they looked too boring, so I added leaves... still not what I wanted so
I added flowers/ butterflies... Then I wanted to make a cap but it was
too short and wouldn't stay on, so I stuck the cap into a ball of clay and make
a grassy hill (really just a evolution of mistakes!...that is how I get
some of my most creative stuff!!) Ruth
Linda WP's lesson
on covering pens to look like a carrot and broccoli stalk
(with cartoon faces)... these are placed in a stand-base of lumpy
ground (made from piles of ground covered clay balls, possibly covered
with a thin sheet of ground-colored clay) which has a purchased mini-fence and
some clay tomatoes added
http://www.hgtv.com/hgtv/crafting/article/0,,HGTV_3352_1915128,00.html
see also "Caps" below for more animals made with pens & Linda Peterson's Polypens book
Mary's innovative pen stand ....a sheet of patterned clay draped
over a lump of scrap clay, and then flared flat onto (table) suface
http://jackmaryetc.com/claymisc.htm
Jean S. & Janet both used thick, domed ovals of clay (covered
with patterned clay or surface technique), with holes in them, to stand
a number of pens in
... Jean also put tool ends (like Xactos) or paintbush
ends in hers, plus she had long slots for holding blades
If making a stand for your pen/pencil, be sure to make it wide enough on the bottom that it won't tip over... you can also add a piece of felt to the bottom
I
had fits after making pens with stands which fell over after
baking. My next stands were flatter and broader, still not exactly tip proof.
. . ."Why don't you build your base on a 2" washer?" Well, I went to the
hardware store and got a small bag of 2" washers (5/$1) and tried one. . . he
was right. Irene
...For a paperweight/pen holder for either the Bic or Penn
type of pen, I've recently been using 5 minute epoxy to glue together three
2" heavy washers which I then cover first with scrap clay, then with either
cane slices or flowers made to match the flowers in the cane I used on the pen.
This makes for a very attractive set, especially if you add the retractable pencil
or a covered letter opener. Of course, to make sure the pen fits the paper
weight exactly, I press the baked pen into the center of the clay at a slight
angle until the clay will support it. Then I remove the pen and bake the paper
weight. Patty B.
wire and
beads (or whatever) can extend from the top or sides
of a pen, or dangle
Susan Walter's metal bead/glass bead,metal bead
and wire spiral extending from top of pen; she also has a wire eyepin?
projecting from the side near the top which dangles some small beads
http://www.polymerclaycentral.com/pcc/swapcoveredpen.html
Allison's horizontal wire coil (which the pen
slips into)... coil has a long leg at each end which is turned perpendicular,
and the end of each leg is embedded in a long, base stand made from clay
http://www.esva.net/~byallison/P5110021.jpg
I can't remember who did it, but somebody made a Bottle of Hope into a pen stand ... then covered a pen to match. The patients loved those. . . . (see Covering/Glass for more info on BOH)
I made 40 or so personalized pens for the teachers at my school -- covered the pens with polyclay and sanded them, rubbed on a drop of diluent with my finger (let sit a few minutes till tacky), then stuck on the names I formed with raw Premo extruded string in script. Worked great. LynnDel
see Websites below, for Pinchy's lesson on adding a screw-in keyring to a (shortened) Bic pen
Make
a tether for your pen/pencil by inserting a loop of wire (paperclip end,
etc.) into the end of your pen, or embed an end of the tether (knotted, or use
ball chain, etc.) into the end; hang the other end from a bulletin board
for a "sign-up" list, or make a weight for the other end of the tether (cover
a rock?).. ball chain comes in various metallic colors and some other colors
......colored
ball chains at PolymerClayExpress... http://polymerclayexpress.com/findings.html
make
pencil or pen grips in special shapes, to fit around writing
ends, to allow for easier holding and writing/drawing
...uses:
for children who are learning to write, or for older people with
arthritis, etc., or for some disabilities...
...could be make with
regular clay, or softer with Bend & Flex clay, or even
with 2-part silicone molding material (see Molds
>Silicone)
http://www.therapybookshop.com/24.html
(various shapes... not nec. clay) ... see more on special grips in Disabilities
> Tools,Assistive Devices
could
we make something from clay like these unusual ergonomic-shaped pens...
or cover or just embellish them?
http://www.penagain.com
Pinchy's
lesson on covering a pen, and also making a shortened Bic
pen with a screw-in keyring
.... she removes the black cuff, then cuts
the pen between the Bic symbol and the word "round" with an extended,
snap-off blade cutter, then reinserts cuff; she cuts the ink cartridge 1/2"
shorter than the pen, and leaves an exposed hole in the end if using a keyring
http://www.geocities.com/pinchyspolymerplace/pentutorial.htm
boxes & pouches
Today I started work on some tubular "pen boxes." They are made from gray pvc pipe. They have a bottom and a fitted cap. The ends will be open, with a recessed circular place for placement (by the purchaser) of pc discs. The use of the same cane in covering the pen and making the end cap discs might be a cool idea. I will be demo-ing a technique for making perfectly round discs fitted as bottom and top ends of this and other boxes made from pvc pipe. Tom
have you noticed the new M&M minis "mega-tubes? They are just long enough to hold a polymer-clay covered pen -- and the one I experimented with survived the oven! Jules
Or, you could always fold small boxes for them with wallpaper or other fancy papers. There are lots of ways to fold boxes... I have various templates and ideas on the Boxes page. . . . or you could just take apart a toothpaste tube box or something similar to get the idea for one way. Diane B.
There's a quick way to sew pouches
for your pens if you know about "chain" sewing/piecing; this is a trick that's
sometimes used by quilters when they need to sew a seam in many sets of
the same two pieces as quickly as possible.
Lesson: ---so, to do this
with pen pouches:
(before sewing, cut out as many fabric shapes as you'll
want from the same or different fabrics with a template )
1. turn under
one long edge of the first pouch piece a bit and sew all along its length (this
is so there will be a finished edge on what will be the tunnel area for
the cord)
.....Now here's the trick: when that seam on the first pouch is
almost finished, butt the next pouch right up against it *in the
same orientation,* and continue sewing the same seam on the next pouch, never
lifting the presser foot. . . do the same with all the pouches until you've sewn
that seam for all (you'll have a long string of pieces...DON'T cut them apart
yet).
2.repeat on the other long side . . . now clip them apart, and
restack them ...all in the same orientation
3. turn under and
sew the top (short side) leaving enough room in the tunnel created for the cording
you've chosen (you can turn it down twice before stitching if you want a finished
edge, but that area won't really show for these tiny pouches)
(*it's easiest
to thread your cording through the tunnel at this point while the fabric is still
flat)
4. finally, fold the pouch over, right sides together, and sew
an L shaped seam:
beginning *just at the bottom, or under* the tunnel, sewing
down the long side, and turning 90 degrees (with needle still in) to sew across
the bottom (stitch back and forth a few times at each end of the L to secure).
....*Then you can string through any kind of cording you want and tie a knot
on each end, or maybe even add a small bead first. Diane B.
For my pouches
I use wide ribbons ...during the after holiday sales, i go to Micheals
mainly and fabric stores, to buy up all the wider ribbons, saving up to 85%! It's
seasonal yes, but great colors, plaids, bunnies, fall leaves, trees, . . .also
grab a bag of embroidery silks . . .
lesson: Take a length of
ribbon double the length of pen, and a half inch or so extra on each side. Fold
over one edge far enough to let a cord slip through, stitch down with matching
silk, same for ther edge, then either basket sticth or straight stitch down either
side in matching silk.
...you can make your own fancy cording too:
Braid 6 lengths of silk together as long as needed and thread through top for
pull cord to close..single silks, verigated look brilliant...also velvets in nice
reds,greens,burgandys for Christmas and pastels at easter and fall colors. Polly
I found pen pouches in velvet for .99 ea at http://www.woodturnerscatalog.com (search for pen bag), which I plan on using until I can get making them down to a science. They had some nice pen displays there too. Laurel
...non sewn version of pouch, lesson for slip case without
a complete closure:
grosgrain ribbon about an 1 1/4" to 1 1/2"
wide and some tacky glue would do the trick. Cut the ribbon the double
the length of the pen plus enough extra to allow for making a glued over hem at
the top edges. Do the cut ends first, then fold ribbon in half, and glue the long
edges. Any excess cleans up with water before it dries.... Might need a light
weight to keep flat while drying. (I'd want to make the top edges uneven, with
the back a little higher than the front, to reduce bulk.
...If a closure
is required, cut it long enough to allow for about a two inch foldover flap
for the top. This could be secured by a narrow cord/string tie. I would
put the centre of the cord/string at the end of the folded over flap, securing
it along the crease of the hem fold with a dab or two of extra glue in the crease
under the string before you glue down the hem. Once dry, it should be nicely secure,
and then just wrap the cords around the whole pen pouch and tie off however you
like.
...Velcro works for this too, but can be expensive
...(Grosgrain
ribbon has some real advantages over the non woven ribbons. It's usually reasonably
inexpensive, is quite strong because it's twill woven, which gives it non fraying
selvedges too. Plus it comes in many colors and widths. Regards, Ke
...don't
know if you can buy them where you are, but I've seen very thin gauge cellophane
(visking) and polythene flattened tubing which is sold on a roll (it looks
like clear insulation tape).I thought that if I were making lots of pc pens, appropriate
lengths of this tubing could be cut and the ends closed with staples or sticky-tape.
It would be an awful lot quicker than sewing pouches. Alan
CAPS
There
are many ways to make caps. The challenge is make the cap fit the pen just right.
My favorite way is to:
--make the pen first and cure
--then dust the
pen with cornstarch (or wrap with baking paper (DB:-or reg?-paper
or aluminum foil),
--wrap with a medium sheet of scrap clay, joining
edges to make a tube around the pen 1 to 1 1/2 inches long.
--Cure
on the pen for about 10 minutes.
--Slide off the tube from
the pen and close off one open end.
--Cover with matching clay, cane
slices, sculptural details, etc.
--Then cure for about 30 minutes.
A pen cap that is slightly loose can be tightened with a dab of
clay around the inside. LynnDel
(DB: or simply make the cap you want over the cornstarch or paper/foil, and bake for the usual time, without making a base first; some people bake the cap right on the baked pen-at least with the foil or paper.)
If you are making a big batch of pens and are good at making them all the same diameter, you can make a long tube of clay around one of the pens, then cut into shorter lengths after the first baking. I have several different sizes of these longer tubes sitting around, ready to fit to pens that are yet to be created. (LynnDel)
Heather's
lesson on making caps, etc.
http://www.polymerclayhaven.com/lessons/pen/lesson.htm
Someone suggested using tampon tubes for the armatures for pen caps, or roll your own paper cylinders--should be a few layers thick for strength. . . Diane B.
One thing I learned about sculpting things at the tops of pens -- they need armatures or you will eventually (in my world) end up with a decapitated figure. My pointer pen has a length of paperclip wire inside the pointing finger. All the animals are formed around the pen all the way to the top of the head; they are not sitting on the top of the pen. LynnDel (see website)
Linda
P's lesson on making lo-ong dogs (or other animals) on a
pen.... these sit horizonally, supported by legs on each end....
the back of the dog is a removable cap which fits over the writing tip when not
in use (it's a "ball" of clay with 2 legs and tail attached ... the
front body ball, head, and 2 legs are formed at the back end of the pen
http://hgtv.com/hgtv/cr_clay/article/0,1789,HGTV_3236_2731434,00.html
Polypens,
a HOTP short book by Linda Peterson, has many cute animal and people
pens, with many highly embellished or sculpted base stands,
etc.
http://www.polkadotcreations.com/books/detail_gr9722.html
(....for
more animal pens, see above in "Stands")
I personally don't like caps on pens -- when I get a pen with a cap I immediately throw the cap away (this is on unimproved cheap pens only). But people always ask for them, and that's why making them seems a necessary evil. In addition to the nuisance of taking the cap off and putting it back on, when the pen top has something sculpted on it, the cap can't be stored on the end of the pen (unless by special design, as when making a top hat with dimensions that fit the inside of the cap) and is almost guaranteed to be lost. At least in my world.. Lynn Del
FINISHES
... sanding/ buffing & sealing (optional)
(see more in Sanding/Tumbling
and in Buffing,
or in Finishes)
+
CARVING
Elizabeth's lesson on carving over
ink guidelines on baked pens, then backfilling with heavily softed clay
(Diluent)
(.... here she carves words... in script!!!) http://thepolyparrot.com/pens3.html
One thing I forgot to put in my pens info file is that many people like to smooth their pens after baking, then some add a sheen or shine.
Smoothing the pen surface as much as possible before baking will help (see above, slices) , but afterwards you can "wet-sand" it with the black wet-dry sandpaper found at hardware stores. (This must be done under a light stream of running water, or dip your sandpaper in a bowl of water frequently--this keeps the powder you're creating from being breathed, and also keeps the sandpaper from getting clogged and less useful.)
Begin with a 400 grit paper (or even 320 if the pen is very bumpy), and sand in various directions or circles until it's pretty smooth. Then go to a 600 grit. (some people go up to 1200 or so, but most don't--the higher grits can usually be purchased at auto supply stores).
If you have a lot of pens to sand, you can speed up the sanding process with an electric drill. Put the correct sized drill bit (one that just fits into the barrel) BACKWARDS into the chuck and tighten (backwards so it doesn't drill into the pen...then it's just like a skewer that spins fast.)...then slide the pen to be sanded over the other end...You then have a rotating pen ... and you run the sandpaper up and down the barrel of the pen. ...(I just lined up the papers in little 2 inch squares by grit and went 400-600-1000-1200-1500 with a few swipes each intermittently dunking in water...changed pens and resumed). .... I finished sanding 70 pens in under two hours, sanding with 5 grits and buffing using this method. ...Sarah
You will notice that the pen now looks kind of light and chalky. Now you can buff the surface to get rid of that by simply rubbing on your jeans or other fabrics. Some people like to use a bench grinder fitted with a muslin wheel, some have bought jeweler's buffers like the Foredom, and one person even mentioned using a hand-held battery-operated shoe polisher. The longer you buff, the higher the shine. Quite glassy effects can be had this way.
You can use a finish-sealer
after buffing instead. There are matte and glossy finishes (e.g. Elite Diamond
Varathane Water-Washup, or the Fimo or other Brands, OR you can use Future floor
polish from the grocery store) --here's some info from my files on that:
Didn't
someone say that you could make Future give a sheen rather than a gloss by applying
it when the clay item is still warm, then wiping it off? . . .several times??
How does this sheen compare to the jeans-rubbed or Foredom-buffed ones, anyone
know?
(LynnDel) I did this (well, kind of) just yesterday -- wow, did that
Future steam when applied to just-out-of-the-oven clay! Two coats on hot clay
= very shiny finish, like glazed ceramic, but I didn't wipe it off. Wiping
it would probably make the difference between "sheen" and "gloss".
Once you start applying it to hot clay, you will be hooked. It's "internalized"
and you'll have a finish that *won't* wear off.
if you rebake (the
pen with the Future on it), how long and at what temperature do you do it?<
Two thin coats. Sometimes it gets rebaked for the full time and temperature because
I have added clay but if you just want to set the finish,five to ten min. at
200 degrees.
~(if you've coated your pens with
finish while they were on skewers), twist them on the skewers before
adding the second coat. Otherwise, you may have all your pretty pens nicely
stuck to the skewers. Kim
Kim--I don't know if this works with Future, but
when this glue thing happens with Flecto (Varathane), I put the beads on the stick
BACK in the oven long enough to get hot, and they slide/twist right
off. Sarajane
Another find this
weekend was a bobbin box. . . . I was clearing out my sewing room when
I found this box which has 28 spindles 1" high, 4 rows of 7 at different levels.
I place my pens in progress on the spindles and they don't get flat spots or pick
up clay scraps. It should work well as a drying rack. Dolly
For
applying a finish, I do JUST what you mentioned! I stick those skewers
into a big chunk of styrofoam... if they get all gunked up, I just replace
them with new ones as I need to.
(At
school) What we've done is put items to sell in a basket, with price information
and an honor system envelope, for checks or cash. I'd ask at the office
if I could leave it in the teacher's lounge for a day. If they know you
at the school they're usually happy to oblige. Maureen
That's what I do,
too. After 25 years as a school nurse in a large K-12 district I can take my wares
into almost any school. Never had any major problems. Those guys are some of my
best customers. Trina
I sell my pens for between $7 and $15. They're really a good seller at shows too, so I think it's reasonable. ~Joanie
Saw some cute
animals last week (Bic w/bases, not technically difficult, no caning or
sanding/buffing) for $18 and watched people handle and buy them without
any price complaints. Biggest complaint: "I love the frog, but you don't have
any dogs. Could you make me a dog?"
I sell my pens for $24 at the
Village, where I have very low overhead and I can work while I am in the studio.
The difference in the cost of materials is no more than $2.75 from Bic to SlimLine,
less if you buy in quantity.
Remember
that color is a very personal choice. If you offer a wide range
of pens, more people will buy them. Once I made this Gawd-Awful warm yellow &
red set of pen & perfume atomizer which almost made me hurl to touch -- a
woman came into the studio and almost wet her pants over them. Wanted more. I
try to keep track of what sells so that I can make more of that color, theme,
whatever. I am not retentive enough to keep a good inventory-- but I should because
I know it would help me understand my customer.
I know people that sell
'theme' or holiday pens like hotcakes, its never worked for me.
Some colors sell better at certain times of the year --I have no idea why. Jami
A nice way to display pens, (mine don't have covers) is to use some food coloring, and color some dry rice. Then I use a clay flower pot, decorated to compliment my display, I covere the hole in the bottom and fill with the dry rice. Now my pens stand up right in the rice, people can take them out and look at them…
One year I filled a decorative glass bowl with rice and stood my pens up in it. The rice (or whatever other grain, etc. you want to use) has to be high enough to keep the pen upright, about 1-1/2-2". It worked fairly well and didn't scratch the pens. … This past year I took a cardboard box that my computer keyboard came in and folded the top right back against the rear of the box and taped it so that the top and bottom of the box formed a 90 degree angle. Then I placed it on my table with the lid to the back and the open box facing forwards and draped a piece of black stretch velvet over it. The pens laid nicely in a row in the open part of the box, with the velvet having just enough texture to keep the pens in place. The display worked quite well, however I had a LOT of pens and although I arranged them in colour groups I think perhaps the effect of the pens was a bit lost with so many all together. Lots of picking up and touching. . . .Vicki in Vancouver
I use an oval box lid (papier mache type box from Michael's) that I've spray-painted with the faux granite textured paint, and I arrange the pens on that. No, they don't stand up, and I can only display 10 or so at a time, but it looks very nice, rather elegant, even. I don't want my displays to attract more attention than my work. I've found that displaying fewer of each item works well, because too many choices can overwhelm some people into indecision. Irene in western NC
I drilled holes in a piece of wood and inserted little brass rods... which I then poke up into the pens for baking. I can bake almost 2 dozen pens at once. I also use the stand for putting a finish on the pens, so they can dry without any marks too. I like to use the brass rods, because I can just take a piece of sandpaper to them to remove any old finish build up. I find this is a good way to display my pens at shows too. When someone buys a pen, I then install the ink part. That way they get to see how the ink part installs, which can be a big help. Joanie
I just heard a cool idea on tv -- use one of those glass flower arranging "frogs" (they are like a glass paperweight with a bunch of large holes in it) to hold pens. Decorative, enough weight to hold them upright, puts the pens on more than one level. Mine holds about 10. Sherry B
make pen & pencil sets
I made 5 pens for my craft show. They matched the theme of my booth which is plain navy blue with gold stars. One for each of us to write with and one for the mailing list and a spare for those who needed to borrow a pen. The customers really noticed them and wanted to buy …
I make note cards with pictures of my angels on the front of the cards. I plan to include a pen with the cards. They fit perfectly in a 1/2 sheet or A-2 size stationary box with a clear lid.
Next I will try the copier transfer thing for the clay I cover the pen with. Could be cool!
The first pen I made I literally stuck a slice of every cane I had in no particular order all over it. Most people like it best. Shane
Sometimes when people say they
don't want to buy one of my pens because they always lose them,
I'll reply that when you have a really special pen, you tend to be a little more
careful and are less likely to lose it. I know that's true for me, anyhow. If
they say "oh I'd still lose it" then I figure they really don't want to buy one
anyhow and that was just their "polite" way of getting out of it.
. . . I
sometimes don't even acknowledge that statement when someone uses it at a show.
Instead...I'll talk about how I make the pens, show how they can be refilled,
tell them where they can get refills, and talk about how they are a great
"guy" gift especially for graduation or Father's Day. I'll hand them
a pen and the "scratch pad" page of my mailing list book so they can feel
how it writes. I'll hand them another so they can compare the silky smooth feel
of the buffed ones versus the subtle roughness of the textured ones.
...I
also display them in a case, similar to a jewelry case, to raise
their perceived value, and I always display one of them in a gift box.
Irene SD
Donna's
lesson on covering pens with a Skinner Blend sheet, adding
onlays, etc.
http://www.diynet.com/diy/cr_clay/article/0,2025,DIY_13750_2274059,00.html
*Heather’s
excellent lesson on covering diff. kinds of pens, caps too
http://www.polymerclayhaven.com/lessons/pen/lesson.htm
Heather R's pens, some with caps, stands
http://members.home.com/claythings/pens.htm
Ziggy’s info and photos on one way of covering
http://www.delphi.com/polymerclay/messages?msg=3394.2
Sue Heaser's diagram of rolling to enlarge a bead (or for
pen, vessel, etc.)
http://www.polymerclaycentral.com/orntrees1.html
Donna Kato's fat pens project
http://www.prairiecraft.com/fatpens.html
(gone)
Linda Goff's higher end shorter
pens & pencils
http://www.lindagoff.com/pens1.html
Bunny's pens made with higher end forms
http://www.thewildbunny.com/pens.htm
PCC’s pen swaps
http://www.polymerclaycentral.com/pcc/swapcoveredpen.html
(plus some stands)
http://www.polymerclaycentral.com/penswap_2004.html
(plus some figures, etc., on ends)
ClayPen photos of many pens
http://gallery.gundo.com/gallery/album62
(3 pgs.)
http://polymerclaycentral.com/claypen_pens2.html
http://polymerclaycentral.com/claypen_pens.html
Random Acts of Craftiness' 1997 pen swap
http://www.mindspring.com/~randomacts/swaps.htm
Polymerclayhaven's
pen swap (many CAPS) http://www.polymerclayhaven.com/PCHSwaps/pen.htm
(gone)
Sandie W's pens with many canes &
techniques , etc.
http://albums.photo.epson.com/j/AlbumIndex?u=4217709&a=31274699&f=
many
pens with simple canes and simple lines at PolkaDot Creations
http://www.polkadotcreations.com/jewelry/pens2/index.html
canejane's cane covered pens, some translucents
http://www.picturetrail.com/gallery/view?p=999&gid=697310&uid=502621
Claire’s pens (website gone)
Tricia
D's fancy pens with large colorful feathers embedded in back
ends (stands reminiscent of trophy bases)
http://ntpcg.org/Tricia%20Dewey/w_feather%20topped%20pens.htm
Tricia
D's fancy pens with heavy onlay, feathers, etc., et.,
http://www.tdartdesigns.com/gallery/polymer%20clay/w_pens.htm
Christy's people pens
http://www.geocities.com/gpcritter105/ChristysClayroom.html
http://www.geocities.com/gpcritter105/MorePens.html
Braidarug's
many cute pens with bodies or other onlay
http://www.geocities.com/braidarug/creative_design.html
(click on first 3 galleries)
Charlene's pens
with lizards or snakes wrapped around ends
http://home.att.net/~reserved/charlene1.htm
Kellie's pens
http://www.cde.com/%7Elunytune/kelpenlk.htm
Michele's pens
http://www.cde.com/~lunytune/clayday.htm
Nancy's pens with gingerbread men on top
http://albums.photo.epson.com/j/AlbumIndex?u=1751472&a=30091915&f=0
Petra's pens (website gone)
my kids’ pens
from the school pen class (website gone)
LynnDel's kids' pens
http://pw2.netcom.com/~p8melo/kidspens1.html
PCC's
kids' pens, with some onlay & sculpting
http://www.polymerclaycentral.com/castle/kidpens.html
Seventh Sense's pens with tiny
figures on top
http://7th-sense.com/fimobuddypens.htm
Lorieo's onlaid faces/hair
and vines (on pens and notebook cover)
http://www.sculpturefromtheheart.com/_borders/tablet2pens.jpg
Kris Richards also has instructions in her book "New Ways with Polymer Clay".