BODY PARTS & sculpting TOOLS
for
much more on HEADS, see Heads-Masks
....(plus more on age, gender & ethnicity characteristics, proportions
for features, etc.... and skin tones)
...loads more info on body parts --human, animal, and alien is on main Sculpting page... especially the first few websites listed under Sculpting, Instructions!!, esp. Dan Perez' site) .. Websites section there may move to its own page soon though
...for armatures (esp. for larger figures) & stands, etc., see Armatures--Permnent
...to purchase eyes, hair, etc., supplies, see Supply Sources
simple lesson on ovals technique for
creating correct body proportions
http://www.sanford-artedventures.com/create/tech_oval_action_figures.html
from THE DANE:
Human
Proportions: There are two forms of measurement for sculpture and 2-D figure artworks.
A. Inches or metric measure.. a man is 72 inches (6 feet)
high and a woman is 5 foot 8 inches high. The human skull is 8 to 9 inches high.
Scale figures 1/5th (16 inch), 1/6th (12 inch), 1/8th (9inch), 1/9th(8inch),
1/12th (6 inch), 120mm (8.25inch approx. I'm not great with metrics), 1/35th)
military tank scale(2.25 inch0, and gaming scales, 25mm(1 inch), 54mm also.
B. Artistic Measure... people are 8 heads heights tall. Mid
Height is just below the groin or crotch. Elbows end at the waist. Legs are a
6(thigh) to 5(lower leg) ratio. Men are 2.5 heads wide at shouders(widest point).
Women are 2 heads wide at the hips (widest point). Hands are one face(from chin
to hair line) long. Feet are one head long. Finger tips end at 1/3rd down on thigh.
Chest opening at bottom of sternum (solar plexus) on men is 45 degrees wide and
on women is 60 degrees wide. Navel (belly button) hieght Men: at waist, Women:
just below waist.
Types of figure
Measurements:
The PAST: (men) 6.5 heads high, TODAY:
7.0 heads high, FASHION Style: 7.5,
HERO: 8.0 heads high, MONSTER
or MYTHIC HERO: 9 heads high
HEAD
MEASUREMENTS:
Eyes are at center from top of skull to bottom of chin.
Ears are midway back on skull. Back bottom of skull ends at bottom of nose. Face
measure (from hair line to chin) brow is 1/3rd down, nose bottom is 2/3rds down,
ears are same hieght and location vertically as nose. Eyes are one eye space apart(any
wider looks smarter, any narrower looks less intelligent). Nose nostrals are (Caucasion
Whites) one eye space apart. Mouth corners width end at eye centers.
MOTION
RANGES OF JOINTS:
Head and hips can turn
almost 90 degrees side to side. Spine has movement only at neck and below rib
cage. Shouder Blades start move up only after the arms have risen 30 degrees.
This is lesson one for you. The best way to learn is by not trying to create a master piece, but get into the joy of practice and learning. Playing like a child is the best way to sculpt.Any questions or problems E-mail me and send jpeg figure pictures for free critiquing. Let's all have some FUN! Sincerely, THE DANE figuredane@aol.com
from KATHERINE
DEWEY:
Elvenwork Modeling Mat
(and the Junior mat) http://elvenwork.com/workbook.html...Katherine
Dewey's mats with all the landmarks and proportions of the human
(adult and child) form listed and accurately illustrated at 1/12th
scale on a precise grid, the scale used by most miniaturists... the other side
is a multi-purpose work surface complete with a grid, clay measuring
and cutting guides that will make it easy to convert the scale of your
figures upward or downward.
..... my work mats got here from Elvenwork,
and I have to say that these things are going to be a real time-saver! I got both
of the mats... the adult and the child... I now have a quick reference
for sizing and checking proportions on my dolls - no more scribbling notes on
freezer paper! I'd seen copies of her workbooks, before, so I knew the work mats
were going to be pretty cool - they are so completely thorough in the amount of
information on them. The child mat has children from six months old up to ten
years old. Really neat, Katherine! I'm going to love these! Elizabeth
(Katherine
Dewey, 1998) ...Those who took my course or bought the handbooks at Ravensdale
will understand this post. Follow are ratios that produce a leaner, but still
accurate figure. I fear Henri Moore's influence got to me: I've been aculpting
a fuller figure lately, and the ratios given reflect that. Here are the new ratios,
ideal for elves and their ilk:
FEMALE
Head: 1 ball; Eyes: 1/128; Eye Lid: 1/128; Nose: 1/64, 1/128; Cheeks:
1/64, 1/128*; Ears: 1/64; Neck: ¼; Torso: 3, 3 ¼; Breast: 1/32, 1/16*; Thigh:
3/4, 1; Calf & Foot: 1/2, ¾; Ankle: 1/128; Upper Arm: 1/4, 5/8; Forearm: 3/16;
Hand: 1/16; Thumb 1/64, 1/128; Shoulders: 1/32
MALE
Head: 1 Ball; Eyes: 1/128; Eye Lid: 1/128; Nose: 1/64; Jaw: 1/32*; Ears: 1/64;
Neck: 1/4, 3?/8; Torso: 3 1/2, 4; Thigh: 1, 1 ½; Calf & Foot: 1, 1 1/8; Ankle:
1/128, 1/64; Upper Arm: 3/8, ½; Forearm: 1/4, 3/8; Hand: 1/8; Thumb: 1/64,; Shoulders:
1/32, 1/16
proportions of average
adult human body and face:
* The average adult is
eight heads tall (eight times the measurement of the head from the bottom of the
chin to the top of the scalp). A woman's head is slightly smaller than a man's
head, but both are still eight heads tall.
* The hips are at just about the
halfway point; in other words, the legs are about four heads long.
* The
eyes are halfway between the top of the head and the bottom of the chin.
* The space between the eyes is one eye-width.
* The size of the ears can
be determined by aligning them between the eyebrow and the bottom of the nose.
* The placement of the ears should be just behind the center line of the
skull in profile, positioned straight up and down.
* Divide the bottom half
of the face in thirds to determine the placement of the nose and mouth.
*
The nose is about as wide as the index finger.
*
The hand can be measured using the face as reference--if the heel of the
hand is placed against the bottom of the chin, the middle finger should reach
to about mid-forehead; a man's hand might reach his hairline.
* Each finger
bone between knuckles (tarsal, I think) is about 1.5 times the length of the next
smaller tarsal.
* The foot is the same length as the forearm, measured
from the inside of the elbow to the wrist where it meets the heel of the hand.
~~~~~~~~~~~~~~~~~~~~~~~~~~~~~~~~~~~~~~~~~~~~~~~~~~~~~~~
Proportion
Wheel for doll artists! .... a 9" wheel that calculates accurate
proportion for any size figure from 2-32" (simply dial the
wheel to the desired figure height, and use the dimensions given in 10 key areas
around the figure diagram)
... order online at http://www.gnomebodies.com
(now gone?--sh. be available elsewhere?)...cost
$18. plus $4. priority shipping. Linda
The
proportion, size, shape, color, texture
of any body part can be created to look realistic, or
it can be unrealistic-abstract (perhaps distorted).
....for
example, the part could be short or long, fat or thin, extra-large or extra-small...
or some parts could be one style, and other parts diff.
Some
figures have all their body parts present
(torso, head-facial features, neck, arms-hands, legs-feet)
........ but some
have fewer parts and are still recognized and considered "figures"
....parts
can also be suggested, but not complete (e.g., a short bit of twig
extending from each shoulder to suggest arms, or a vertical indention created
in a solid area of the lower body to indicate legs)
...when body parts
are omitted, in general the first part to go is often the neck...
followed by feet-legs... hands-arms ... torso... facial features: ears, nose,
mouth, eyes ... (heads are sometimes omitted too, but then any or all other parts
must be used) ...all these things up to the maker, of course
physical
details can be added to any part even if the part itself remains abstract...
or embellishments can be added to any part
...e.g., on a torso: boobs,
round belly-hips-navel, jewelry or clothing ...on an "arm": bracelet
or purse... on a "head": elaborate mouth or hair, etc., ...not to mention
attached, dangling, or projecting feathers, wire, stones, beads, whatever
skin color possibilities:
...flesh (Caucasian, Asian,
light brown, cocoa, dark brown)...(see recipes in Heads-Masks
>Skin Tones)
...white... white with gloss finish (faux
ceramic)
...black
...translucent: plain... over white (alabaster) or color...
tinted, with inclusions
...Pearl: over white or any color... tinted... using
a mica technique
...pink or other pastels
...special colors like: green
or glow-in-the-dark for a monster, witch... red for devil ...bone for skeleton,
etc.
...any color at all
flexibility options for
figures
....immovable poses (rigid)
... jointed (usually for
arms and legs only... but could also be at neck, or elbows-knees, or hands-feet)
......joints
can be movable in all directions, or only in 1-2 directions
--depending on the material used for the joint, and the shape and tightness of
the connected parts
.......e.g., the flexibility of most cording will
give a joint that's able to move easily in any direction, whereas metal eyepins
may give a more restricted motion
.......closely or tightly joined
pieces or those with short connectors, may not be able to move as much
as loosely joined ones or those with longer connectors
.......
shape of ends to be connected can block each other's movement somewhat,
or allow more of it
(for most rigid figures and dolls, see Sculpting)
aluminum foil
NoraJean's
video lesson on making an aluminum foil armature for figure which could
also be used a free-standing aluminum foil figures (posable)
http://www.youtube.com/watch?v=nwlqanYbACY
(some of NJ's videos are from previous webcam demos so the frame rate is slow
& choppy... so best to let the whole video load, then move the scan button
at bottom of video window with your cursor to make the movement smoother and quicker)
pipe cleaners, etc.
lesson on figure from pipe cleaner (aka chenille stem)
http://www.mcuniverse.com/index.php?952
lesson
on 3" dolls ("wee folk") each made from a 12", 3mm dia pipe
cleaner, folded in half, then for neck and arms
... 14mm wood bead head, real
acorn cap...clothing
(dress shown) of wool felt sewed with blanket stich and embroidery
floss, perle cotton belt...neck of pipe cleaner poked through top of dress-shirt...
long "fleece" hair?
http://www.hgtv.com/hgtv/cr_dolls/article/0,,HGTV_3242_2334417,00.html
tallmouse's West African dressed figures made with doubled
pipecleaner for arms, dowel
through bead (head), robe-dress rectangle of fabric (diamond cut out
in center for head, then tie around waist and neck, turban)
.....these
figures often carry everyday items like baskets with fruits/ vegetables/
straw/ fish, buckets, jugs, beautiful boxes, lanterns and filled sacks
http://www.tallmouse.com/projects/kids/african/index.htm
"macaroni
monsters" -- jointed figures &animals on pipe cleaners
...could
be made with
polymer clay tube beads (thin walled) instead of dried pasta pieces
...for
animals, create torso by sliding a few pieces of macaroni (or tube-shaped, or
other polymer beads) onto the center of a pipe cleaner....bend on both sides to
form neck and tail... add more (beads), folding ends of pipe cleaner to hold in
place... bend neck between beads 90°
to make a head... attach pipe cleaner-and-tube bead legs, etc.. can add other
parts like ears, horns, manes, of clay with glue or other pipe clearns.... can
also wrap pipe cleaners with beads around torso, if want.
http://familyfun.go.com/arts-and-crafts/season/feature/famf97project/famf97project22.html
...if
using clay, these could resemble brightly painted wood figures (and chairs) which
have a different color and diff. pattern on each section
...similar to
http://www.artware.ns.ca/Retail%20Store.htm#Birds%20of%20Paradise
...add my pipe cleaner doll or figure instructions (and Grace's photo?)
pipe
cleaners (the bumpy kind) formed into many tiny animals by Garie
and his kids
... then bodies are embellished with shapes of
raw clay (and bit of white tacky glue?) to add eyes, muzzles,
bellies, plus hands and feet, and many other things... then baked at
265 for 15 min. (frog, bears, Picachu, monkeys, bunnies, dragon, etc. )
http://www.garieinternational.com.sg/clay/furry.htm
Garie's
lesson on making a fluffy bear with bump pipe cleaners
http://www.garieinternational.com.sg/clay/furry_stems.htm
Max's
wonderful pipe cleaner figures and action heroes (no clay, but could be)
http://www.likeacarp.com/max%20page.htm
Family
Fun's examples of pipe cleaner figures
http://familyfun.go.com/arts-and-crafts/buildmodel/feature/famf0200pipecleaner/
(see also below under Jointed for Sue's using short lengths of pipe cleaner as joints between clay arms or leg and clay torso)
mostly-wire figures
lesson
on making a flexible simple colored wire figure... 2- 3 pieces of
corrugated cardboard (for head and body, or head and chest
and pelvis), which can then be posed or "play baseball" etc....
head has drawn face
http://twisteez.com/lessons.html
Dar’s mostly-wire
“ladies” pins ...torso is one large, flat, fairly triangular
polished stone, multi-wrapped with wire and beads
...for hair
and head, loose coils of wire around a ring of wire ...each leg
or arm is a short wire with loop at end (one has tiny stone attached
to loop for shoe )
http://www.afamilyjournal.com/WireLadies2.jpg
and http://www.afamilyjournal.com/WireLadyGold.jpg
Susan
B's lesson on making a tiny simple wire figure ...then (partly)
clothing it with caned clay (sheet of spirals)
http://www.sculpey.com/Projects/projects_wiredwomen.htm
Marcia
B’s a tiny wire body with a polymer cane slice wrapped around (square
orientation) for a dress...head of wrapped wire, hair of 7 cut loops of embroidery
floss
http://www.rubberart.com/classes/class6_people.html
(lesson gone)
Michelle R's lesson
on making a small body from twisted wire (wood bead head)... filling
it out with scrap white clay... dressing with cane-slices top (probaly
disk, w/ slash to center), a textured/highlighted skirt piece, and a belt?
to gather top ... hair is loops of embroidery floss gathered in the wire
above head, trimmed at ends
http://www.hgtv.com/hgtv/crafting/article/0,1789,HGTV_3352_1399700,00.html
Debra
G's art figure in shadow box... mostly wrapped wire, with polymer
head and hands
http://www.hgtv.com/hgtv/cr_clay_figures/article/0,1789,HGTV_3237_3417221,00.html
see
also bead people and tube-bead people below in Jointed
>>>>>>>
reference aluminum foil figures
flexible,
posable puppet (or figure ) made with 2 twisted wires, wrapped with cloth
tape + sheets of polyfill a for extra thickness ...then (epoxy)
clay, but leaving actual joints are wire-only
http://www.darkstrider.net/puppet_tut.html
(flexible clays)
for making figures from special clays which remain flexible
after baking, see (Sculpey's Super Flex) "Bake and Bend" clay
n Characteristics > Super Flexible
Clays
(one lesson on using it to make a flexible frog) http://www.sculpey.com/Projects/projects_Nick_RainForestFrog.htm
Jointed figures ...(3-D and flat)
General Info.
ADD ALL OTHERS HERE
many
of the Dia de los Muertos skeleton figures could be jointed, or just
inspirational for jointed figures (see Halloween
> Dia delos Muertos)
...a jointed (plastic) skeleton http://www.art-e-zine.co.uk/dia.html
...Joanne's
skeleton ladies (white skin) have arms and necks which look jointed but
aren't ...facial features & finger lines added with black paint
see also "marionettes" below for more inspiration for jointed figures (...just don't add strings or rods)... lots of ethnic ones too
arms-legs-heads for
jointed figures could be made with clay:
clay fauxs :
...wood
(unfinished or finished, "stained" or natural) ...twigs-bark...cork...
terra cotta... ivory... jade or other semi precious stones...stone... metal...
straw or twine... leather
(see Fauxs-many,
Faux-turquoise&wood, Faux-ivory,
Inclusions)
patterned clay:
...random pattern
of stars, flowers, or any clay pattern
...abstract (marbled colors, mica manipulations)
...particular colors/patterns to indicate stockings, gloves, shoes, etc
(other possibilites for any clay)
...add texture
(and maybe highlighting or antiquing)
...twisted-braided clay ropes
...use
beads or tube bead for limbs and/or hands-feet
...use a mask or plain ball
as a head
...make any kind of shoes, hats (or other accessories) and clothing
for a particular figure's look (ethnic, seasonal, period, etc.)
or
with mixed media:
real objects
... some 3-D
items could be twigs or bamboo... twine (frayed for hands?)... wire (plain, twisted,
flattened)... plastic (tubes, coated wire)... fabric (stuffed, pleated,rolled)...
cording... twine... ribbon... paper-cardstock... fabric embedded with translucent
clay or liquid clay
...for heads, anything round, oval, etc., but could really
be any shape-thickness
.......coin, cane slice, small rock or polished
stone, any piece of nature, metal washer, glass, aluminum foil shape, metal or
other bead or "charm" or some part of a piece of jewelry,
...many
"junkyard dolls" made from all kinds of things... most have dangle arms
and legs
http://www.art-e-zine.co.uk/abbottdolls.html
"Parts"
of limbs (or clothing, etc.) can be any amount of the whole limb you want
...
e.g., an entire one-piece arm could dangle from a shoulder... or the arm could
be broken up into various clay shapes, beads, wire or wire coils, other materials
for many parts (some of which could be jointed or strung on eye pins, etc.)
....legs
could include shoes as one piece, or shoes could dangle
You can also use
other materials and items to create "joints" which can
move in all directions, or one direction
...cording of
various kinds and materials could be used
...wire or pipe cleaners (could
also be twisted or braided)
...for shoulder sockets, you might check
out fishing swivels. It's a bead between two wire loops. The loops can
be turned individually. The shoulder "muscle" over the arm socket might just be
so thin and delicate that it would have to be made out of something other than
clay. Maybe belt lining (available at fabric stores) embedded in the clay.
...I
used chain like the kind used in pull chain lights....also embedded right
into the joints. I am going to try this on my marionettes next…
....jumprings
or things connected with eye pins or jumprings
....Irene
C's joints made from embedded snaps http://www.polymerclayhaven.com/lessons/joints.htm
(gone)
....Nancy's
wire springs for legs/necks birds (heads, feet and body/wings made of clay)
(website gone)
..........(see
also nodders and bobbleheads in Kids
> Sculpting)
...the
hinges on pinbacks might work if they're bare, but the upper and
lower bar and pin were covered with clay, or embellished,
... ll the results
(on doll joints) went into my miniature polymer clay dolls book
. Sue Heaser
...fabric embedded with liquid clay or translucent clay
...liquid
clay ropes
"cotter pin joints": plastic
or cardboard discs in each part held together with a cotter pin which is
bent apart inside the body (for clay too?).
SOME
OF THE FOLLOWING SUB-CATEGORIES OVERLAP...need to be sorted
by number of "units"
(below, both arms are counted as one "unit" ...also
both legs as one unit)
Maureen
Carlson's lesson on 2-unit figure (jointed at one area) with
dangling arms (using embedded eye pin in "shoulder"
and in arm to connect)
...body is 2 thick, tapered square cane slices
(top square lengthened and narrowed a bit at top; bottom sq. narrowed a bit at
top... join)
...neck is small flattened clay ball
...head is molded face
placed on top of flattened ball a little larger than face (black clay with blue
Pearl Ex)
...hair is 9 bent U's of colored wire (could be cut paperclips too)
placed around face (jowl to jowl)... between face and "head"
...arms
are simple tapered logs (wide end down)... insert eye pin in tip of small end
on both
...butt head to neck to body, add eyepins to shoulder areas, butt neck
to body, butt head on neck
...bake body and arms separately ... after cooling,
attach arms by joining eye pins
http://www.michaels.com/art/online/ProjectPrint?width=80&pid=24065
Patricia's
2 unit figures (no arms)... separated at neck with one bead,
and at legs with several beads
http://reve.roche.free.fr/patpinups.htm
Melnik's 3-unit figures,
jointed at two places ...with embedded eye pins in
shoulders and hips ...head & torso...arms...legs
http://melnik.freeservers.com/orn.html
Selkies's
3 unitdangle
figures: ...head... upper toso & arms ... lower torso-skirt & feet
http://hometown.aol.com/selkiewhitebear/myhomepage/collection.html
(gone?)
3-unit
cane slices figures ..... head,hat,trunk,upper arm ... lower arms...
legs/shoes
http://www.flowervalleypress.com/five.html
(from the book "Five Artists--Five Directions in PolymerClay")
Nina's
jester figures jointed between 4 units:
.... head,hat & trunk (collar,shirt,skirt)
..... arms...legs....shoes
...also (hands &
shoes are a bead, a wire spiral, group of beads, etc.)
http://www.picturetrail.com/gallery/view?p=999&gid=5377855&uid=132892
Fayette's
many fabulous dangle figures! ... mostly 4-units ... many diff.
leg and arm styles & beads
...many heads,
hats, shoes .......mermaids
w/ separate tails..... ethnic &
Halloween , figures etc.
http://www.picturetrail.com/gallery/view?p=999&gid=778722&uid=492837
fashionruler's
robot dangle... 4 units... arm is 3 unit but wrist is a stiff.
joint
http://harlejm.blogdrive.com/archive/11.html
Lala's
larger jointed figure/puppet made from various thick flat shapes
of decorative clay, held with wire (& rivets)... clay slice face
http://www.sdpcg.org/Sandy%20Camp%208/sc8ap211.jpg
Various
More jointed and/or dangle
.... some a little
different and/or jointed with other materials...
Cheryl's
many and varied fabulous, more abstract, ethnic-looking
figures
.....canes ....lots of mixed media for skirts
(some are danglies)... hair ...many legs are danglies
.....most arms
are interesting fixed-position (clay-covered wire strand, or wire
coiled around clay rope, or around other wire)
http://members.shaw.ca/gera/new_page_1.htm
Leslie
Blackford's several whimsical figures, various number of joints
http://moodywoods.deviantart.com/art/group-of-figures-39273422
(click on photo for extreme enlargement)
many
wonderful varied jointed figures
(very abstract), by different clayers
---made with clay, beads,
yarns wire, charms (with different types of parts,
and different looks)
http://www.art-e-zine.co.uk/funfigs.html
Julie's
6-unit,
dangle-jointed
figures from thick-flat clay shapes (cane slices?)...
joined with eye pins (or
small bead between)
......units are: head-hair, upper torso, lower torso
(a skirt), arm-hand, and legs-feet (together
)
http://members.aol.com/wise1j/page1.html
("Kidz
Pinz")
skeleton
with 15-units (head/neck, chest, pelvis...plus 2 each of upper arm, lower
arm, hand, upper leg, lower leg, foot)
... eye-pins embedded in the
end of each section, joined with eyepin of next section) made from glow-in-the-dark
clay by suitcase2space
http://i4.photobucket.com/albums/y150/leahtheking/DSCN3304.jpg
Tonja's
3-unit Lanky Lady pin... flat clay cutout as body-head... long
arms and legs made from beads on a head pin attached with jump
rings to holes in body... flat clay hands and feet at
ends of head pins... (lesson will be in Polmer Cafe magazine)
http://www.tonjastreasures.com/jewelry1/tn30.htm
Loretta's
triangle (body) girl pins, with coiled wire arms &
legs with polymer hands and shoes attached, clay disk heads
& wire coils hair
http://www.members.tripod.com/loretta.hughes/id35.htm
Chris Gluck's lesson on making funny & simple bugs (could
be people)... coiled
colored wires for arms & legs, but head
& torso rigidly connected
http://www.hgtv.com/hgtv/cr_kid_crafts/article/0,1789,HGTV_3256_1385790,00.html
Krista's
jointed "birds or paradise", using beads or wire
for long necks, legs attached to flat torso... heads are 3-D (see also
assem. fig's)
http://www.artware.ns.ca/Retail%20Store.htm#Birds%20of%20Paradise
Nancy's
legs-dangling flamingo; body is covered xmas ball (website
gone)
Christel's
lesson on making a "rabbit" hair holder, using elastic
for the holding band and also for the dangly feet and hands
http://www.pcpolyzine.com/0203march/rabbit.html
(click on any photo to see enlargement)
http://home.online.no/~raje/Web/Rabbit/full/2002_0201_202602BB.JPG
(unfinished rabbits with clothing)
Gilda's
cute dangles with large shoes dangling from long string legs
http://members2.clubphoto.com/gilda220950/2043485/guest.phtml
chicken
...& other animals leather thong dangly legs (other
animals in dropdown menu)
http://www.eberhardfaber.com/Comic_Chickens.EBERHARDFABER?ActiveID=17200
Micky's dangle arms and legs made from embroidery
floss and beads... one also has a dress made from a wrapped-around
length of fringe
http://neabez.home.comcast.net
(click on Dolls ... 2 of the gray-haired
ones)
Josh's lesson
for ribbon-dangle cow, cat, apple and snowman
http://joshclay.com/projects.html
Dawn's
Dolly Dangles (website gone)
seasont's jointed dangling figures (website gone)
Gwen's dangling Humpty (and jester)
.... note the hole
created for the leg's jumpring formed by 2 U-shaped clay extensions
under body, each with a hole
http://www.picturetrail.com/gallery/view?p=999&gid=271391&uid=145717
interesting
shoulders... rod or bar inserted through "neck"
of chain links (to create shoulder unit)
http://www.art-e-zine.co.uk/funfigs.html
(see Evelyn's figures)
Kris
R's very cute flat "Polydollys"
(not
"jointed" but could be)
...
various body parts made from different clay patterns (slices
from canes & stacks, or pattern sheets cut with cutters)
http://www.sculpey.com/Projects/projects_PolyDollys.htm
...lesson
Jean
Comport's Ouchie Box (clay-covered metal bandaid box)... simple beaded
arms dangling
from each side (head
pressed on top of box body)
http://albums.photo.epson.com/j/ViewPhoto?u=4153008&a=31266991&p=68352233&f=0
Beckah's
jointed figure with covered matchbox bottom as torso...
flat arms and legs are jointed to sides of upright box with brads or
bolt and washer?... head fixed rigidly on top of box end
http://www.bearingbeads.com/Box%20Buddy%20Pictures.htm
Dan's
and Tracy's "figures" made with box and other shapes ....
tube bead arms, etc.
http://www.nwpcg.org/ravensdale/classes.shtml
(gone)
Merri
Beth's jointed arms made from beads and jingle bells
(hands?), attached to "Roly Poly" torso formed over glass ball
ornament or light bulb?
http://www.nwpcg.org/ravensdale/rave/rave00/hill.shtml
(gone)
pipe
cleaners +long clay "bead" arms and legs
= posable joints)
...make holes through the limbs (arms
and legs) with a fine knitting pin (diameter?) before baking
--think of the little limbs as long beads
...then make
corresponding (short?) holes in the body (where they will attach)
(not through body)
...thread pipe-cleaners through
the limbs
(...glue
the ends of the pipe-cleaners into the tops of the lower legs, the tops of the
lower arms (?)... and then thread on the limbs... then glue the other ends into
holes in the body)... .
Sue Heaser ( add hands and feet (or
hands and feet built into "limbs"?)
Garie's
film cannister people ...many whimsical sculptures & chess set
http://www.garieinternational.com.sg/clay/spools.htm
and http://www.garieinternational.com.sg/clay/morespool.htm
*wild,
jointed figures (mostly flat).. all kinds, but especially
"paper dolls" (not polymer?, but easily could be)
http://www.art-e-zine.co.uk/dolls.html
...& Liz's http://www.libzoid.com/files/polydoll.jpg
*Ginny
L's larger elaborate wire figures... many separate (flattish)
clay parts threaded on wire... attached with sometimes elaborate
wire (to create one dangling figure)
http://www.digitalartbeat.com/sculpture/bellrna.htm
and http://www.digitalartbeat.com/sculpture/diva.htm
and
http://www.digitalartbeat.com/sculpture/bchbabe.htm
inspired
by PAPER, or OTHER MATERIAL, figures
...You can make jointed flat
figures (like paper dolls or puppets) with button-type polymer
disks instead of the traditional paper fasteners at the joints (puppets could
be paper or flat polymer clay).
.....make two holes in each disk, then thread
a u-shaped bent wire through the holes and the corresponding body holes of both,
from front to back; twist wire in back, and trim off ends.
....here is one
template & lesson: http://www.ruthannzaroff.com/mirkwooddesigns/paperdoll.htm
various
figures (hinged) diff. paper patterns, etc., but still inspirational
http://www.art-e-zine.co.uk/contents.html
paper
figures (hinged) --mostly paper but inspirational
http://www.polyclay.com/paper.htm
Sarajane’s
character dolls (& paperdolls) (hinged--mostly
paper but inspirational) http://www.polyclay.com/paper.htm
lesson
on figure with 5 parts (head/torso + 4 limbs) connected with brads (front
view)
http://www.enchantedlearning.com/crafts/Ballerina.shtml
see
also jumping jack figures of various kinds http://www.enchantedlearning.com/crafts/stpatrick/Leprechaun.shtml
acrobat
figure lesson below under Dolls & Other Figures, shows similar
technique used with clay pieces, but figure is from the side rather than
front-on
FLAT "paper
dolls," Flat Stanley, etc.
loads of different paperdoll patterns
(or printables) ...(+animals, historic, movie, cartoon, misc.)
http://freepapertoys.com/paperdolls.html#1
many paperdolls to dress online (click on each outfit, or print out and use)
http://www.paperdolls.com/pages/dressem.htm
many
paper doll websites
http://www.clothdollconnection.com/PaperDolls.html
(...for
more on paper dolls, Flat Stanleys, etc., made from clay, see Kids
>
small
bead
figures (jointed) like the following could be created with polymer
beads instead (or polymer beads mixed with other beads)
Sue
S's Beople figures... jointed with fancy bead bodies... beaded
arms/legs longer beads for feet, and crazy, mixed media hair
http://home.attbi.com/~beoples/gallery.htm
moonbaby
bead people (many pages with diff. theme figures)
http://www.amtraco.com/%7Emoonbabies
simple
lesson on making bead-type people (top to bottom)
http://www.springfield.k12.il.us/schools/Iles/demosp/Mari.html
lesson on making bead people (bottom
to top)
http://www.beadstudio.com/info.php?a=141
few
moonbaby animals, bugs, etc., using projecting beads only
for legs or hair, etc., around large face or lg. body
http://www.amtraco.com/%7Emoonbabies
Lynne
M 's boy and girl jointed figures (cane slices/shapes, jointed with
eye pins or curved wire --pipe clearners? or wire-wrapped
arms & legs?)
http://store1.yimg.com/I/manning-creations_1814_652334
wire
and beads figures (some have personality or good-cause accessory)
http://www.nanosite.com/confab/awareness.html
http://www.nanosite.com/confab/wwnote-holders.html
(head and body only, mostly wire)
Patricia's
wire & mostly seed bead arms and legs (long, posable)...
also head beads made with face cane slices, and hats made from disk
of clay + wire toploop... some have simple
painted faces
http://reve.roche.free.fr/zagdouns.htm
....
http://reve.roche.free.fr/aimantsmagnets.htm
& http://reve.roche.free.fr/aimantsmagnets.htm
tube
bead figures
jointed
figures & animals on pipe cleaners could be make with all kinds,
sizes and shapes of polymer tube beads (patterned, embellished,
or plain, etc.), substituting for the pasta pieces! DB (see more on making
tube beads in Beads > Tube Beads)
(see more on this idea above under Bendy,
Flexible --"macaroni
monsters")
(see
also more ways to make joints in Armatures)
...for
cutting, preparing and covering or painting aluminum flashing figures ,
see Covering >
Metal
(somewhat realistic figures ... often with simple joints at shoulders and hips)
most
of the following examples are made with plain white bulk Sculpey, and painted
after baking (though certainly wouldn't have to be)
...some clothing
patterns, shoes, etc. may be painted on
...but fabric often
used for clothing, or partial clothing ...may have mixed media accessories/jewelry/
trims, etc.
...legs and arms often long and slender ...small, slender
heads ... very long hair
...simple joints at shoulders
and hips using wire, ending with wire loop or bead outside each
shoulder)
...often "odd/Goth" or Edwin Gorey effect
(...but...Sfigures
like this could also be animals, or have none of these
characteristics though)
Spookbot... women, painted fancy eyes, lower dress
area made from fabric/trims, some with hair painted on, wire-loop joints...also
skeleton figures
http://spookbot.com/green/index.html
(click on My Dolls,
at left)
Dollings ...women, painted fancy eyes, lower dress area made from
fabric/trims, wire-loop joints ...back stories to go with each figure
http://www.thedollings.com
(click on Sold)
Strangedolls... worry figures
(and others)...embroidery floss or dental floss (many strands) joints
http://www.strangedolls.net/dollprofiles/worrydoll1.html
Micky's
various figures ...mostly jointed with floss or cording
http://neabez.home.comcast.net
(click on Dolls)
"Dame Darcy" doll (shown on Crafters Coast to Coast) ...long arms/legs...long
neck...v.long hair...small head...fabric dress/trim... 5-6" tall
http://www.damedarcy.com/products/dolls.htm
...http://www.damedarcy.com/products/products.html
......downloadable doll-making video http://www.nutmusic.com/damedarcy
(currently unavailable)
..(she
used plain white bulk Sculpey,
but I'd suggest a stronger clay like Premo, Fimo, Kato
--in white or any color)
...shape a head and torso unit with a tapered rope of white
clay (~3 1/2" x 3/4" at top?)
...flatten face area a bit ...roll
neck area between thumb and index finger to narrow it (long neck)
...narrow
waist area same way ...flatten abdomen a bit
...press inward on
hip joint area on each side of belly to narrow it at an angle (will better
fit upper leg later)
...make fairly large joint hole through upper
torso almost at breast level (drill with needle tool, et., from outside
one shoulder, through torso, out 2nd shoulder)
...make another joint hole
through depressed hip area (side to side)
...rest of face (ends
up somewhat triangular)
.....eyes/nose: press index finger of each hand
into eye area and slightly toward each other, to create 2 large shallow depressions
(also creates beginning of a nose)... pull nose out a bit more ...add small
flattened balls of clay in each eye depression
.....onto mouth
area press small ball ...indent horizontally to create separate lips... press
small vertical line down into top lip, to create lip bow
...arm...make
thin, tapered rope (bit shorter than head/torso in length)... press down on smaller
end to create hand... indent 3-4 small lines to indicate fingers...
make hole through top of arm for later stringing (watch
hole orientation so hands will
hang with fingers forward!) ...make 2nd arm
...leg (slender rope
but wider than arm.. same length as head/torso) ...taper let to a point (leave
for simple shoe, pointing down... or create high-heeled shoe by
turning up tapered end on leg a bit, then pinching a heel-arch for it)...
...knee
..pinch middle of leg area a little, then roll-narrow leg a little just underneath
...hip
..flatten inside top of each leg a bit ...make hole through top of leg (watch
orientation)... make 2nd leg
...bake
pieces at 275 about 20 minutes (...though Sculpey can darken at that
temp) ...cool
...paint all pieces with acrylic paints
before assembling... (wipe down with alcohol beforehand for best stickability...
can use "artists" paint in tubes which are thicker than bottled, or may need 2
coats)
...(face): bright red lips (paint nice lip shape on mouth mound)
.....eyes...
paint thick black line in crease along top of flattened ball to create upper
eyelashes...then shorter-lighter black line in bottom crease for lower
eyelashes... in-between black lines, paint large colored iris (will
be truncated a bit by eyelashes)...add black dot for pupil
.....cheeks
...paint pink disks on cheek area (can water paint down, if desired)
...long
stockings ...paint alternating stripes around lower legs (can even make each
stocking diff. color)
......paint shoes over stockings ...high heeled
shoes with "cross-strap"... or plain shoes (just paint tips of feet)
..assemble
...string arm-torso-arm together with cording...make knot in cording at each end
...can dab with bit of nail polish to secure (can also add sequin or bead to cording
before knotting)
..assemble leg-torso-leg the same way
..fabric clothing...
make simple shift-type dress using truncated-cone of fabric by sewing long sides
together...add sleeves or not... cut length at knee or below ...can embellish
by hand sewing several "buttons" (beads of diff. colors) down front
of dress and/or add trims to bottom, collar, etc
.....slip dress over head,
pulling it way down so neck area looks really long --part of this look
..hair
(straight "real" hair... or any kind) ...put E-6000 glue onto head and add hair
like a skull cap ... press center of very long hank of hair to top of head, and
press some to sides... trim any unruly hairs (hair can be as long as hips or knees
if desired)
Judy's lesson
on making a toy polymer acrobat figure (with flat pieces...
body in profile) from diff. baked clay pattern
pieces, jointed with wire ---spiraled and flattened outside each
join) ...it does sommersaults on string when frame is squeezed
http://www.hgtv.com/hgtv/cr_clay_figures/article/0,1789,HGTV_3237_2831708,00.htm
marionettes ...(jointed puppets)
often jointed
at knees and elbows as well
(without the strings or rods, these make good inspiration for regular jointed figures and dolls...)
Garie's
small bear marionette puppet ...6 pieces, connected
to thin nylon filament strings... has T arrangement of popscicle sticks
for controller
http://www.garieinternational.com.sg/clay/bear-puppet.htm
Garie's
lesson on making a small puppet
from a clothespin ("cloth clip"), jointed with wire
loops, and toilet roll holder(?)
...4-6 pieces (don't understand
swinging legs)
http://www.garieinternational.com.sg/clay/clip2.htm
Garie's
mid-sized marionette figure (no clothes yet)...8 or more joints
http://www.garieinternational.com.sg/clay/bare_puppet.htm
Lynelle's
lesson
on a more complicated marionette...10 pieces
(+ optional 2 for "tail")......
jointed also at knees and elbows
...added fabric costume
http://members.aol.com/lynellev/catgallery.htm
flexible,
posable puppet (or figure ) made with 2 twisted wires, wrapped with cloth
tape + sheets of polyfill a for extra thickness ...then (epoxy)
clay, but leaving actual joints wire-only
http://www.darkstrider.net/puppet_tut.html
mini-me
marionette (vegbee's husband) made by running wire through each body part,
leaving a bit sticking out at any ends which will be joints... then forming a
loop at ends of wires before joining two together ...(he also poked a small hole
in hands and knees to pass through the invisible thread (monofilament), winding
it through the hands, knees and top of head... tied the monofiliament from head,
from knees and from hands to wood crosspiece for moving ...he suggests figuriong
out the best length for each string so movements you want can be created)
http://i43.photobucket.com/albums/e386/vegbee/mar2.jpg
I find that my marionette is difficult to operate because I did not constrict the movement of the limbs. you can form the limbs in such a way as to only allow certain movements which would greatly improve the end result. Have fun building your very own you.
Jan's
bird marionette, comprised of only 4 polymer parts (flat
body-with-onlaid-wing, flat head, and two hemiphere feet)... length of string
(or pipe cleaner??) connected between head and body, and body and each foot (embedded
in clay)... 4 strings control movement, and are tied through (side to side) hole
in top of head, hole in tail (drilled into edge from one side of tail to other,
and wrapped around bottom cording of legs to feet)
http://www.mindspring.com/~janruh/clay/bird.jpg
....similar
bird marionette, but with large beads threaded onto the string lengths...
other marionettes http://www.marionettes.com/ozzie
...(add
my photos of fabric bird marionettes like this)
...4-legged
animal marionette (unicorn) at unicorns.com (gone)
simple
bunny marionette wtih flat body & 2 dangling feet which move ...
3 pieces (head+body, +2 feet)... 3 strings attach fr. T controller to head
& ea.foot (not made from clay)
http://tac.shopnetmall.com/www.funroom.com/easter/bnymarionet.html
(If photos don't show, click on "template,"
then return to page.... should become visible)
what about a miniature marionette inside a
box. ...stand the box (cigar or other) on its side and you can have the
lid/door open or not... if you have a string coming out of a hole at the top,
you could pull it and make it jump). Nora-Jean
...DHM
(Doll House Miniatures?), the March 2000 issue, page 56, has an article on Poly-clay
marionettes by Sue Heaser ...lenora
examples
of many marionettes http://tinyurl.com/6aea5
(google search)
many Asian marionettes http://www.lotzdollpages.com/lpmarion.html
rod
puppets.... there are also marionette types which have only moveable arms,
and are connected/controlled by sticks from below rather than by cording
from above ... these are often from Indonesia, Bali, India, etc. ......wayang
golek, wayang kletik, etc.
http://www.marionettepuppets.com
(for more on marionettes as well as unjointed puppets of all types, see Sculpting-gen > Other Items > Puppets)
fabric
bodies can be "jointed" too... either by just stuffing
them loosely, or actually sewing a line of stitching across each joint
to narrow it (or could be tied or gathered)
...lots of patterns (free
& purchase) can be found online for simple or complex muslin shapes to make
figures with
http://tinyurl.com/68ajx
and http://tinyurl.com/5aahy
http://www.clothdollconnection.com/FreePatterns.html
(patterns, tips, various other figures)
... these can be used
in lots of ways for making "art figures" ( bakable if necessary?)
...any
fabrics can be used but some may not accept the acrylic paints or dyes/inks
used to color them?
....can also use embossing powders or use other
metallic techniques (especially over acrylic paint)
....can sew
or glue on any other items, or sew with decorative threads
...do coloring
and embellishing first, or afterwards
http://www.art-e-zine.co.uk/createdolls.html
Maureen
Carlson's small fabric doll forms with polymer faces
http://www.weefolk.com/mold_example.htm
--sewn on through holes in each side http://www.weefolk.com/ideas.htm
(gone)
JJHandworks'
polymer faces attached to simple small fabric bodies ...some have
can slice? "masks" glued or sewn to head fronts ...
simple stuffed
arms and legs --or no arms and legs ...bodies often pieced patterned
fabrics with beads, etc., here and there ... some have elaborate mixed
media hair or headgear
http://www.jjhandworks.com/patterns/crafts.htm
Debbie
Jackson's faux ivory ethnic faces on fabric-body dolls
http://www.tinapple.com/oldsite/cynthia/dolls.html
Chris
Sickels' various figures with clay faces and fabric and other materials
bodies
http://www.flickr.com/photos/85664803@N00
...http://www.art-bio.com/artists/sickels_chris/artwork.htm
...premade
stuffed muslin doll "blanks" (human or animal) can often be purchased
at craft stores (I've seen bunnies for Easter time)... these may have fairly long
arms and legs, or may be small and stubby
......"Bendi Dolls" and
Bitti Bendi Dolls" can be bought in two sizes (6" and 14") http://www.stampington.com/html/bendi_dolls.html
...many
doll patterns for inspiration http://clothdollpatterns.com/patterns
(see above for more)
fabric figure jointed by sewing small button,
etc., through top of arm or leg fabric
http://www3.sympatico.ca/netchess/boudoir_betty.htm
Non-realistic figures (usually without legs --sometimes arms, etc, or otherwise abstract, are fun to make ..and extremely varied.
...can be 3-D,
or slightly dimensional, or flat
......if they're 3-D,
can be used as dolls, or sculpts, or as embellishments
......if they're relatively
flat, can be used in scrapbooking, altered books, cards, or anywhere
...can
have fabric clothing, clay clothing, suggested clothing, or no clothing.
...often
have lots of embellishment in the form of stamping, onlays, mixed
media, antiquing, wrapping, etc, but these aren't necessary
amulets and fetishes (items with magical powers) ...and some art dolls, etc.
true
amulets and fetishes
...
are
small human or spiritual figures (or they can be animals
or items) usually worn on a person's body to "protect"
or to help them in some way or confer special powers, or to repel
something bad . ..or they can be placed next to the thing to be
protected or helped
(......can sometimes be a specific god/dess who then protects
the wearer, or an animal whose special quality is given to the wearer ... also
crystals, certain gems, etc.)
..."but almost anything could serve as an
amulet --a red string wound around the wrist, a stone carried in a small pouch
around the neck," a horseshoe
...may also have or contain special words,
symbols, incantations, etc.
...traditional ones are most often
seen in older cultures or those which continue older rituals... some religions...
but in subtler ways, amulets can be found everywhere
...can also be
used to proclaim or encourage association with an idea, a
value, a characteristic, etc.
info about real amulets http://me.essortment.com/whatisanamule_rldf.htm
lots of info about the broader topic of amulets and "protections,"
etc., and how widespread they are
...http://en.wikipedia.org/wiki/Amulets
meanings of certain amulets, fetishes http://www.fortunecity.com/marina/pontoon/2457/id58.htm
(other
words and concepts for these: talisman, charm (lucky), totems, relic, runes,
etc.)
amulets/fetishes/etc.are often used as stand-alone
pendants or pins .....or can also be attached
or connected to something else
...can also be used as vessels,
pouches, containers which are worn (...some
original amulets were for holding a medicine, or recipe for it)
.........(for
rigid, hollow, or somewhat hollow, amulets which are formed over small rocks,
see Vessels-Rock
> Websites, mostly)
...but
they can also be used as embellishment on items such as vessels,
jewelry, covers and mini books/journals, covered gourds,
etc.
attached to them can be things like:
......all kinds of embellishments.... (even hair,
bone, a belonging, etc. of one of the parties --intertwined with, attached
to, or enclosed within, some real amulets)
......dangles comprised of
beads, shells, or anything which can be hung or strung
.....framing
or background piece ... or something to interact with, or to be
associated with
Since I'm somewhat sculpting challenged, I like the a-hem "primitive" shapes and details that amulets and fetishes usually have. Plus, there are just so many little things you can stick on them, in them, or wrap around them ... kind of like an adult version of paper dolls <g> Diane B.
Polyform's Art Doll
Super Shapelets (stencils & templates for abstract
body-and-head units) http://www.sculpey.com/Products/products_access_shapelets.htm
Polyform's
Art Doll face molds (3?... in diff. sizes, eyes closed)
http://www.sculpey.com/Products/products_ezdoll.htm
SOME
LESSONS:
Susan B's lesson on amulet-type figure
....with flat torso...
molded head.. and simple coiled wire for arms
http://www.sculpey.com/Projects/projects_InsetPeoplePins.htm
Roberta
A's lesson on simple textured amulet figure
http://www.hgtv.com/hgtv/cr_clay_jewelry/article/0,,HGTV_3238_1386894,00.html
Barbara
McGuire's lesson on amulet pendant figure (flat, textured, cut out
for torso and head, with molded face embedded into head
area... antiqued)
http://www.hgtv.com/hgtv/cr_clay_jewelry/article/0,1789,HGTV_3238_2216608,00.html
Susan
B's lesson on amulet-type figure with flat body, molded
head, and coiled wire for arms
http://www.sculpey.com/Projects/projects_InsetPeoplePins.htm
Maureen
Carlson's amulet-type figures, with molded faces on various bodies
http://www.weefolk.com/mold_example.htm
Dayle's
various ethnic and other faces used alone with embellishments,
or for amulets, art dolls, etc.
http://www.dollartists.ca/mediaconference/2004/workshops/ccharacters/characters.html
http://www.dollartists.ca/mediaconference/2004/workshops/Messengers/messengers.html
complete
lesson for "stick doll" figure with polymer face ...flat,
ethnic figures made with 2 upright twigs... body is attached between
them mixed media-- could be all clay)
http://www.dotcalmvillage.net/nowwhatzine4jan03/starshaman1.html
(keep clicking on Next Page)
(Star Shaman Wishing Doll)
http://www.dotcalmvillage.net/cre8it/stickdollkits.html
(more photos)
Roberta
A & students' amulets, fetishes, abstract women figures, etc,
with stamping and mixed media
http://www.eragraphics.com/classes/facepins1a.jpg
and http://www.eragraphics.com/samples4.html
http://www.eragraphics.com/fetish.html
and http://www.eragraphics.com/amulets.html
Crafty
Michele's various spirit women and other figures for pins
http://www.geocities.com/Wellesley/1644/cm-pcj-pins.htm
"spirit
stone" figure... clay pattern torso, faux stone head... wire neck,
arms (one wire hand)... one arm holding twig
http://expressionartmagazine.com/tocMA02.html
various
amulet figures and other "dolls" from Arizona guild
http://www.azpcg.org/documents/DollSwap.htm
Leslie Blackford's several small figures
http://moodywoods.deviantart.com/gallery/#_featured
Rosemary's
small figures ... almost all clay, little mixed media ("Little
Babies")
http://www.mhpcg.org/clayDays/claydays00/oct2000/oct00.html
many more small all-clay figures from the Mile High Guild
http://www.mhpcg.org/clayDays/claydays01/jan2001/January2001/index.htm
many small
mixed media amulet figures ...folk dolls (.."voodoo" amulets)
http://www.folkart.com/voodooshop/dolls.htm
*wild
jointed figures with transfers for faces (not polymer), "Milagro
dolls"
http://www.rdwarf.com/~mnoel/rice.html
....for
more "art dolls" of all types, see Sculpting2
> Websites > Art Dolls
Arizona
guild's "doll swap"... variety of figures & amulets,
etc. ...(plus Donna H's " paperdoll " with polymer head)
http://home.att.net/~reserved/DollSwap.htm
(gone)
Beckah's
fetish doll head-torso, with bunches of dangling pebbles on sinew as
skirt or legs
http://www.bearingbeads.com/Images/_ifetishdoll.jpg
Dayle D's various mystical figures (& shrines)
http://dayledoroshow.com/pics3.ht
Jean Comport's larger women & cat women... heavily embellished....
one woman with body of clay-covered cylidrical can?
http://albums.photo.epson.com/j/ViewPhoto?u=4153008&a=31266991&p=68340303&f=0
2001
Chicago Area Polymer Clay Guild goddess swap
http://members.aol.com/CAPCG1000/goddess.htm
goddess-figure swap (bas relief, other techniques) ...esp. Denise
and Cindy P.... also stamped women (medallions)
http://sunnisan.com/crafts/goddess2.html
Google's
"Image Search" feature..go to:
http://images.google.com/
then enter the words....goddess clay
Sid's
4 goddess shapes (non--pc)
http://goddessmandala.com/gallery/goddess.html
Jean Comport's Boob-a-la ( full-figured
women with mixed media dangle arms, etc.)... over eggs?
http://www.nwpcg.org/ravensdale/rave/rave00/comport.shtml
(gone)
Cindy's
"goddess" (mixed media ...wild women) pendants
(gone, find her new site)
"wild
women" swap (many many styles and techniques) (website
gone)
Dawn Sch's goddess figures http://members.aol.com/rhaiven/goddess.html
(gone)
Jean
Comport’s The Girls http://www.mdpag.org/gals.htm
(gone)
Marie S's women pendants.... triangle body +
small head (no features)...cane slice decorations on "bodice" &
"hair cap"
http://www.clayfactory.net/marie/images/ms2003.jpg
Roberta A & others' wild women and various other fetishes... stamping
& mixed media... hair is linen cord tied double in holes, then unraveled (lesson)
http://www.hgtv.com/hgtv/cr_clay_jewelry/article/0,,HGTV_3238_1386894,00.html
http://www.eragraphics.com/samples4.html
... http://www.eragraphics.com/fetish.html
... http://www.eragraphics.com/amulets.htm
Jeanne
R's "stiff-jointed" abstract figure.. head, torso and hips/legs
units threaded onto a long stiff wire (somewhat nested but still
separated)
http://www.heartofclay.com/eb/challenge15.jpg
Dave's
various abstract "stone" figures and faces, runes,
Celtic crosses. etc. (all faux rock... some polymer inclusions)
http://www.earthpottery.net
Dar's dried-bean-pod "body" (covered with clay) with face (mold) http://www.afamilyjournal.com/pcfunthings1.jpg
Kokeshi
dolls, nesting dolls, etc.
Sarajane's "girl beads"
...cane slice faces on slightly flattened round or oval "bodies" (Japanese, Indian,
Island, and Southwest themes) http://www.polyclay.com/beads.htm
Kim K's goddess beads with cane slice face, and "gorkley" strands for oval
body
http://www.beadyeyedbrat.com/images/goddessbead-kim001b.jpg
....see also Faces for faces canes
Japanese
Kokeshi dolls/figures aren't just round and "one-piece"
...
kokeshi can have separate heads, hair, and/or even accessories (and
clayers have given them to-the-body arms, etc. too), and they can have various
shapes for their bodies, etc
http://tinyurl.com/5jncpv
...http://tinyurl.com/6gncwq
http://www.flickr.com/photos/oldjapanphotos/sets/72157604387284960/
http://www.flickr.com/photos/oldjapanphotos/collections/72157602678402255/
...(some
people have suggested that in "matryoshka"-- the nesting Russian dolls that originated
in the nineteenth century-- some influence of "Kokeshi" can be seen. babushka)
Japanese Daruma ...face (in depressed are), as half of abstract
round body http://tinyurl.com/66elzz
"nesting
dolls” come in all kinds of shapes, animals, etc from Eastern Europe, Japan,
China, and India; these are usually painted and smooth-surface, but could be clay,
and or have dimensional arms, clothing, etc.
http://home.hetnet.nl/~ingrid41s
....http://tinyurl.com/479gn ....http://tinyurl.com/44z7q
.....I
am going to go to the thrift store and buy a bunch of chess sets and cover the
pawns with cane slices. (that is if they pass the oven test first!). Or, I have
seen little wooden "playschool" shaped pieces that I will cover with canework.
I'm even going to put little caned faces on them like Russian Nesting Dolls
.....(if wanted to make hollow, smooth size, and successive sizes, could be made
with rock vessel technique ? (see Vessels-Rock)
for more polymer faces which are added to other
materials like wood/twigs/gourds or metal, etc.or
items (especially those surrounded or embellished with
hair, headwear, neckwear, etc., or with cane slices or
other onlays --leaves, flowers, anything), beads, etc). ....see
Heads >
Faces Used Alone)
...there could be more inspiration in the Masks
section of the Heads-Masks page as well)
tiny
worry dolls ...(Guatemala..share a problem with a worry doll, then place it
under one's pillow.. will take the worry away)
...very simple 1" tall
figure traditionally made from splinter of wood wrapped with bright Guatemalan
fabric and yarn/thread, plus painted dot-eyes, but could be done with more realistic
head, or arms and legs., etc.
http://tinyurl.com/64zvz
(many google images)
looking
at all kinds of ethnic masks can be inspirational
for doing these kinds of figures (see Heads-Masks
> Masks)
...Jeanne R suggests using an ethnic, etc. mini-mask
as the actual head for an art doll, or assemblage, etc.
for
a totemic animal, you want to repeat what you see in symbology for that
animal
...for example, geckos are almost always depicted with a curved
body in symbology. Its head should be smaller, flatter, and more diamond shaped,
its' toes more splayed out, possibly with balls on the ends. Maybe leave it eyeless,
and only give a suggestion of spots if you want them, or stripes, and also totem
symbols or fetishes would have the spots or stripes more in pattern than the random
sprinkling you would see in nature. The whole body should be flatter and less
rounded. author?
...fetish...
an object (such as a small stone carving of an animal) believed
to have magical power to protect or aid its owner. . . . "At the most fundamental
level, a fetish is "an object, natural or manmade, in which a Spirit is thought
to reside, and which can be used to affect either good or evil." All American
Indian tribes of the Southwest make use of charms, talismans, and amulets, but
the Zuni Indians of New Mexico are especially renowned for their animal carvings."
...Zuni
fetishes http://www.nfobase.com/html/zuni_fetishes.htm
...symbolism for
many animal totems ..., plus links to other animal symbol websites
http://www.writedesignonline.com/assignments/masks/animalsymbolism.htm
and http://www.crystalinks.com/totemanimals.html
Karen C’s deer hide medicine pouches with fetishes on the front (could be polymer) http://www.fix.net/~kclanin/medicine.html (gone/)
MORE INSPIRATION
...larger
high-art figures with twigs used as woven cages or in bundles for
torsos, other wood/bark, and other mixed media (the rest isn't polymer,
but it could be ...god for inspiration)
http://www.akirastudios.com (look all
around)
.....Gabriel Colunga's
various contemporary "figures" with mixed media and often
multiple legs, heads, etc.(not polymer)
http://www.galleriadante.com/artists/gabriel.htm
ancient
and ethnic objects and symbols (loads of Egyptian, Greek
and other items)
http://www.egypt-greek-gifts.com/egst.html
````````````````````````````````````````````````````````````````````````````
(all of the above applies as well to animal figures, monsters/ghosts, dolls, chess pieces, etc.)
.....for aluminum flashing figures (cutting, preparing and covering or painting) , see Covering > Metal
YouTube + Other Free Video-Sharing Sites
YouTube....
http://www.youtube.com .....and other free
video sharing sites
...many clay demos of all types
are being uploaded to these sites all the time.....yay!!
...to find the
lessons at these sites, enter significant search terms into
the search box there, such as these bolded ones
(from YouTube):
http://www.youtube.com/results?search_query=clay+sculpture&search=Search
http://www.youtube.com/results?search_query=clay+sculpture+foot&search=Search
http://www.youtube.com/results?search_query=clay+sculpture+head&search=Search
Torsos
freestanding torsos (embellished, 3-D)... http://www.art-e-zine.co.uk/contents.html
unusual
items can also be used as torsos (to which limbs and head are added)
...they could be covered
with clay, or not, and be any size that suits the figure...some
examples might be:
...
glass balls, wood balls, eggs, empty containers of any type (Bandaid box, film
cannister, matchbox, wire "cages", etc.), gourds, nature items (pinecones,
rocks or polished stones, sticks, bean pod), tubes, even
clocks/watches, CD's, or just anything at all
Dotty
McMillan's women with highly decorative tubes covered with clay (here used
to make kaleidoscopes into "figures")
http://pcpolyzine.com/0301january/0301fantasyart3.html
woven
wire "cage" used to make lower torso (skirt) for figures
by Laura Balombini's ....patterned clay sheets over wire mesh, etc
...she
also has upper bodies of amazing figures, birds, etc.
http://www.lbalombini.com/index.php
(keep clicking on Next to see more)
(many examples of all kinds of torsos on all the sculpting-related pages)
Desiree's lesson
on making a hand
http://www.desiredcreations.com/howTo_PJHands.htm
Loretta's lesson
on making a realistic hand
http://www.fairysong.com/tutorials/Tutorial1.jpg
Christel's
lesson on sculpting hands and feet (..& links to her head & body
lessons)
http://www.pcpolyzine.com/june2001/troll.html
Marika's
thorough lesson on realistic hand
http://members.home.nl/asrai/cursus-en.htm
(click on Hands or Lessons)
Jenna's lesson
on making a wispy hand (thin hand/fingers, fingers curvy)... thumb added to
palm later
http://tutorials.theclaystore.com/dolls/hand-tutorial
Tony
R's lesson on making a slender hand by making palm, index and little finger
shape (middle &, ring fingers and thumb added later... fingernails
drawn in)
http://www.cdhm.org/tutorials/learn-to-sculpt-doll-hands.html
Polymerclayfan's
lesson on making a hand (thumb, palm, and thumb base added later... alcohol
used to smooth out... he adds veins and lines for men)
http://www.polymerclayfan.com/hand-tutorial.htm
Chrissie's
lesson on making hands (and feet)... adding raw hands to baked arms
http://pageperso.aol.fr/Paithian1/Technique.htm
Angels Unawares’ lesson on sculpting hand and arm, using only toothpicks
for finger armatures (from earth clay)
http://members.tripod.com/~AngelsUnawares/hands.html
Jack Johnston's lesson on making a hand and arm over five 16 (or 18
wrapped) & 24 gauge wire, plus brass tube and paper tape
http://www.artdolls.com/handsforchristmas.html
Mariel's lesson on making head, hands, feet, body armature
http://people.zeelandnet.nl/staamg/webdoc3e.htm
Monica's lesson on making simple head, hands, feet, body armature (cork)
http://guide.supereva.it/hobby_femminili/interventi/2001/11/76787.shtml
Maureen's
online video lesson on using her one-sided hand mold to make
a 3-D hand
http://www.youtube.com/watch?v=iXS-TQ_lUIk
Maureen's
lesson on head, hand (using molds) and body (armature also), and pattern
for robe
http://www.weefolk.com//santa.htm
http://www.weefolk.com//hands.jpg
see Karen P's lesson on how to use the hands, feet,
and face molds to make a bas relief old word Santa on a plaque http://www.sculpey.com/Projects/projects_HolidaySantaPlate.htm
Pennydolls' lesson(s?) on making small, simple hand, arms, etc.
http://www.pennydolls.com (click on English
flag, then on Fimo Workshop, then on each photo for lessson)
Katherine Dewey's
lesson on making paws, arms, tail of lifelike mouse
http://www.hgtv.com/HGTV/project/0,1158,CRHO_project_27285,00.html
Christel's lesson on making a rabbit hair holder, using elastic
also for the dangly paws
http://www.pcpolyzine.com/0203march/rabbit.html
(click on any photo to see enlargement)
(for more dangly legs/arms/hands,
see Sculpting/Websites/Danglies)
For LOTS
of descriptions of making hands, go to Polymer Clay Central’s message board
at Delphi.com and search for message # 2935.1
hands
& feet ...with forearms & calves (groove in
top for attaching to fabric doll)
http://www.angelfire.com/biz/laurascrafts/piclink5.html#firstdoll
lots of good hands to
study on the sculpts of Julianne ... and fingernails
http://www.mysticalis.com/gallery.htm
(look all around site)
...and http://www.mysticalis.com/galleryall/woodspirits/index.html
real
baby hands to study (also newborn), photos from Millie
http://www.onestoppolymershop.com/page/971075
Sarajane’s hands (with Victorian sleeves as well)
http://www.polyclay.com/beads.htm
and http://www.polyclay.com/hands.htm
Celie's
hand pendant (fingers pointing down) with "bracelets" of
various kinds hanging down onto hand
http://www.celiefago.com/gallery_earlywork.htm#
the large-round tipped #13 tapestry needle forms a nice simple fingernail- simply roll the needle across the end of the finger. Kathndolls
Bunny's
lesson on using a heat gun to help with making hands.... and giving
hands different poses
http://www.thewildbunny.com/HeatGun.htm
Fingers can be very frustrating or they can be very easy! Here's
what I do.
Mind Prep!: ...Study your own hand. You will
notice as it moves it has certain design features. I like to break it down into
two gesture areas. The palm and the fingers. Both should be considered as two
slightly mobile solid blocks of clay. Forget about the divisions between the digits.
As you move your own hand around, you'll notice that the palm and finger block
areas behave in certain ways with the thumb as an independent but close nieghbor.
The fingers and palm will do solid arcs of 3D curves. Imagine connecting all the
finger tips and filling in all the gaps together between the digits. You'll see
these two different waving arcs (fingers and palm). Now you can begin blocking
in your sculpted hand imagining these arcs of movement. Any hand gesture can be
symplfied into 2 two arcs (finger group & palm group). These quick gesture arcs
are the KEY to a natural looking hand in clay (the natural pose). You have a LIVE
model always with you! YOU! Take the pose you would to sculpt with your own hand!
Execution: ...Whether you have connecting finger wires to the wrist or
not, it makes no diff.... visualize those finger group, palm group and thumb
as arcs with a big nieghbor,Thumb.
Always start sculpting the fingers
straight and splayed out to give yourself the maximum amount of manuvering room.
Pose them afterwards.
Rough in the palm (it's a lens shape with a convex
and concave side , unless you sretch it flat).
Now make coils of clay for
the fingers off the sculpt before installing them.
Proportioning:
...Remember that each finger is devided into 3rds, each with 3 joints including
the knuckles. The pinky ends at the the last joint of its nieghbor, the ring finger.
The thumb ends at the ist joint past the knuckle on its nieghbor, the index finger.
The middle finger is the longest with its nieghbors, ring and idex finger 2/3rds
up from the middle finger's last knuckle. As a matter of fact the proportion
of 3 to 2 RULES all the proportions of the hand!
I reccomend the book,
An Atlas Of Human Anatomy by Stephen Rogers Peck, This book makes make
drawing, but has wonderful tumbnail sketches and explainations about how the body
is designed...
Slide those coils of clay onto your wires. Guide them so they
stay "on center" keeping the wires and coils absolutely straight! Don't worry
about the length of the wires or the coils at this point. One doggone thing at
a time! This makes for more easily achieveable goals in everything! Once the coils
are on the wires.....
Trade Secret for clay finger manipulation.
Using
your index and thumb of your own hand roll the clay in the following ways to achieve
desired results.:
1. To firmly attach finger coils to palm AND To thicken
finger thickneses AND to add more clay to finger: use a gentle rolling motion
pushing the coil towards the palm
2. To thin fingers: Do the reverse rolling
motion gentley pulling the coil out away from the palm (always make sure the coil's
bases have been attched to palm first!)
3. To create the hour glass thinness
between each finger joint (in the top view of hands): Use the same gentle rolling
motion pulling away from the palm. Do the rollling motion pushing toward the palms
for thickening knuckles.
4. Masculine hands: keep the coils more iniformly
thick along their length with the above rolling motion that pushes toward the
palm.
5. Feminine hands: make sure to use the gentle rolling motion
that pulls away from the palm.
Create a very gradual taper to the mass of
the coil for each finger. NOW Cut fingers to length! make sure the wires are just
short of the finger ends vusualizing the proportions given above.
(for babies'
hands, see just above)
...Now pose your wires and fingers
and thumb Use your own hand as a guide for the movement design based on those
two solid arcs of movement with the loner thumb! Don't worry about mushing the
clay doing the posing. You have the correct amount of clay on each digit from
your layout sculpt above. Reshape the finger masses you have just mushed using
that smae rolling motion with your own thumb and index finger if possible. If
you can't get your real fingers to fit to do this, just make sure you take a tool
and gentlely rewrap the clay around the wire from each side letting some clay
go equally around the wire for good coverage. If at any time your clay gets separated
from itself on a wire or from the palm, use your gentle rolling motion pushing
the parts together or sliding the clay parts towards each other. Recreate those
hour glass shapes to the finger lengths between each joint.
Make sure you
have that convex curve to the upper palm, knuckle ridge line too. Note that the
knuckle joints looked all in a row from above or below, have the same arc that
the tips of the fingers have! *Use your own hand pose to refine your clay hands.*
...The secret to doing finish work in clay to to stop being
as heavy handed (pun here!) with clay movement. Rocking motions and rolling
motions with the tool instead of sliding motions to do what you need to get
done.
I use a ball stylus tool for making veins. The tendons can be
slightly in a stretched out pose in a younger hand before viening with a cylnder
tool that has a bend curve in a it so it doesn't dig into the clay. The recesses
on the joints undersides and skin folds on knuckles joints and palm
skin folds, I use a rocking motion with the leading edge of a spoon tool that
has a soft not sharp edge to to it.
Water
is my savior for making softer looking sculpts and smoothing clay. I use it on
my tools (predipping them). I use it on my finger tips always in an up & down
finger motion, so the ridges of my finger prints don't transfer to the clay.
Plastic Wrap: can be used to create softer details first time in clay:
1. Soft clear plastic placed between the tool and the clay. 2. The tool only
should move. Never the plastic against the clay. 3. Lift the plastic between each
tool stoke for maximum detailing and minimum mushing. 4. the thinner the plastic
the finer the details. The thicker the plastic EX: both layers of a common freezer
bag. the larger or grosser the detail like boidy muscles general sculpted latout.
Sandwich bags would be medium detailing plastic... Sincerely, Wayne THE DANE Hansen
Jodi & Richard Creager's video on making hands http://members.aol.com/creagers1/videos.html
simple hands can be made from ovals (with or without
a narrowed area for wrist)
...if desired, simple fingers and
toes can be indicated with indentions, or cut and separated
without further manipulation
(The armatures in my figure are wire wrapped with fusible fleece). ...(after baking and before dessing) The head and hands were covered with Apoxie Sculpt air dry clay (before adding final polymer clay?) ...(while Apoxie isn't as light as foil, there's no chance of getting a trapped air bubble that will later crack clay, and Apoxie is ROCK HARD when it dries). DivaLea
gloves and boots are easier for beginners than making hands and feet
Arms, Legs, Feet & Tails, etc.
(see
Sculpting-gen for ideas on joining them)
(see bottom of this page, and also Miniatures,
for more polymer shoes)
Maureen Carlson's online
video lesson on making a foot from her two-part mold,beginning
with a log of clay
...she also shows how to make a knee &
leg by using a longer log of clay (only foot part in mold)
http://www.youtube.com/watch?v=I6xuR55mJO8
(You Tube)
Nora Jean’s lesson
on how to sculpt leg/foot and shoes (website
gone)
catbyte's (Hazel) fat Maryjane-type
shoes and socks on ladybug (website gone)
Christel's lesson on sculpting hands and feet (&
links to her head & body lessons)
http://www.pcpolyzine.com/june2001/troll.html
Marika's thorough lesson on feet (realistic)
http://members.home.nl/asrai/cursus-en.htm
(click on Feet or Lessons)
Mariel's lesson
on making head, hands, feet, body armature
http://people.zeelandnet.nl/staamg/webdoc3e.htm
Patricia
Rose's lessons on making feet ...also legs and various
body parts
http://www.patriciarosestudio.com/html/tutorial.html
Millie's
photos of feet of real babies
http://www.onestoppolymershop.com/page/971075
Katherine Dewey's lesson on making paws, arms, tail of
lifelike mouse
http://www.hgtv.com/HGTV/project/0,1158,CRHO_project_27285,00.html
Melnik's various kinds of tails
(some articulated) (lesson) (website gone)
Monica's lesson on making simple head, hands, feet, body armature
(cork)
http://guide.supereva.it/hobby_femminili/interventi/2001/11/76787.shtml
Karen P's lesson on how to use the hands, feet, and
face molds to make a bas relief old word Santa on a plaque http://www.sculpey.com/Projects/projects_HolidaySantaPlate.htm
Pennydolls' lessons on making somewhat simple arms,legs/body for babies
in various positions
http://www.pennydolls.com
(click on English flag, then on Fimo Workshop, then on each photo for lessons,
esp. January)
fireEyes' lessons on dragon
shapes (bodies, heads, eyes, feet&claws, Eastern/Western
style); drawing, but applies to sculpting too
http://www.tailchaser-sushi.com/index2.html
(see also links of dragon photos in Sculpture)
Jodi
& Richard Creager's video on sculpting life-like legs and
feet
http://members.aol.com/creagers1/videos.html
simple
toes can be indicated with indentions, or cut and separated
...Peggy
O's toes sticking out from mushroom people (mushroom cap on sculpted
head on mushroom stem, on feet-toes)
http://pg.photos.yahoo.com/ph/scadventurer2001/my_photos
(click on "Enchanted Mushrooms" in alphabetical order)
boots
are easier for beginners than making hands and real feet
(see
making boots below in Clothing Accessories)
Katie
created the (flesh-colored) feet of her sculpt shaped as
shoes, so that after baking the shoes can be made by simply covering
the "feet"
...she also firmed up (partly cured) the feet of
her standing sculpt (in position, standing on a flat dish) with
a heat gun or hair dryer before baking so that she could make sure
the feet were perfectly flat on the bottom, and also the body would be
well balanced over the feet for more baking (when clay softens a bit, and
balance can change)
http://tutorials.theclaystore.com/techniques/firing-a-standing-polymer-clay-doll
Arms are generally added to a fairly finished torso, rather than "sculpted" at the same time as the torso. Depending on whether the figures are simple or realistic, the arms may be blended into the shoulders or just left as is mostly hidden by the head.
dressed arms, especially for simple
figures, are usually created by making the arms from the color or pattern of fabric
desired for the clothing, with a flesh-colored hand added to the end.
....very
simple "dressed" arms can be created with tapered logs...
hollowed out at the end a bit to receive the flesh-colored hands... the
thin end of each tapered log is then pressed to the top of each shoulder, and
the wider area is pressed to the body (hanging down, or around the chest, etc.)
http://www.makinsclay.com/US/eng/project_gallery/seasonal/xmas03.htm
...for
short sleeves, make the tapered log shorter, then press a flesh-colored
log into the end as the arms/hand in the same way
...for totally
bare arms, make the whole log from flesh-colored clay (less tapered perhaps,
maybe pinching out an elbow if arm is to be bent)
I
do the arms with cuffs a couple of different ways depending on how
they are positioned, or what they are wearing.
....sometimes I
make the sleeve first out of a solid rod of clay, and stick a hand in the end....
then I add a small rectangle of clay wrapped around the wrist of the sleeve
to form the cuff so it is thin and cloth-like, and blend it in where it meets
the sleeve
.......a tooth pick or knitting needle can be used to make the wrinkles
around the elbow bend.
....but sometimes I make the arm, bake it while
attached to the body, and then remove it while it is warm after the bake. Then
I wrap the sleeve around it allowing some extra clay up around the shoulders....
Then I glue the arm in place with a 5 min. epoxy and blend the clay at the shoulders
with the torso. Dawn S
This is the "etc."
part... avoid if you are easily
offended:
chimbo swap:
http://norajean.com/Biz-Archive/MSAT/ClayArt/Swaps/Chimbo.htm
Neck & Shoulders & Chest, etc.
(mostly
for more realistic figures)
males develop an Adam's Apple in the
front of their throats during puberty... this protusion falls about halfway
between the neck and the collarbone... women have them too, but they're much
flatter
The female neck should sit farther back and be thin and swan-like in contruction. A slight lengthening of the neck is an enhancement as well. Wayne the Dane
Shoulders (women's) should be narrower by almost 1/2 a head measurement than males they should not be more pronouced at the deltoid tops outcroppings like male shoulders.. . A very attarctive feature to sculpt in female shoulder areas is a slightly round-shouldered look from the side with careful attention to life references concerning the shoulder blades and their positions and softness of form.. . The female shoulder may be slightly lowered in angle from the square look of male ones if desired with an enhanced display of the trapeius slope from the front view. Wayne the Dane
hard
lines read as "old" to our eyes, whereas smooth is "pretty"
...
so I use this technique on doll bosoms for nicer "cleavage" and smooth
joins to the chest.....Roll
out a ball of clay ..add bits of clay for the "sticking out" parts... Press them
into place, and indent wherever needed... Then roll out a sheet of clay (set on
#3 or so) and use as "skin" to cover the whole area... press gently
into place, working any air pockets out to the edges. This gives a gentler smoother
surface and sharp edges become obscured-- Sarajane
possible
stylized "breasts":
-- the cut-off ends
of a cracked (or not) uneven, roll of clay... especially from rolling a long fat
triangle into a log, beginning with the wider of the two ends (like a croissant
bead)
--Varda's teapot stacked disks... these are z series of smaller
and smaller disk shapes shacked on top of each other... in this case, they are
stacked toward the bottom of the first disk, not in the middle . . . more pendulous:
http://community.webshots.com/photo/3014194/37918228hRQKHU
"wild
women" swap --various hair types (website gone)
Clay hair
for caned hair, to use with canes, see Faces
For
any hair which will have thin areas or thick projecting areas from the head, it's
important to use a strong clay to avoid breaking off ...use a strong
polymer clay (a strong regular clay, or use Bake and Bend flexible
polymer clay, or mix Bake & Bend witn a regular clay)
...press hair parts
as close to the head and body as possible (to avoid projections and give
support)
...perhaps use some matte liquid clay (TLS) for extra
strength
...bake thoroughly
...perhaps use a finish
(matte or shiny) for extra strength
Dotty's lesson on making a Japanese
hair style for a head with ropes of clay piled around head
http://pcpolyzine.com/0204april/vessels.html
Make a sheet of clay that's the length
you want you hairstyle to be
... use a craft knife to cut strips in
the clay leaving about an inch or so at the edge.
....place that over
the figure’s head, pressing the uncut portion on the head to make bangs
and to cover the top of the head
.... then curl the cut strips
around your needle tool or just twist them with your fingers. You can make the
strips as thick or as thin as you want. I'd reco mmend a strong clay like Fimo
or Premo. Gwen
Or, after placing a cap of clay on the head ...I take a needle tool or other sculpting tool and 'style' the hair, making waves or giving the impression of strands. Gwen
for hair or just bangs:
...first
cut a small rectangle from a sheet of clay
...then cut lines in it but
don't cut all the way to the top...when you pick it up, it'll look like a small
piece of fringe.
to make it curly:
...take
each strand of the still-connected fringe and twist it
...apply those
in layers on the head and it makes the CUTEST curly hair!
wrap small ropes of clay around a pin or small tube, then press to head for curly hair
for curly hair can also use
extrusions from a clay gun or garlic press for short or long locks
......(for short hair) I extruded a small amount at a time, and then scraped
across the end of the clay gun with my needle tool - which causes a group of those
strings to stick to your needle tool - which you can then apply to the (head).
...It's a little time-consuming, but very easy to do. Ginny
for
hair, begin with a flattish piece of scrap clay (or form it?)
... then
use your clay gun to extrude teeny, skinny snakes
...
swirl them around on the piece of scrap clayinto hair-looking arrangements ...
bake.
...can make a mold from this too. Anna
Cecelia
Determan wrote about a texturing tool for making curly beards
or curly fur, in her HOTP book Merry Christmas Faces
... she wraps
a 1 1/2" length of (20-gauge) wire around a bamboo skewer or pencil tip to
form a 1/8" wide circle, and bends both tails back to insert into a handle
of clay. This leaves a flat circle standing up to impress into clay.
These could be made any size though. Stamp this a
number of times on the beard, hair or fur. http://i96.photobucket.com/albums/l163/DianeBB/tools/tools_handles_CeliaW.jpg
(top tool, right side)
...you
can use the circle side of a safety pin for indenting on clay. .
-Laurie
(see much more on using tools and textures of various kinds to "scratch" or "stamp" lines of hair into raw clay, in the Fur category below)
Karen P's lesson on adding Santa hair
& beard with extrusions, and antiquing
http://www.sculpey.com/Projects/projects_HolidaySantaPlate.htm
lots
of kids with various hair styles, some clay some not
http://www.thumbprintkids.com/pages/gallery.htm
Julie
W's long curly clay hair (2 of her "Wise Women" galleries
http://members.aol.com/wise1j/goddesses.htm
... http://members.aol.com/wise1j/goddesses.htm
see many more examples of clay hair in Sculpting > Websites and in Heads > Faces Used Alone
hair
sculpting is approached just like the rest of the sculpture.
1.You have the overall hair mass
2. Then you have a design layout
of hair groupings or lock cluster layers.
3. Then you have inital
detail textures which can be of varying tool pressing depths for a natural
look. Detailing in some stray curved locks on upper surfaces adds realism.
4. Fine detail textures.
...Many beginning sculptors jump from #1.
to #4. DON"T. My hair sculpting technique starts with laying in the hair mass.
This should be planned for the molds, if you are going to produce castings. Any
loose draping hair structures will have to be separate cast parts.
..Some sculpts
involve laying in planned tapered clay coils to make up this mass in an actual
first step designing stage. Just remember it's hair, not muscles and has certain
characteristics of water in its flowing nature. A slightly random choosing of
hair direstions helps give a natural effect in all stages of sculpting it.
....I
take soft non-crinkly clear thin plastic and sculpt through this with
my tools.... Lift the plastic between each stroke for maximum detail retention.
The thinner the plastic, the finer the details. I do this for above steps
2 & 3.
...The final hair splitting detail stage is done (by me) without
plastic with the edge of a spoon tool or a needle shaped tool. Using direct
downward gentle pressing motions you can minimize any unwanted clay balls or overly
sharp edges.
...To make a uniform look to everything I sometimes apply vegatble
oil or alcohol with a very soft small brush stroking in the
direction of the hair flow. One maybe two strokes at most! ....Bake and
you are done. THE DANE
(see under Fur below for more on this technique, plus
tools)
This
is some advice my mother gave me (she's a professional artist) when I was doing
a portrait of my daughter in pencil. ..I was trying to "draw"hair"...She
said not to think of the hair as "strands", but sections
of lights and darks.. . . leave the "highlights" as the raised
parts, and the darker sections more indented, it might help.
....So,
if you wanted curls, I would try to just indent between curled "locks".
Of course, I would indent at different depths to represent different "shades"...Marianne
Why not take a sculpting cue from cameos or similar items? I think if you looked closely at them, you'd get a good idea of how hair could be sculpted around those face cabs... the different hair designs on them are plentiful! Jodi
Celadonia's
clay hair styles (and hats) . . . for woods fairies; some are leaves
or flower petals
http://www.celidonia.it/English/woods_fairies.htm
Judi Madiggan's lesson on
using washes and highlighting on clay hair
http://www.angelslanding.com/pushmolds/paint.html
The natural finish of baked Kato clay is shiny and can look nice for hair... Dawn
The sheen imparted by adding a touch of gold or copper metallic clay to your other clays makes a realistic effect for hair...also adding a bit of Granitex (brown, etc.) will add texture. Katherine Dewey
Non-clay hair
Many materials can be used for hair, even real human hair. Many can be baked at our temperatures so they can be applied to raw clay, or they can be attached after the head is baked.
.....see also Fur below for more on using non-clay hair
on Unbaked clay
Tommie Howell
says that he snips the eye end of a needle (embroidery
needle?) then uses the little "fork" to embed each group
of several hairs into the clay. I have tried this too (thank you, Tommie)
and it works quite well. Irene
....for a larger needle/fork, use a sewing
machine needle and glue the other end in a dowel. MelissaJ
Cecilia
D's snipped-off needle in a clay handle
http://i96.photobucket.com/albums/l163/DianeBB/tools/tools_handles_CeliaW.jpg
(left side of top tool)
Two
ways to avoid messing up the face during the embedding process:
...use a heat
gun to set the face
...leave an indented area where
the scalp will be for the first baking .... then fill in that area
with raw clay. MelissaJ
Start adding the hair a few strands at a time
by pushing the ends into the clay.
...A tool for this can be made by
gluing the pointed end of a larger sewing needle into end of dowel rod,
then use wire snips to cut off 1/2 the eye so you end up with a mini, 2
pronged fork.
...When I glue to finished doll, I've had the best luck with
tacky glue ...regular white glues tend to
seep through the fibers and ruin the look... and silicone
glues (E-6000/Goop,etc.) either skin over too fast, or just makes a royal
mess. MelissaJ
Start at the back/bottom of the hair line and move forward.
"When I get to the front of the head, I push the needle in at an angle to create a more subtle hairline. Sandra
I also use my needle to draw "hair" texture into the clay, so it almost blends with the clay and makes a less startling transition between the two. Sandra
You just do not want to make the haircut and style until after the clay is cured. Dianne (baked or unbaked head??)
real hair (fur,
mohair)
I do use that
particular technique. Mohair is the stuff that I use though. And I do this
because of the scale in which I work (and and doesn't suffer from the baking process.)
The hair shaft of human hair is simply too big to look in scale
with the smaller figures.
The mohair (goat fur basically)
has a much smaller shaft width and looks much better, I think, on dolls and small
figures.
Mohair may have a tendency to stick to things
though.
Another
issue in using real hair of any kind is the overall sculptural
look of a piece.
....for dolls and what not, real hair is sort of
the tradition
... but on things meant more just for display
like sculpts and figurines and the like,. it sometimes looks out
of place a bit..... But it certainly has its uses and for certain effects
it's really nice. SpookyT
I
have lately been thinking about something which my sound strange but may look
really nice... that is going ahead and using mohair, but separating
locks of the hair and varnishing it..... let that dry... then paint
it over to achieve a more sculptural yet very delicate look.
I will let you know how that works out. .
...One of the garage kit hobbyists
used varnish on a figure that was supposed to look wet, and the hair ended
up looking really good that way. SpookyT
plastic
hair will melt if
baked.
... so stick with any kind
of real hair or fur. . . mohair, dog, cat, human, goat, horse, whatever.
. . .even feathers. whatever you can dredge up.
....if you don't
have any extra $$, stop by the beauty shop and glean some of the sweepings.
--sunni
. . .what i do is pull some out like pulling on cotton
candy, then snip it with scissors to get a straight edge. --sunni
(see
below for more on mohair, and other materials)
Some sculptors, like Jack Johnston, just use hot glue to put on the hair.... I think I will prefer the embedding method myself.
see idea for embedding hair for manes and tails in horse-like animals below in Fur
hair on Baked clay
You
can bake the doll with the hair on it as long as it is not synthetic.
. . if it is mohair or other natural fiber then you can bake it, (many)
synthetics will melt. Loretta
...although some synthetics
won't melt at 275?. .
lots
of kids with various hair styles, some made with various thicker "threads"
somtimes arranged
http://www.thumbprintkids.com/pages/gallery.htm
braided crepe, mohair, and viscose hair
types
http://www.webcentury.co.uk/Products/products.html
http://sandyslace.com/supplies4.htm
Shelly's
lesson on using Bunka thread-yarn (aka Bunca?) for hair -- when
unraveled creates lots of tiny curls; found at miniature (and hobby?)
shops-- cut into short lengths and glue (onto baked head)
http://www.sculpey.com/Projects/projects_littleangel.htm
...You might be speaking
of a type of cording that is sold at Polymer Clay Express http://www.polymerclayexpress.com
(look under Jewelry, then "Cordage") .silky/nylon type of cording that
drapes nicely . . . (many colors, is used for graduation tassels) . . .
Bunka is often used for tassels (and doll hair). Kay
how
to put hair on a doll (wigging lessons)
http://msatminidolls.minilists.com/wigging1.htm
http://msatminidolls.minilists.com/wigging2.htm
(curls, tendrils, straight bangs, wavy, viscose)
http://www.dollmakersite.com/tutorials.htm
(Barb's wigging lessons)
Antonette's lesson on
wefting hair for dolls (using any type of hair)
...row of lengths of
hair are sewn between a folded piece of tissue paper with a sewing machine, in
several rows
...excess paper is trimmed away to leave onlya long narrow
strip of paper with hair hanging down
...strip placed around head
in spiral (bottom to top so each row overlaps previous one)
(attached
with glue or sewn) (...can double for "part" if want)
http://www.cely.com/doll/weft.html
If your doll is already cured, you can get a glue called "Dolly Hair" at Michael's... it's a very thick, white PVA type glue. I've used it a couple of times, and had intended to try plain ol' Tacky Glue for the next one, because it seemed like that's exactly what "Dolly Hair Glue" is. There are a couple of good books and a video about wigging dolls, so you can see that it's sort of a complicated topic. ;-) But, this is one way, and I hope it helps.
lesson:
Wrap your doll in Saran Wrap, leaving the head exposed, and cover the head with
a thin layer of glue. Let it "set" for a bit and get really sticky, then beginning
at the back of the head/nape of the neck, start picking up small folded strands
of mohair or synthetic hair on the end of a toothpick, and pushing that
folded end down into the glue and working it in, well. . . . Make a line of
little mohair loops across the back of the neck. Make a line of glue a little
above that one and work in another line of mohair loops. . . .Above the ears,
the line goes from right in front of the ear/behind the eye all the way
around the head in a U-shape. Make a few of these U-shap rows, until
the last one, which is so narrow that the loops of mohair will be touching each
other in the middle... forming a middle part on the head. For this last U-shape,
you fold the mohair , but you hold the top half of the fold up and away from the
hair, so that it doesn't get glue-y.
. . .Let the head dry at least
overnight, before you try to style it. . . .If you don't like how it looks,
peel it off the doll's head and start over. Hope that's help enough to get
you started! Elizabeth
Some of my doll's have hair that is a skin... I cut a small circle of skin to glue directly to the doll's head, and then I cut some hair off the skin and glue it to the doll- to create a hair line. Kathndolls
Are
you folding the hair completely in half (the loops you call them)? Cindy
Yes, on some of them... it gives you an easier "grip" to just loop the hair
over a toothpick and dig it into the glue.
and are you using Sobo or does
it have to say Tacky Glue on the bottle?
Tacky Glue would probably be
easier to work with, because the hair is going to want to spring away from the
glue, and the tackier the glue is, the more it will be another pair of
hands to you. Trying to keep all that hair under control is trickier than it sounds.
;-). . . One more thing that might be helpful... I have always tended to put wayyyy
too much hair on a mini... it would look more natural to apply tiny wisps,
especially at the back/bottom of the head - I finally managed to not overdo it
on the last doll I made. Elizabeth
I use Mohair from goats. That is the best hair:)) If you maked the head, after baking it you take the mohair and pulls little strings out of it, you take the string in the middle and glue it to the clay with the hot glue gun. When you start glueing start almost on the neck and work slowly up. Take not to biggest strings, only small ones make it pretty.At last you do the front of the hair. That way you get the nice effeckt of a great bush of hair :) Ria
Viscose is just like mohair but so
much thinner...i find mohair like horses hair and too thick for my dolls. Kara
I'm pretty sure that One and Only Creations also makes "Wavy Hair," a very
fine viscose fiber, finer than the fiber of "Mini Curls" or "Curly Hair."
Elizabeth
I used to use an acrylic "Curly
Hair" but that stuff is not particularly consistent as to whether it can
withstand the baking temperature. Usually it was ok, but sometimes it just shriveled
up. Whenever I made ornaments without hats, I'd glue the hair on after baking.
....This year I switched to English Viscose doll hair (from http://www.minidolls.com),
and that stuff has no problem withstanding the baking temperature. I usually plunge
the hair into the head at the "roots" and then cut, style & glue it where necessary
after baking. I have to say that adding hair is my least favorite part of ornament-making.
I'm always happy to make the Baby's First Christmas ornament, since the babies
are bald ;-) Lisa
Marina's fantasy woman with hair of dried moss,
and some with other woolish hair also
***
look now at ---> http://www.marieidraghi.itinglese/epiccolopopolo.htm
......curls,
tendrils, waves, etc.: (depending on amount of fiber used ...more fiber
= thicker curl; wider rod = bigger the curl.
...spritz a length
of hair with water and wrap around a knitting needle or other smooth
rod, like floral tape on a stem (on diagonal angle, spiraling
downward but slightly overlapping?); wrap around itself several times at end to
hold in place. Dry with hair dryer (or bake in low oven?); slide hair off when
cooled.
....you can take thin strands of the viscose and wind it around a
knitting needle of the diameter that you want, tying the ends onto the needle
or rubber banding them. Then soak the hair with water and heat the needle in the
oven to dry it. That hair endures polymer curing temps just fine, so... 200-250º
should be fine for drying the curls.Elizabeth
Angela's lessons on
dealing with mohair (straight, curly, using gel, etc.)... she likes
"pearl moon" doll hair best
http://www.emilysfairies.com/hints/Hair.pdf
(requires Acrobat Reader)
... Sue's
lesson on making mohair curls for gluing onto head (Sobo or clear)
by wrapping 3" lengths around a wire, submerging in boiling water before
allowing to dry; she clips short lengths of curls and applies on their
sides, all over head
http://www.polymerclaycentral.com/pcc/suefairy.htm
Pat
S's adorable little almost-bald guy ...with small clump of hair sticking
up from top of head
http://www.brpcg.com/Galleries/pat.html
if
you unravel the satin braid that fringe is made from it makes wonderfully
curly fiber called "bunka" that make great curly hair for a smallish head.
.
. . you could unravel bunka yarn - it's made of another very fine fiber
that's in scale for tiny creations, and when you unravel the bunka, it has a ripply
or curly shape, depending on how short you cut it.
With the bunka, you can
cut it into very short pieces and have a short, curly hairdo, or cut it
into longer lengths and make "Gwenivere" type strands.
You can use
regular hair spray to set the style as you make it.
With the very
short lengths of unravelled bunka, you can also glue it onto a tiny doll or figure
where it becomes a fuzzy sleeper on a baby doll or "fur" on an animal
figure, like a lamb. Elizabeth
I have two nieces
who I made dolls for using their own real hair and I gave them when they
were four years old. They both are eight years old now and those dolls are handled
with TLC. Just like I made them. Jeanne
...The other day I cut my daughters
hair, I thought it was a waste to throw out the pretty locks (I had cut about
5 inches off), so I picked up a bunch... I made a pin - face with a half
bust, and of course a nice head of real hair. My 17 yr old ...said "that's gross
Mom"... my 13 yr. old said "you're weird Mom"... and my 10 year old said "cool!"
Linda
...I used tls on the ends of real hair and baked them on foil.
Then you can put it on the head in strips. Denise
The best way I've found is with Fabri-Tac glue, though many dollmakers use "Velverette." I bought some but haven't tried it yet... it's apparently been discontinued by the manufacturer and I'm afraid of getting hooked on a product that could disappear any minute. *g* Elizabeth
I
used to use hot glue to attach hair to my dolls, and it works great until
it cools, at which point you can peel it right off in one piece. And use it
as a wig, which you glue on with dollmaker's wig glue.
The last
stuff I used was a PVA type white glue that I bought at Michael's, very sticky
and messy, but, it's holding... this brand is "Dolly Hair Glue" by Fiber
Crafts, but I suspect that "Tacky Glue" would work just as well.
I washed
the head with alcohol first, and sanded it a tad with rough sandpaper,
then started at the neckline, gluing on small hanks one piece at a time and working
up to the forehead. It was acrylic hair, so I couldn't rebake after it was attached.
I haven't tried wool or jute hair, but I did use some of that "loopie" stuff - cute! . . . I glued it to baked clay with a glue I got at Wal-Mart called Gem-Tac. It's made for bonding porous surfaces to nonporous surfaces. Worked well. :) Pat
BTW have you noticed how fast Fabri-Tac
turns yellow and gets thick after you open the bottle? Is there anything
I can do to slow this process down? The stuff is not cheap and I don't want to
have to keep throwing away nearly full bottles of it! I wish it came in smaller
bottles! Sally
It used to come in larger bottles!!! I had to tell all my students
to buy the smallest bottle! I think it's much cheaper at JoAnn's fabric. I find
I can still use it after it's thickened- if I make a stand to hold the bottle
up-side-down. That way I don't have to wait for several minutes for the glue to
get to the tip. I don't know of any way to prevent it from aging! I just lost
about 1/4 of a fresh bottle- my cat tipped it over on my work surface- and it
went ignored for several days. kathndolls
That is great that Fabri-Tac thins with acetone. . . .fingernail polish remover? Trina
My
favorite glue to use for doll hair is Beacon Fabric Tac. It's available
at Michael's and JoAnn's. It glues just like a glue gun... strings and all- but
without the heat and bulk. It's clear and stays that way. As far as method...
play around and see what works!! Kathndolls
I myself like to use a glue called "fabric tac" to glue the hair to my figures.
Jenny P
(website gone)
The best way I've found is with Fabri-Tac glue, Do you know of a way to dilute it? I use it too, but by the time I have a drop in the right spot it's already started to dry, and I end up with shiny threads stuck to everything. By the time I have the wig finished, it looks like a spider's built a web between me and the doll. :) Leslie
I was glancing through Maureen Carlson's new "Family and Friends" book yesterday and she has excellent directions for gluing hair onto clay heads. Of course her characters are fairly small, but that shouldn't make too much difference. One tip I really liked was using a damp wooden stick to push the hair into the glue because the glue won't stick to wet wood. She uses Beacon's Fabri-Tac. Sally
Fabri-Tac dries very quickly, so you can apply a drop, then a lock of hair, a drop, a lock of hair and so on. When it's completely dry, it's bakeable at clay-curing temps, in case you have to cure the doll again, or in case you use a heat-set paint like Genesis to paint the doll's features. Elizabeth
I use FabricTac glue by Beacon. It acts a lot like hot glue- without the heat. It holds well- yet will peel off if you need to change a doll's hair. .. . Kathndolls
Christel's lesson on gluing sheep wool hair
onto baked head with Aleene's Tacky Glue
http://www.pcpolyzine.com/may2001/troll.html
.....see also Fur below for more on adding hair of various kinds to figures
If you pose the question of glue and wigging material to a group of mini doll folks you will start a major chit-chat! Most miniature doll artists use either Aleene's Tacky or Velverette for making wigs... most use viscose (a Viscose is the processed cellulose --plant fiber--used to make rayon... Jane) for the hair though some prefer silk and others use the ultra soft/fine mohair (be careful, there's some yucky mohair sold for wigging that does not work well at all). Fabri-tac is not used very often as it tends to yellow over time as do most of the house brand tacky glues. I use mostly vicose, followed by silk roving and lastly mohair when I need a coarser textured hair and always use Aleenes Tacky as it holds well, does not yellow over time. Sammy (I'm a girl) Smith
Child
asks me today, "Mom, why is the Little Old Lady from Pasadena hanging upside down
in the fridge?"
dyes and coloring:
(will all these work on natural hair like mohair, and synthetic hair??)
Leave it in until it's a bit darker than you actually want ... then I'd heat set (iron) and rinse with cool water, and iron again (heat setting helps lock in). pokopat
I really like Procion dyes. I get the MX fiber reactive dyes from either http://www.prochemical.com or http://www.dharmatrading.com Sarajane
RIT and Koolaid are both very light-sensitive and can fade quickly. ...both can often stain things they touch as well, especially if there's wetness at all.....go ahead and do it with good dyes--always use good materials if you can! Sarajane Helm
Rit Dye is readily available
at discount stores like WalMart, and is inexpensive. ...pokopat
...
Tan Rit dye with a little yellow mixed in makes a nice natural
blond. . . it's much easier than human hair dye and is more permanent.
...I
used to dye nylon rope in RIT dye... it says you can't,
but it worked incredibly well for me.... I let them sit for 24-48 hours...
GORGEOUS color.. Nae
I dye my mohair with regular human hair dye...I like a thing called Glintz by Clariol (I think)...kinda a rinse...or cellephane...I can control my color mor
I understand that several people use cold water wool dye...and they love that
A good hair dye section
: http://members.xoom.com/LDSmith/Tips1~4.html#dyeing
(gone)
.
...this is
one of the greatest sites for Barbie customizing, (or other dolls?)
--it has info of about everything you need to know to get started.
.Nicolette
Basically, the
idea is, if it'll stain your clothing, you can use it to intentionally
color fibers.
...experiment with things like food coloring. . .
...mustard
will dye (stain!) almost anything a lovely yellow. . . .berries work,
although you probably wouldn't want to use them as hair colors!
...coffee
and tea
...leather dye, available just about anyplace that
sells shoes, would give you natural colors.
...water base
paints can be thinned and used as dyes.
...DyeNaFlow paint
...inks
that you use for clay (you can try some of those on the sisal). pokopat
Katherine
Dewey is using sisal for hair in her new book
...sisal is
a natural fiber, not a synthetic fiber, so
should take almost any dye readily.
...she uses alcohol based silk
dyes.....which helps narrow the field down quite a bit... Jenn
One inexpensive alternative, that's safe and available at most Michael's is dye markers, by FabricMate.. . .real dye, permanent, and works on natural fibers. pokopat
You can color Barbie
hair with a permanent marker. I used Berol Prismacolor markers to color
Barbie hair bright red on one doll and bright green on another. They were white
blonds to begin with. Jody
...indelible markers can be used, if you don't
need to color too much at a time.pokopat
And Kool Aid, don't
forget that stuff! Nae
...just make sure it's the type without sugar!
(...sugar in a dye solution gives mottled
effects...can be neat if it's what you're going for...could also draw ants
later on. pokopat
I discovered that I could transfer color by pressing Maroon Sculpey III clay on the baked head and get a very natural look. . . What a clever idea! . . . other colors too???
Beards & Mustaches & animal Whiskers
Actually,
beards can be made from any shapes at all ... anything that covers the
lower part of the face, or hangs down from the face will be seen
as a beard
...anything from just a solid sheet of beard-shaped
clay... to individual strands of clay ropes or twisted square
ropes (see Clay Guns, etc.)
...beards
can also be created by texturing . . . e.g., streaking with a pin
or stylus, impressing repeatedly with a multi-pins tool or other
object, or impressed with a texture sheet ...these things
can be done to the beard before or after adding it to face
.........(see
also above in "Clay Hair" for a tool to impress
"curls" for beard)
.........and also (see
Texturing and Stamping,
etc.)
beards can also be antiqued
if you want, particularly for the Old World look (see
Faux Ivory>Antiquing)
.......or they can be highlighted
with powders, inks, etc.
Karen P's lesson
on making Santa beard with clay gun extrusions
http://www.sculpey.com/Projects/projects_HolidaySantaPlate.htm
Tracy's
Amish figures, old-fashioned clothing and accessories, beards
http://www.doveceramics.com/amish.html
Marie S's excellent flowing beard on wizard
http://www.clayfactory.net/marie/images/ms8503.JPG
Marcy's
Santa beard, mustache (and hair) made from many overlapped rows
of baseball bat-shaped pieces of white clay
http://www.marcysclaypen.com/santafigures/santafigures.html
Cecilia's
several types of beards (see Hair > Clay Hair
above and Fur below for tools for adding texture to beards
and mustaches --curly, etc.)
http://i96.photobucket.com/albums/l163/DianeBB/Christmas-winter/5401.jpg
Spooky's
lesson on wizard & beard/mustache http://www.polymerclayhaven.com/lessons/wizard.htm
(gone)
Irish Red's marbled beard
on wizard (website gone)
..(see
many more examples of beards in Christmas
{Santas} and in Sculpting >
Websites)
For those of you who can't collect real (shed) whiskers from your pets, look for some cheap disposable paint brushes (also toothbrushes?). ...The brushes I use have off-white bristles and work just fine. I am not sure what they are made of though, so any bristles you use make sure to do a bake-test before using them on your creations. Just to make sure they won't melt in the oven! Fayette
(see more ideas & techniques above in Hair, and below in Fur)
lesson
on inserting eyes and making eyelids
http://www.faeryforest.com/sculpting_tips.htm
eye
placement by June Goodnow --draw temp.horizontal and vertical lines
bisecting face... mark placement one eye apart... place ... check for consistent
depth by looking over top of forehead or up over chin
(...of course, pupils
must be pointing in exact same direction!)
http://www.niada.org/arch_dollmaking_5-99.html
NoraJean's
tips on making eyes
http://www.norajean.com/MSAT/ClayArt/FaceOff/Eye-Trouble.htm
& http://www.norajean.com/Biz-Archive/Sculpt/Eyeball/Index.htm
......NoraJean's
mini-lesson on pressing baked white clay balls into a molded face,
then adding lids, etc (photos
# 25-33)
http://albums.photo.epson.com/j/AlbumIndex?u=4213214&a=31248347&sp=1&showall=true
Sandy's (painted or rolled-on-cane-slice?)
eyeballs in figures (website gone)
Anita W's lesson
on making a more painterly eye cane and nose
http://www.billbra.com/thumbcart/caning1.htm
Katherine Dewey's lesson on making eyes, nose, and ears
on lifelike mouse sculpture
http://www.hgtv.com/HGTV/project/0,1158,CRHO_project_27285,00.html
Nora Jean's lesson on making cat face . . . the eye canes have a shadow
on the bottom/side of them, which isn't part of the cane, but would make a
good dramatic eye if it were actually part of the cane
http://albums.photo.epson.com/j/AlbumIndex?u=1751108&a=13507252&f=0
Donna
Anne's lesson on painting facial features (especially
eyes) on a plastic doll/figure, from which the factory applied coloring has been
removed with acetone
http://www.fantasydollsbyd.50megs.com/new_page_14.htm
...another
site suggested using "vinyl" or soft vinyl paints?
many
lessons on heads, faces, features (eyes, etc.), and armatures fr.
various participants at NoraJean's swap page
http://www.norajean.com/MSAT/ClayArt/Swaps/Faces-NonSwap.htm
Eyes
Caned
as part of face canes
Kim
K's lesson on making an eye area cane for use in face canes
http://www.pcpolyzine.com/0208august/eyecane.html
lesson on making simple spoked
eye cane+ then eye-area cane
http://members.aol.com/polyclay/cane.htm
....Polly's
lesson eye area cane, complete with folds and wrinkles, etc.
http://members.aol.com/polyclay/senior.htm
flat eyes (cane slices)
flat eyes with baked slices from an eye
cane
...... Christel's lesson
... she makes an eyeball cane, then cuts
slices and bakes the slices
...... then puts the baked slices into
a raw clay face (...also makes a nose and ears)
http://www.pcpolyzine.com/may2001/troll.html
...flat
eyeball slices (baked
or raw) could also be used for masks, flat critters or people, etc .
dimensional eyes
flat-backed eyeballs
(hemispheres) made from thick slices
of an eyeball cane pressed into a mold
...first make an eyeball cane
...then reduce the cane, cut a thick slice, and shape the
slice with half-sphere mold
.......this mold is simply
a sheet of polymer clay with hemispheric dimples made by pressing ball bearings
of varied sizes (or other perfectly round things) into to it halfway ....bake
before using. Katherine Dewey
iris canes??
I make iris canes in all colors... then I make round white eyeballs, and roll a thin iris cane slice into each white ball. brigitta
Leigh
makes an eye cane by wrapping many concentric layers of various
shades (e.g., blue) around a black iris log
. . . every few layers,
she cuts into the cane through several layers of wraps and inserts
another shade (of blue) -- she does this all around the cane, like rays
at least twice during the making of the cane, but leaves the outermost few layers
alone.
...could do something similar with indenting through all the
layers (but not showing the outermost parts of the log where the "loops"
are?); maybe something similar but simpler could be done with a Skinner blend
of light blue to darker blue indented to the iris?) DB
*Kerstin's
lesson on a many-spoked-iris eye cane made with squashed ikat
http://www.kerstinsfimoseite.de/fimo/Augencane_engl.html
Kerstin's
iris cane (many tiny, uneven spokes radiating to outside... squashed ikat,
formed into wedges)
http://www.imagestation.com/album/pictures.htm
http://www.kerstinsfimoseite.de/fimo/index.html
(esp. in Sonstiges category)
....just add a black pupil
in the middle of the cane. That's what I did with the green eye cane. It comes
out more realistic. Kerstin
.......If
you don't add a pupil, you'll get a flower - not really an iris but a carnation.
Kerstin
...slice
of can can be placed on a white ball to make a 3-D eyeball
Ikat cane based on the ikat cane lesson from Mia Rox:
http://www.polymerclaycentral.com/cyclopedia/ikatlesson_mia.html
......and modified as shown here (the 4x4 grid is made with 4 gradations
of a single color, rather than Mia's two-color checkerboard, then squashed so
that the light colors run through the middle, dark at each end):
http://www.picturetrail.com/gallery/view?p=999&gid=646662&uid=415436
...I didn't use black for the outer edge for mine. I used a dark shade
of green, so the contrast is not so great...But I really like yours, (Stargazer).
It looks like it was drawn. :o)) Kerstin
(Jean's lesson)...Mia's tutorial
uses 2 colors... i used about 5 or 6 different (separate) greens
in my ikat cane
http://www.pbase.com/image/345020
....(each triangle light-to-dark, but triangles reversed)
....... i actually
cut it in half, then squished one piece one way, squished the other half using
opposite corners... then i flattened them out. i stacked then up staggering the
two versions, and actually flipped one over, so i had A, B, A, upside-down B,
A, B, upside-down B, etc. it made a neat effect in the (iris color) greens
........I
added a layer of black clay around the outside (like a bull's eye) after
putting the pieces together... Stargazer
lesson on
Skinner blend ikat iris cane, by Katherine Dewey
....create a graded
sheet using the Skinner blend method for the iris (brown
and gold... or cobalt and light blue...etc.).
....roll the blend sheet very
thin... accordion fold it to achieve the effect of variegated striations.
...
compress then wrap around a (round) black pupil log so that the
striations are perpendicular to the center.
..... At this point you
may wish to wrap a very thin sheet of dark blue, or brown, or
green (depending on the color of the eye) around your cane before building
the white of the eye.
There are two accordion folds
to create the variegated iris: The first establishes a pattern of graded stripes
from dark through medium values to light.???... The second accordion fold
is done perpendicular to the first..... Then this pattern is compressed
and is wrapped around the pupil so that these striations radiate outward.
....For the white of the eye, blend a non-plaquing translucent
clay (Premo bleached) with white using a 2-1 ratio. Katherine
Dewey
...(using mutliple Skinner Blend
ikat canes... see Canes-Instr. >
Ikat)
.....spiral canes/slices of various
kinds, including ikat) can also be used as very interesting eye canes,
or eye slices
...depending on how they are oriented, and the number of revolutions
in the roll, "eyelids" can show up, a white glint
can appear in the "pupil" area, etc.
has
anyone tried making an iris cane using translucent clay
wrapped with colors?
... I see a snake of translucent
wrapped in green, (then?) one in blue and maybe a bit of turquoise, and then reduced,
flattened, and added around a cane of black,...I am wondering
if you would get a little depth to the eye cane?
.....in
fact I see a continuum of color with the eyes made of 3 connecting colors:
red (burgundy), purple, blue... turquoise, green... brown, umber, yellow. KateAnd
Nora Jean's lesson on multi-colored mica,
iris for eye cane http://www.norajean.com/Biz-Archive/Sculpt/Eyeball/Index.htm
...Nora
Jean's method for staggering lightly blended (still streaky) multi-color
blends, then twist? to form half-circle (which she then doubles for a disk of
radiating lines like an eye iris)
... not blends (simple stacks formed into
wedges, placed around an iris http://www.norajean.com/Biz-Archive/Sculpt/Eyeball/002.htm)
http://www.norajean.com/Biz-Archive/Sculpt/Eyeball/009.htm
http://www.norajean.com/Biz-Archive/Sculpt/Eyeball/012.htm
and http://www.norajean.com/Biz-Archive/Sculpt/Eyeball/005.htm
Alan's
owl (or other) very shiny iris eyes
http://groups.msn.com/ALANpolymer/polyclaysculpture.msnw?action=ShowPhoto&PhotoID=31
.
.. yes I did make the eye cane myself Diane - using about 10 or 12 different
metallic and shaded blendings around a black core - all Premo incidentally)
Alan
For the pupils, I'd suggest you look at goat eyes. They have the most alien eyes I have ever seen on a real live creature. Their pupils aren't slits like a cat, they're rounded "I" shapes *on their sides*! Tiggersong
Aurora's
idea for cat eye and tiger eye effects, based on Mike B's technique
for a holographic long bead with illusion stripe down the center --see
Mica/Mike B.)
I do this thing with the "mica" colors. I think Mike
B did it as well with a piece on his site. You'd have to pick the colors right,
like black to gold to maybe a gold/pearl mix, and do a skinner
blend with it.
Next, roll the skinner blend out at a five or six
from black on one end to the light color on the other.
Now roll it up
real tight and even with the lt. gold in the center. Compress the
log a little to have it set together real good, you don't want the diameter too
small.
Cut a 1" piece and set it on end.
Now cut down
that piece and what you will have is a sort of cat eye effect. You can take it
from there.
You can roll the slices from this out or thru the pm but
not too much or you'll lose the mica effect.
eye
ball cane (lessons):
... make a (log) of black... roll a slab of
blue (around the log) with a bit of white conditioned in (remember the clay darkens
when baked)... then adda slab of white around the outside
... cut across this
cane (as a very thick slice?) and round the edges a little... pierce
a hole across the slab and Viola!, an eyeball ..if you are really worried, a red
slab around the blue inside the white might resemble the blood shot eye?
............To make an eye bead in a clay gun,er use the size Round (hole)
you want as eyeball size... put a white ball/cylinder in front of the tube a blue
one behind it and a little bit bigger (black?) one behind that... (extrude)...(if)
you push (out a few inches) you should have many "eyes" (if you) slice
these off and round em and bake em. . . you have eyeballs for little dolls
or a million eye beads for a leviation... ( you can also) use this premade
cane ...when making face canes. Faun
polymerclayexpress'
lesson on sculpting (open, friendly) eyes ....then
painting them
(after antiquing the face with a combo of burnt
umber and red oxide, she then created eyewhites and eyebrow color by
adding white to this mix)
http://www.polymerclayexpress.com/nov2001.html
I make and
pre-bake several sizes of eyeball canes (I think I have 8).....
I then slice the canes AFTER baking so they don't get distorted.
...
I have containers full of little eyes... I just insert them into the raw clay
and rebake the whole piece. Tamila
simple "eye"
beads (concentric circles) ... could be made from slices of bullseye
beads (or bullseye canes, or both?)
I am toying with
the idea to make a single eye with the pupil material going all the
way through, cane fashion, which would then be baked alone.
.... Then I
would cut it in half with my band saw. This would make two eye halves
of the same size (they would not be totally the full half as that would require
that they were inside the egg to some degree. These would then be placed on the
skull.
....Once the eyes are in place, then the eyelids brow etc could be
built up to make the dimensions more realistic. Lysle
Eyeballs (usually pre-baked) ....& sculpting eye areas
clay
pre-baked eyeballs. . .I use white clay rolled into balls to make eyeballs, then bake the eyeballs 'bout 5 min... later I'll press them into clay face. Erin
If eyeballs or eye slices
are not held in mechanically with eyelids, etc.... you can hold them
in with a bit of liquid clay , superglue or diluent ...
or just let the eyeballs sit in the raw face a few hours or overnight
before baking
...I did have some
noses and eyeballs fall off of some
critters once during baking
...... I had put recently conditioned clay on a
sculptured piece that was cold and had been
worked the day before. I think that might have had something to do with
it... ...now I use mineral oil (like a glue) and have had no probs
so far (just a teensy bit, hardly enough to even see it). Kim2
With
a bead roller, you can make a bunch of eyeballs to pre-bake! and they will
match exactly in size and be perfectly smooth. Elizabeth
...Sue
Lee's bead roller set for small round beads.. 3-8mm....I love the idea
of making eyes for my clay figures that are the same size and round!!!
Dianne C.
http://www.poly-tools.com/Merchant2/merchant.mvc?Screen=PROD&Store_Code=PI&Product_Code=SR&Category_Code=ROLL
...I've
made several "eye ball rollers" based on the bead roller concept. To measure
the clay, I roll it into rods the same diameter as the bead roller ....
then cut the rods into slices 2/3rds the diameter of the rod. That
way they're always the right size for that roller. Katherine Dewey
I make
iris canes in all colors... then make a round white eyeball with
my beadroller, and roll a thin iris cane slice onto it. brigitta
(I
make an eyeball cane & reduce it...).. then I shape
it using a half-eyeball mold.
....this mold is simply
a thick sheet of polymer clay with hemispheric (half sphere)
indentations made by pressing ball bearings of varied sizes (or other perfectly
round things) into to it, halfway ....bake mold before using.. Katherine Dewey
You could also place progressively smaller disks of contrasting color (e.g, black, blue, black) on top of each other on a raw white ball, then roll in.
(if
you want correct size eyeballs for a realistic human figure)
Here's how to find the right size for eyeball and right placement.
...The
eye is 1/5th the width of the head at the midline and placed on
the hoizontal midline. Divide the midline into four equal sections, and
roll a ball of clay the same diameter as the width of a section. Divide that ball
of clay in half and roll those half balls into balls, eyeballs. Each will measure
1/5th the width of the head. Katherine Dewey
Plankspankers
lesson on making a simple dragon/animal eye with
a ball of clay, pressed down and eyelids formed
http://www.geocities.com/Area51/Shire/6883/draeye.html
(check subsequent pages too)
Jodi &
Richard Creager's older person's eye area forms for studying &
purchasing (may have others later?)
http://members.aol.com/creagers1/eldereye.html#ElderEye
Nora
Jean's many photos (lessons?) on eyeballs and eye areas
http://www.norajean.com/Biz-Archive/Sculpt/Eyeball/Index.htm
Dawn
Sch's snail with eyeballs set into heavily hooded lids, way up on
slender stalks
http://members.aol.com/rhaiven/critter.html
Antonette's
lesson on making faux "glass eyes"
with raw & baked clay, and gloss varnish
...create stiff iris rod
by making a colored log (exact diameter for irises --roll log with flat object
to make even thickness throughout) ... bake/cool... can paint outer
surface of log with darker iris color for thin ring around iris
....cut baked iris rod into lengths twice as long as the eyeball
...create
raw balls of white clay (from logs or cutouts for consistent size)
...push
stiff iris through eyeball's center to back side (to make good contact,
press clay around it on back side, use a bit of liquid clay, let sit awhile, etc.)
...bake together
... lay eyeball on cut-resistant surface with iris
log parallel to surface by holding extending iris... with sharp stiff blade, cut
off other end of eyeball deep enough to show the complete iris (& removing
a tad of white)
...prop extending iris rod end into foam or raw clay,
then place a drop of glossy varnish (or other clear medium) on the slightly
flattened area of eyeball (surface tension will create a slightly rounded clear
"lens" after several layers --dry between)
...apply
glossy finish to entire eyeball.... cut off extending iris if you
want
http://www.cely.com/doll/eye.html
not clay eyes
simple, painted eyeballs
....Margene
Crossan makes "white eyes" with white "quilter's" pins (see details
below in Other Materials For Eyes)
.......to create an iris,
Margene then uses 3 gradually smaller sizes of dowel ends, dipped
in acrylic paint:
1-- black iris rim (large black dot) .....2--
colored iris (smaller dot) ......3-- black pupil (smallest dot)
...Susan's
lesson showing this with clay balls made
in a bead roller... she paints them white after baking
(before using dowels)
http://www.theclaystore.com/pages-tutorials/polymer-clay-project-tutorials.html?action=showTut&tutID=35
The eye area will be easier to shape if you place the rounded almond eyeball in the face.. then bake, and add the lids. This will keep the clay from squishing around as you work. 10more
eye expressions, tips on color, etc.
polymerclayexpress'
lesson on sculpting (open, friendly) eyes ....then
painting them
(after antiquing the face with a combo of burnt
umber and red oxide, she then created eyewhites and eyebrow color by
adding white to this mix)
http://www.polymerclayexpress.com/nov2001.html
eye expressions
...A
larger iris, as well as both eyes pointing *slightly* inward indicates
interest …. DB
...A larger iris tends to give a more innocent
expression...Judi Maddigan
...I found you get really a "cute" or sweet look having the (animal)
characters looking upward. Sort of a "please take me home" look. . . And
definitely don't forget the little white dot, the light reflection in the
eye. I find it looks best in the 2 o'clock spot right where the iris and the pupil
meet. That tiny addition really makes the face come to life. Dawndove
...large
pupils are perceived as "friendly"... tiny pupils are interpreted
as "evil" or "mean." Elizabeth
....my "cartoony"
eye slices (what do you expect from a girl with the last name of "Darling"?) give
my pieces more character than plain black beads ...however, they
are still realistic enough that for my angels, santas and other
things they look nice too, and have become kind of a signature part of my work.
Tamila Darling .
a
suggestion for teeth & eye whites clay. . .I use Cernit's white- it's
not a stark white, it's slightlly translucent,
like real eyes. Make sure you use the # 010 white in the small (65g) package-
their #049 white (in the big 500g package) is much more opaque.... I place a small
dot of colour on the eye-balls for the cornea, then bake them for about 10 minutes.
When I place the pre-baked eyes in their socket, they retain their shape while
I do eyelids,etc
....for eyes and teeth -- I've used
(Premo) translucent-- It's worked great .
For
non-realistic eyes (often in scary or caricatured faces), colored
balls of clay (often in bright colors... like red, yellow, green, etc.,
or with gray, black. or brownish or yellowed)
...
some of Kevin's colored eyes are also made glossy with varnish http://www.kevinbuntin.com/miscmischiefgallery.html
(look all around)
... plain colored eyes could also be
have an iris or pupil painted on, or added in other ways
It
makes sense adding depth to the iris like most real eyes actually
are:
... .green eyes
with a tiny bit of yellow or amber within the center, or blue with grayish
inside and outside too... brown could be done too using a lighter brown
or tan in the center with a darker brown around the edge. Sandy
....I
used Pearl Ex powders mixed into translucent clay for my iris cane...
really makes it look real!... think I used Antique Gold and Spring Green, or something
like that cox420
....Maybe I should try a Glow in the Dark clay cane?
LOL Hang 'em aroung for Halloween...Tonja
....I used premo bleached
translucent in it and I put it under the black light last night and
WOW did it look awesome!!!!! Jen
The pupil needed a light reflection in it so a crescent moon of translucent and pearl alternating sheets was used in the black pupil, so it didn't look like a black flat disk... but it could be better. Nora-Jean
I find that (a
pupil highlight) isn't necessary if you use a good gloss coating. It's
the light in the eye that's important... and the light hits the gloss coating
just like a natural eye. Kathndolls
......when the sculpture
or doll is finished, I varnish with Hyplar Gloss Varnish for a shiny
eye. Katherine Dewey
......buffing
them to a high gloss with my Dremel wheel made the black of the iris just glisten
Nora Jean's striped "highlight" for pupil in eye cane) http://www.norajean.com/Biz-Archive/Sculpt/Eyeball/Index.htm
fireEyes'
lessons on dragon shapes (eyes, etc.); drawing, but applies
to sculpting too
http://www.tailchaser-sushi.com/index2.html
Karen's
lesson on drawing a dragon eye on an oval "cabochon"
of baked translucent clay, using oil pencils (or colored pencils?)
...
then surrounding the eye with clay for framing, eyelids, embellishment,
etc.
http://www.karenlorraine.com/howtodragoneye.html
http://www.karenlorraine.com/DragonBeads.html
Y'know,
I found after many attempts to use the little white balls that they just didn't
work for me. They would always seem a little buggy, or a little uneven, or whatever.
And to fix them, I had to gouge them out and start over on the eyes if not the
whole head.
...So I switched back to a direct-sculpted eye
area instead of a ball. Here's how I do it (lesson) :
... I use
my pinky or a properly-sized ball tool to press in eye sockets, pushing
excess clay upwards to form a brow bone. Then I make an oval-shaped ball
of (flesh) clay (shaped sort of like a Tic-Tac), and set it into the socket.
I use a tool with a spear-shaped tip to press in the corners of the eyes in the
centers of the tic-tacs. The clay that squishes away from these indentations will
be the lids. I blend this excess clay into the brow-bone and cheek, leaving nicely-defined
thin eyelids behind. Then I round out the eyeball itself using a spoon-shaped
tool, digging a little deeper into the corners to give hte impression of an actual
ball. I use a tiny ball-stylus tool to press in the inside corners of hte eyes,
where the tear ducts would be. I think that's it. To finish up, I use a soft paintbrush
dipped in rubbing alcohol to smooth out the ball and soften the edges of the lids.
(then I paint it??) This method may not be for you, but it's an alternative
to the little white balls. Both methods take a lot of practice--you just need
to decide which works best for you. Leslie
Other Materials for eyes
....see many mail order sources
for various kinds of eyes in the Supply Sources
category, under "Eyes")
....eyes for
sale http://www.allaboutdolls.com/eyes01.html
--click on each to see variety of iris types
....I get mine from Hamilton Eye Warehouse in
Moorpark, California, and from G. Schoepfer ... to find all of these contacts,
go to http://www.dollmaking.org
(Dollmakers Suppliers List) which is a site compiled
by one of our list members to find all of the contacts that we all use in dollmaking.
Lynda Struble
Glass eyes come in sizes 2mm-8mm on a wire for small dolls, and larger more fancy and expensive up to human size. Linda S.
I've
used hematite beads for eyes before when I wanted a spooky look on
a polymer clay creature. They have the perfect amount of reflection, but
look deep and weird. FerretNose
I
am a dollmaker and I use both glass and acrylic eyes. The smallest that
the acrylic eyes come is 8mm. They will melt as Ginger says at anything higher
than 275 degrees. . . . .However, someone in our dollmakers group on the
internet suggested putting small wet felt pads over the eyes while baking.
It has to be re-wetted every 10 minutes but when I did it, I had wonderful
results. No surface hazing or melting like I had come to expect. Linda
S.
.../.If you place a drop of water on the eyes, or place a damp
paper towel over the eyes before baking, you shouldn't have a problem...Sue
"Glastic" eyes do NOT survive 300 degrees. I've ruined so many dolls that way. 275 is the max, and it's right at 275, too. A very accurate 275. I use glass eyes now. ONLY! Hope this helps keep someone from making the same drastic mistake I made. Ginger
These particular plastic eyes survived at 265, but they dulled, so I just put gloss over them and they were fine. Cindy
Plastic eyes melt just sitting in an unbaked clay head over time ! I have had this happen. Make sure you finish your doll in a few weeks if you have plastic eyes----they will oooozzzz and look like a very, very old persons eyes! Been there and done that! Marty (plastic is eaten by the plasticizer)
Margene
Crossan's method for making eyes is to use white "quilter's"
pins. ...the smaller-head pins are glass and work well, whereas the
larger-headed white ones are plastic and may melt in the oven.. ....she uses about
3/4" of the pin shaft as well as the head and presses it into a
pre-made eye socket hole.
....to create
an iris, Margene then uses 3 gradually smaller sizes of
dowel ends dipped in paint:
1-- black iris rim (large black
dot) .....2-- colored iris (smaller dot) ......3-- black pupil.
...Susan's lesson showing this http://www.theclaystore.com/pages-tutorials/polymer-clay-project-tutorials.html?action=showTut&tutID=35
Seed
beads (see Tools > Misc for tricks
on using toothpicks with either dried white glue or a tiny "wetting"
of clay to pick up and place them correctly for eyes, etc)
I have another "altered toothpick" tool that I took ouside and scraped the tip on a slant a few times on the side-walk to sand it. Now it is a sort of teardrop-ish shape that makes for good tiny eyesockets when used on the slant. The still pointed end I use to poke where the tearduct should be and pull down slightly, to finish the eye shape. . . . They work as tiny smoothers too. Sarajane H.
polymerclayexpress' putting silver
(paint, alum foil, silver leaf?) on the back side of a round, colored,
glass bead to form a reflective eye; insert into head
with silver to the back side
http://www.polymerclayexpress.com/images/dragon01.jpg
and http://www.polymerclayexpress.com/dece2001.html
....
one nifty and wonderful trick is to put a small piece of mirror on bottom
and then the stone (on top of it). The mirror will reflect some light back
trough the stone. It will sparkle when it moves. I have made few gremlin pendants
having "fire" eyes that are somewhat creepy. They seem to be more
alive. If you do not have mirrors available, use a small, very straight piece
of aluminum foil. PöRRö
The eyes on that figure are not clay, they are hematite. pegg
For the little one though, her eyes are made of fiber optic black glass beads ...and they follow you (I love her eyes in person.). peggy
lesson
on using using a 2-pt epoxy adhesive in a homemade 2 pt silicone mold
a realistic whole eyeball
http://www.bellaonline.com/articles/art25389.asp
(see more details in Other Materials >
Epoxy Adhesives)
What I am using for the small dragon swap dragons are basically converted "jiggly eyes" that you can get at any craft store. I basically "disembowel" them, remove the black "dot", paint the back with a special paint mixture that I concocted, overlay that with the Black pupil, let it dry, and then glue it back together using superglue. Needless to say, you can't bake the piece with them in, so I usually glue the eyes in after their final post-varnish baking. I have found that tinted acrylic gel medium run through a VERY tiny cake decorating tip makes wonderful "lids", and helps to seal the eyes in, as well. Of course, working this small (well, for me at least!) means that I can't do all the detail work on the eyes that I would like...
Painting Eyes
in sculpted or molded faces:
Judi's
mini-lesson on painting eyes (+ eyebrows, eyelashes) on molded face... "smiling
eyes, etc.
....I always paint the
eyes after the piece is baked.. There are painting directions and closeups
on my site: http://www.angelslanding.com/pushmolds/paint.html.
. . . Judi Maddigan
(You can do some customizing of a molded face to make
it easier to paint the eyes evenly and without smudges along the eyelid
lines).
...first use a tool to define the edges between eyelid
and eyeball and open up the eyes a tad --the teeniest ball stylus is
good for this.
... also deepen the corners of the eyes
(lesson)
...Here's how I paint sculpted eyes (in heads):
...I either
leave the eyeballs the same color as the face, or I put a coat of palest
peach on the eyeball and let it dry (painting the "whites" of the eyes white
can give too stark a look, & the smaller the doll, the more you notice it).
...Using a tiny brush, like a 6/0 or 10/0, paint a black iris in a
each eye, starting with a dot - make the dots bigger, gradually, so that
you can adjust either or both for size and direction. ....Make sure they're looking
the same direction.... Let that dry.
...Then paint a thick
"o" shape inside those black irises with the eye color (leave a largish
pupil in each eye). Elizabeth
separate eyeballs to insert into faces
Susan's lesson (she uses clay
balls made in bead roller)
...sticks a straight pin (or toothpick) into
raw clay ball with a bit of superglue, then bakes
...dips the whole eye into
white acrylic paint, and sets end of pin or toothpick to dry in a clay drying
stand
...makes a large disk of black (will be outermost part of iris)
on white ball by dipping into black paint
...makes colored iris and
pupil by "stamping" with a dowel dipped in correct colors of
paint
...trims excess pin/toothpick
http://tutorials.theclaystore.com/dolls/doll-eyes
I
can get away with some roughness because he's a demon!
(lesson
... for 2 flat-backed eyes
.... I rolled a football (oval) of
clay in my hands, made it a bit more eye shaped...then sliced it in half
....the
lids were a thin sheet of clay laid over the eyeballs.
....I didn't
sculpt in the pupil5471.
more tips
My favorite way to highlight is to put a
rather hard, round light in the upper right or left quadrant of the
iris... plus a softer arc (just a little bit lighter than the
iris color) in the quadrant diagonal to the hard highlight is.
...also,
to give decent realism for, shadow the lid and the eyeball
just below that lid by toning down some burnt sienna with some of
that very pale peach, then paint that inside the upper eyelid,.
Elizabeth
... The "trade secret" (said tongue in
cheek) is that I stick in one fleck of tiny glitter on the eye when
I do the first coat of clear finish (later I add more coats of finish ).
Erin
Large pupils are perceived as "friendly"... tiny pupils are interpreted as "evil" or "mean". Elizabeth
I like the surface of the eye to shine... so a bit of clear gloss on the eyes will give a very life-like quality!! Varathane works great for this. Kathndolls
Acrylic paints work fine, but you can use Genesis heat-set paints for more translucence, too. Elizabeth
One
trick to get a superbly metallic, radiant, eye color
....paint the
whole iris area black
....then paint over that
very thinly with one of the interference colors (use either a pre-mix,
or possibly Pearl-Ex mixed with a little acrylic medium)...the thinnest possible
layer of interference paint with a very dry brush
....protect that
after it dries with a coat or three of gloss medium. Halla
s
since it's a lot easier to paint what I want on a smooth eyeball...
(He has gray green skin and red reptilian eyes. Nothing subtle about this
guy, but he's for Halloween)! Jody B
http://www.pbase.com/image/17
to keep the nose from flattening (while you work), keep track of where your fingers are when you're working on the rest of the doll. sounds simple, but it isn't. Sunni
many lessons
and tips on noses, heads, faces, features, and armatures fr. various
participants at NoraJean's swap page
http://www.norajean.com/MSAT/ClayArt/Swaps/Faces-NonSwap.htm
Noses (and ears) are made from cartilege, and therefore grow with age.
Jodi
& Richard Creager's nose forms for studying & purchasing
http://members.aol.com/creagers1/adultnose.html#adultnose
(....see
also above in Eyes+ for other lessons and examples for noses and
ears that are included with eyes)
(....see
more tips on making facial features in Heads
> Age & Gender &
Ethnicity)
Ears
Dotty's
cat ears (caned and added to
head cane as separate components ) (website
gone)
(see
also Odd-Shaped Canes in Canes-Gen)
Norajean's
tips re making ears, and ears for a mer-man
http://www.norajean.com/MSAT/ClayArt/FaceOff/JudithK/On-Ears.htm
http://www.norajean.com/MSAT/ClayArt/WebCam/05-22-03-DemoLog-006.htm
Julianne
has many ears (especially pointed and large ears, older
ears) on her ogres, fairies, and other figures
http://www.mysticalis.com/gallery.htm
Jodi & Richard Creager's ear forms
for studying & purchasing
http://members.aol.com/creagers1/adultears.html
(....see
more tips on making facial features in Heads
> Age & Gender &
Ethnicity)
(....see
also above in Eyes+ for other lessons and examples for noses and
ears that are included with eyes)
Full
lips paint wonderful with thin coats of acrylic wash ...layer so that
the darker color of the paint is to the outside of the lip and the lighter
look is to the insdie of the lip...this gives a good perspective to the lip and
added dimension...a solid color is flat and dull looking.
... Always add a
tiny bit of shine to the lips when finished (bottom lip)..also
adds a nice dimension.
...Back to the smoothing before baking...make sure
that all small blemishes are removed by brushing with a fine brush...a tiny amount
of nail polish remover can be used to make the lips smooth well...but be cautious.
It will help lip formation if you add a mound for teeth. 10more
I
sculpt Santa faces out of Super Sculpey, so of course my mouths don't have
to be real good because they are almost all covered up with hair, but here goes:
You need to make two logs, one for the top lip and one for the bottom.
The one for the bottom should be a bigger log than the top.
Smooth just the
very bottom edge of the bottom lip down towards the chin.
| Smooth the top
edge of the upper lip up under the nose area. It might help to put more of a pancake
type shape on the upper lip to begin with instead of having to smooth a log shape
out.
Then kind of put an indent running from the nose down to the upper lip.
I feel the smile is more in the cheeks than the actual shape of the mouth, unless
you have teeth of course. You can look at your own mouth in a mirror and that
helps too....AllTucker'dOut
......Sometimes when you just add lips on top
of face, you can end up with a pouty or kissing
looking mouth. MelissaJ
Female Lips, in particular:
...The mouth area requires subtly added amounts of clay in comparison
to the male mouth form.
...The upper female lip should protrude
slightly more than the lower one, but generally both lips sit out
slightly more than the male (hence, women going to plastic surgens for collogen
lip injections)
....Mouth forms should be "puffier" or fuller... not
just the lips themselves, but the entire circular area surrounding the
mouth.
... Of course lips should be fuller and rounded in treatment.,
using the same human anatomy references as males. Wayne THE DANE
It
does depend on ths size of the head you're making too.
....most small
heads (dollshouse, and somewhat larger) don't need any added clay at all
--
just cut the mouth ... open it as much as you want
... then roll and shape the edges of the cut to make the
lips. Crafty Owl.
One simple way to start the lips is to cut a slash ...then use the point of an exacto knife or something similar to lift the mouth. Do this slowly a teeny tiny bit at a time. .....You can add little dots of clay under the lips as you go, and use the excato to slice off any excess. MelissaJ
A very simple smiling (or frowning) mouth can be made by bending open a paper clip, then cutting the leg off one side to leave only a short curved area; bend the curved area back 90 degrees with pliers; this can be done at both ends (for two different size smiles); the middle area can be wrapped with clay for a handle if desired.
I keep a mirror handy so if I have a problem with a certain feature, I can see what it looks like on a real face. MelissaJ
many lessons and tips
on making lips
http://www.norajean.com/MSAT/ClayArt/Swaps/Faces-NonSwap.htm
Christel's
lesson on making a troll's mouth
http://www.pcpolyzine.com/may2001/troll.html
Anita W's sort-of lesson on making a painterly mouth
http://www.billbra.com/thumbcart/caning1.htm
Angelas
lengthy lesson on sculpting lips and lower face
http://www.emilysfairies.com/hints/Lip_L1.pdf
(to proceed to all 3 pages, substitute L2
or L3 for L1 in the URL of your browser bar)
Monica's simple mouth with a # 1crochet
hook (lesson) (she put a little ball of Fimo red and shaped the lips)
http://guide.supereva.it/hobby_femminili/interventi/2001/11/76787.shtml
Dorothy G's interesting Skinner Blend mouth (website
gone)
Julianne's many sculpted mouths http://www.mysticalis.com/gallery.htm (look all around)
caned mouth. . . (using
mutliple Skinner Blend ikat canes... see Canes-Instr.>
Ikat)
....when two rows with horizontal line patterns are separated by one
row with a vertical line pattern, these can look like crazy lips and teeth
(see
more in Masks)
(....see many more tips on making facial features in Heads > Age & Gender & Ethnicity)
Teeth
(see just above in Mouths also)
Teeth can be made by indenting
or cutting white or light clay, or by prebaking a set of teeth or individual
teeth then pressing into raw clay mouths
....you can shape your teeth,
bake them, then individually place each one
... make a u shaped piece,
and individually score the teeth onto that
... make a gum piece
and insert the teeth one by one like a denture and then bake and insert that.
Three different options! Hardened teeth are easier to work with and not mishape
them accidently--like eyeballs. Sarajane
...I would suggest making the upper
and lower jaw together with the teeth ...and then putting the jaws
on the bear's head. That's what I usually do with my creatures. Boris
Christel's
lesson on pre-baking teeth and inserting into an unbaked troll face
http://www.pcpolyzine.com/may2001/troll.html
It will help lip formation if you add a mound for teeth. 10more
real-looking human teeth... form with dental tools (spatula, etc.)...shapes of human teeth are different front to back though Dan P.
For
teeth, I've used Premo translucent-- It's worked great.
...one
thing to remember for teeth, mix translucent and a little ochre or yellow
and brown for a faux ivory rather than true white. Teethre not really
white. Sarajane
animal teeth especially are not white... animal teeth
are also much darker near the gums than ours are supposed to be allowed
to get. A little brown/red stain takes care of that. .....Like eyeballs,
they also often have a little shine from being wet--I use flecto
varathane. Sarajane
....Katherine
Dewey's realistic alligator teeth http://www.polymercafe.com/feat_of_clay/dewey.html
...the best thing I've found for teeth is Fimo Glow in the Dark! It's slightly off white just like most real peoples teeth and is firm
yucky
teeth or horns, etc.... score with a pin, X-acto knife or dental tool (can
mount on toothpick to hold), follow with alcohol
...Jody's
monster's teeth (very crooked, and with spaces between; also
"antiqued" with brown paint?)
http://www.pbase.com/image/175471
...Plankspanker's
lesson on making dragon (or monster) teeth by onlaying
baked cones of clay on gums, and also impressing? a second row of
less pointed teeth
http://www.geocities.com/Area51/Shire/6883/drateeth.html
(see subsequent pgs. too)
...Garie's
horrible yellow teeth & forked tongue in mouth of snake creature
http://www.garieinternational.com.sg/clay/alien2.htm
...Alexandra's
skulls with yucky blackish teeth .....& deer skull with
yellowish teeth
http://www.alexandrablythe.co.uk/photogallery/work/work-pics/Fashion%20Victims.jpg
http://www.alexandrablythe.co.uk/photogallery/commissions/commissions-pics/Taxidermy1.jpg
Dawn
S's fiendish, etc., sculpts with various kinds of teeth (look around)
http://www.pacificnet.net/%7Erhaiven/fanto.html
Julianne's
teeth for ogres and wolf-type head http://www.mysticalis.com/galleryall/ogrestrolls/index.html
...
and her great tongue! http://www.mysticalis.com/galleryall/misc/anubis/index.html
Jill
Willich's teeth and tongue
http://www.studiowillich.com/images/DSC03834.jpg
Plankspanker's
lesson on installing a long tongue (into a the mouth cavity of the
top half of a dragon's head)
http://www.geocities.com/Area51/Shire/6883/tounge.html
(see subsequent pages for other views)
Garie's
teeth and tongue (with stud?) http://www.garieinternational.com.sg/clay/threesome.htm
caned
teeth . . . (using mutliple Skinner Blend ikat
canes... see Canes-Instr.>Ikat) . .
. (also see more in Masks)
.....when two
rows with horizontal line patterns are separated by one row with a vertical line
pattern, these can look like crazy lips and teeth
I cannot stress the difference in finish of the clay when buffed. It glows. . . Cary
(almost
looks like Pearl-Ex on surface) . . . .I work in layers which
makes for neat effects... pale gray Pearl clay base with translucent
over it, and then straight pearl clay ...rub the pearl to align
the mica (baked inbetween ).... adding a gloss of varathane makes the pearl
pop. (I was trying for mother of pearl) so it's not what I planned but
I really like how it turned out. 10more
http://www.geocities.com/sleetwealth/PEARLFROST.html
to create light texture in skin, make
wavy and uneven crosshatched lines in the raw clay with a light touch
....then
soften up the pattern by brushing with Turpenoid or 91% alcohol.
K. Dewey) (more instructions for solvents for softening
in Sculpting >
Fingerprints >> Solvents)
...paint-sculpt.com's
lesson shows fine crosshatches ("tertiary" lines) --made after deeper
and farther-apart lines made for skin itself (deeper lines should be where the
skin folds or strreches the most)
http://www.paint-sculpt.com/tutorialspting-tutorial/sculpting-skin-texture.html
I have taken the spring out of a ball point pen and made a handle out of clay for it - i use it to make wrinkles in faces by just rubbing it over the face gently or not so gently depending on the size of wrinkles wanted … Kathy
I don't really 'carve' in the wrinkles,
just like you wouldn't 'carve' folds in fabric. Try sort of pushing the
clay over to form the shapes. use the tool for definition. or
...add
a sausage-shaped piece of clay and then blend it in, you can
build your details instead of carving them. look to fine art resources for reference,
like figural sculpting books/lessons for help on that all. JoAnna
...wrinkles:
thin clay ropes wherever desired...blend together ...or use a loop tool
to cut grooves in the clay ...follow up with alcohol. Dan P. (...Wayne's
method using of drawing with tools over a layer of plastic wrap on the clay)
...polymerclayfan's
lesson on making dimensional veins on skin with tiny, uneven, curvy
ropes placed on skin... then pressing each side of ropes into skin with spatula-type
dental tool, and brushing with 91% alcohol to soften and shape more
http://www.polymerclayfan.com/sculpting-veins.htm
Polly's caned eye area, with folds and wrinkles,
etc.
http://members.aol.com/polyclay/senior.htm
veins (human & animal): thin snakes of clay...taper
ends...apply and blend partway into surface...follow with alcohol to smooth. Dan
P.
(also see Dan Perez' website http://www.danperezstudios.com
for more (look esp. in Workshop and Model Shop)
for very wrinkled and rough skin, and for evenly-spaced scales ... see below in Dragonskin & Scales
...for
many skin color recipes, see Heads-Masks
--& also Color?
...for more on older
faces, wrinkles & skin, see Heads-Masks
> Age Groups
SCULPTED
wings
Barbara's extensive lesson on making dragon
wings with wire armature
http://home.att.net/~ntwadumela/how_w1.html
polymerclayexpress' lesson on making dragon
wings (veined, powdered if desired, and shaped around body)
http://www.polymerclayexpress.com/dece2001.html
In the dragon swap, There were some lovely dragon
wings out of translucent clay, with veining (must have been a cane)
that were pleated like a fan which gave the wing more strength. They are
holding up well, and look pretty good, . . . Cate
fireEyes'
lessons on dragon shapes
http://www.tailchaser-sushi.com/index2.html
embossing powders kind of explode into larger and smaller tiny dots after being baked in clay, so using a bit of embossing powder in translucent clay, e.g., might look cool for wings (the embossing powder will tend to puddle on the top surface of the clay after baking, so sand that top bit off if you want fewer and finer dots... also the embossing powder may feel a bit liquidy just after baking and will need to set) (see more in Powders > Embossing > Inclusions)
CANED wings
Any
pattern can be used as a butterfly wing, or made into a butterfly wing
if you're not particular about the biology
....re-shape any cane
(or group of canes) or even individual slices into a roughly triangle
or into any butterfly wing shape, then cut it in half for two wings, add a rod-shaped
body between and maybe some antennae (... to make background, wrap the image with
a thin sheet of background color, then fill in the rest of the cane with the same
color as the wrap)
various butterfly
wings at Kim K's site, with some wing shapes
http://www.beadyeyedbrat.com/canesbfly.html
many wings are made with some form
of multiple bullseye cane (lace cane, etc.) . . . see Canes-Instr
> Bullseye for more on bullseyes)
....Donna's, e.g., uses
Skinner blend logs http://www.prairiecraft.com/pdf/spring_flowers/spring_flowers.pdf
Sue's simple fairy wings lesson using bullseye
canes (translucent wrapped with white "lace cane")
http://www.polymerclaycentral.com/pcc/suefairy.html
( fig's 5-7)
Betty's
lesson on making wings with translucent logs and color logs,
ea. wrapped with trans, then black (teardrop shaped)
http://polymerclaycentral.com/bettywings.html
Carolyn's
lesson on making a butterfly wing (and cane) using reshaped bullseye
canes and Skinner blend bullseye canes (quartered lengthwise)
http://carolynsclaycreations.com/Butterfly_Tutorial.html
Linda's
lesson on making a butterfly cane with many colored bullseye canes
(could use any canes though)
http://www.geocities.com/pinchyspolymerplace/butterfly.htm
Desiree's "butterfly wing beads"
have patterns that could be adapted to actual wings? (...tiny logs
rolled up on solid clay sheet into a spiral, then " football" cut
http://desiredcreations.com/howTo_CAButterflyBead.htm
Tzunun's
whole bull's-eye cane which trimmed with a wavy blade on all 4 long
sides looks rainbow butterfly wings...did same thing with a spiral cane,
using Linda H's " technique", with Skinner blend of colors, black,
and Pearl, and even better
http://www.polymercafe.com/images/polymer_cafe_14.jpg
(upper left)
Linda
H's black-wrapped purple
logs of diff sizes for outsides... black-wrapped Skinner blend canes
(with inserted dot) for insides, plus onlaid body
http://www.polymerclaycentral.com/chall_apr04.html
(click on "Details" next to photo)
Lynne
M's butterfly & moth wings
...each wing made
from a multiple-cane cane formed into various wing shapes, etc, wrapped
in black
http://www.frajeelai.com/Subcategory.aspx?categoryId=10&subCategoryId=11&page=1
(2 pages)
City
Zen Cane has a long lesson on making a complex Monach wing pattern
in the book Creating with Polymer Clay, pg. 64-67(color &
pattern variations, pg. 6)
Cynthia
Toop's many butterfly wing half tiles, strung on a necklace so that opening
two flat tiles apart creates a whole butterfly (both wings)
http://www.npcg.org/Activities/muse/images/toops/Original%20Files/TOOPS2.JPG
Dawn
C's caned monarch butterfly wings
http://hobbystage.net/art/media.cgi?site=teri&folder=*&group=1&page=*&id=1038291490-002369
(inaccessible?)
Diana's
scalloped fairy wings made with purple and translucent clays, and
gold leaf (edges are like sharp, waves)
http://www.picturetrail.com/gallery/view?p=999&gid=655124&uid=490015
(gone)
Lorie's
fabulous wings on her fairies, mermaids, insects, etc.
http://www.sculpturefromtheheart.com/2001_melbourne_cup_hat.htm
(moth wings and fairy wings, with translucent, glitter, etc.)
http://www.sculpturefromtheheart.com/wearable_fairies.htm
(complex caned wings ... monarch, etc.)
.....http://www.sculpturefromtheheart.com/fairies.htm
(these not caned, but good for inspiration)
lesson: For the
butterflies forming my bowls, I carefully drew out all the veining
of a 'typical' wing and used it to design the canes.
....a vitally
important thing is that the wing canes be reduced separately- the
forewing is rather triangular, and the hindwing is almost a circle.
...the two parts are assembled as a finished 'wing' only after reduction.
...Also,
because of their strange shapes, the canes really benefit from being well cooled
before slices are taken. Alan
http://groups.msn.com/ALANV/canework.msnw?Page=2
Alan's
caned dragonfly wings
.....those wings are just plain
clay --translucent Fimo (next time I'll use Premo's bleached translucent),
interleaved with "raw sienna" Premo-- Honest!
.....They
were cured twice - after cutting the cane, I assembled the 4 wings and
cured them flat and quenched them after 15 minutes.
.....Then later
I made the body + armature around the wingset - coloured it, then re-cured the
whole thing with the body in an aluminium trough and the wings as flat as I could
arrange them. The whole lot was then quenched again. .. Alan
..I am the proud
owner of one of Alan's dragonfly broaches, and was too scared to wear it in case
these delicate beautiful wings would break. But, I touched them a little more
and they were not as brittle as most fine things... Flyte
in your
case, the first wings you saw were caned ...most likely with a combo of opaque
and translucent clays
...in this case, yellow/orange/red tinted translucent
clays for backlit-looking parts, wrapped
with a layer of black opaque clay
.....the other wings...plain
translucent clay and browns ... opaque brown clay
used for vein lines
.....(then they were textured and glittered).
DB
... multi-wrapped
brownish "bullseye" logs, placed next to each other
in long triangular cane, then wrapped as a unit ...NoraJean's "bug
petals" . . .
http://www.norajean.com/Bug-Petal-Grp.htm
Donna
Kato's beautiful bug, moth, dragonfy wings, some caned
http://web.mac.com/donna_kato/iWeb/Site/Page%202.html
Kim
Korringa's lesson on making a 6-color Skinner blend ikat-flame
cane for dragonfly wings
... puts long triangular-wedge-shaped sheets of
each color next to each other (to create blend
sheet)
.......she puts through pasta machine 5 times ...(for this blend,
she then covers the blended sheet with ultra-fine glitter)
...cuts
long sheet lengthwise into 4 narrow strips, and stacks (offsetting?)
...WINGS:
she then shapes the stack like a dragonfly wing (and lengthens (some?)
... cuts into 2 equal lengths and lightly stacks ...then presses together
at one end to create a double-wing unit (the two wings at
the other end will stay slightly separated)
...(she then dusts the edges
of the wings with Pearl Ex)
...takes one thick slice from this unit
for each side of the dragonfly (4 wings total)... and adds body with beads on
wire
Those
wings are actually slices taken
from a complex cane
....draw a wing pattern you think you can
convert into a cane.
...place that design (make it fairly goodsized) under
a piece of glass and then use that as a template to put
(shapes) of clay until the design is complete. It's a lot like assembling a jigsaw
puzzle.
...The veins are actually thin strips of clay between the
shapes. For an idea of what I'm talking about, go to
http://www.sunnisan.com
and look at my my Stain Glass tutorial ......you can build
a cane the same way, only it would be about 1-2" thick...Sunni
that little fairy
had caned wings (partly using glow in the dark clay)
... I used a Skinner
blend with fluorescent green...it had gold veins... used liquid
clay to attach the wings...worked great! Lorie
http://www.sculpturefromtheheart.com/wearable_fairies.htm
(gone?)
Many "feather"
canes and "folded" canes would work well for
butterfly wing canes too:
Nora Jeans' feather
lesson, made with bullseye cane, resembles a butterfly wing pattern
(see above in Spiral canes for her owl-type multiple feather look)
http://www.norajean.com/Faux/Feather/10-2002-001.htm
Kellie's
"feather cane" used as dragonfly wings (see Canes-Instr
> Striped-Stack for lessons on this "Feather Cane")
http://www.kelliesklay.com/Pins.html
(bottom of page)
Teri's caned monarch
butterfly wings, using many wrapped (bullseye) canes, one of which has an
accordion-folded Skinner Blend inside (gone)
(...
see more feather and folded canes in Canes-Instr)
for caning with embossing powder mixed into
translucent clay (probably wrapping with opaque clay to separate the
segments, see above in "Sculpted" wings ... might make cool wings
cutters
or freehand cutting can also be used to create a butterfly shape from a
sheet of clay... bodies can be added in various ways
... could
use any type of decorative sheet like mokume gane or a cane slice
sheet, or even a symmetrical "Natasha bead" pattern
flattened
....or could use onlays, stamping, etc., to
embellish
....Lynne's butterfly wings...
non-symmetrical patterns cut out of a cane slice sheet, with butterfly
cutter?
http://www.riverpoetdesign.com
(click on Butterflies)
...simple
flat and rounded-top wings can be created by using a heart cutter (to cut
a sheet of slices), then cutting that heart in half if necessary
to separate the "wings". (from Laurel)
non-caned wings & misc.
harryjohnpursey's
various dragon wings composed of a sheet of decorative clay in a
wing shape, topped by thick veins (ropes) of clay
http://s10.photobucket.com/albums/a107/heroic12345/?start=all
(see
more dragons and their wings in Sculpting-Gen
> Websites > first set of links)
Peggy O's many
wings (made from various materials) on backs of "babies"
and other fanciful creatures
http://pg.photos.yahoo.com/ph/scadventurer2001/my_photos
(click on the various figures for many more)
I solved the problem of my wings breaking off by reinforcing the back - I used a piece of thin brass sheet (any metal would've been fine) and cut it to just less than the size of the back of the butterfly. Then I flooded the back with 5 minute epoxy and clamped it to the metal. I was lucky in that all I had to do to the front was reapply the varnish over the clay/pearlex surface. Alan V.
LIQUID CLAY, sometimes with other materials
(see Liquid Clays
for details)
....(decal) How about making wings on glass? Paint on the
liquid clay ... then when it's cured, it should peel off....no?
Deb
....How about making a wire frame from 24 or 28 gauge wire, then
using the TLS on the glass over the wire, and cure? Caroline
...TLS
is better (thicker) to work with for wings than the liquid Fimo
in my opinion, after having used both... TLS is also easier to spread for
a wing than the thicker (?) consistency of the Fimo... (though Fimo gel is clearer,)
TLS will clear up if you bake it in a 300 degree oven for 20 min.... . Wendy
Interference
or iridescent paints, mica powders or fine or very
fine glitters can look good on some kinds of wings
...Donna
Kato's beautiful bug, moth, dragonfy wings, some in textured cells
with metallic powders, etc, some caned
http://web.mac.com/donna_kato/iWeb/Site/Page%202.html
Jenny
Cox has a wonderful lesson on fairie wings using TLS and glitter,
outlined with wire ...very easy to do, and very delicate looking. kellieAK
http://www.polymerclaycentral.com/tlswings.html
Wendy's lesson on making multiple-component wings held
together with liquid clay between them, forming cells
...each component
is a S-shaped, 20 ga. wire ...(strung with seed beads &
ending with 1 larger bead)
...Pearl Ex added to back side after
baking... she also may use floral wire instead of beading regular
wires
http://www.pcpolyzine.com/2004october/wings.html
Suzanne
H's lesson on making butterfly wings by filling a black clay rope
in wing shape with different colors of liquid clay & paint
(oil?) on a sheet of glass
....she uses a log of clay for the body (with an
embedded wire loop for hanging later)
... bakes the body together with the
wings in an angled pose ... (later makes a mobile from the butterflies)
http://polymerclaycentral.com/mobile.html
Sarah
Lajoie's fairie/butterfly wings (made with liquid clay?)
http://www.users.qwest.net/~lajoie/minitiles/fairies1.htm
Alan's realistic wings for moths,
dragonflies, etc., made with TLS
http://groups.msn.com/AlanJamesV/wingwork.msnw
liquid clay "bug wings" for fairies
http://members.spree.com/sip/sunnidaze/me/polyclay.html
(see flies and description in bottom left) (gone?)
Alan's dragonfly wings made with photo transfers of real dragonfly wing
images
http://communities.msn.co.uk/ALANMARY/newdragonflies.msnw
Alan's (copyable?) photos of dragonfly wings
http://communities.msn.co.uk/ALANMARY/transferimages.msnw
Some are just TLS alone ... and some have (bleached) Premo
translucent clay for added support.
....the photos of wings
were printed onto either Tshirt or temporary tattoo paper.
...I made
my standard-type bodies to match the size of the wings and the largest fly's ended
up with a 6" wingspan - a little large to be worn as a brooch!
...the
bodies are coloured with Pearl-ex ...and are finished with Fimo spirit
gloss varnish. . . .
...there's a brass wire armature along
the whole body... and I've planted tinned, copper wire (like 22swg fusewire)
along the front edge of the hindwings to allow the wings to be attached to the
bodies.
...I drilled fine holes into the thorax area (after baking),
superglued the wires in place and snipped off any excess which protruded.
.... the one with see-through wings is TLS alone- as is the
one with the spots
.......I simply painted TLS onto the photo (on t-shirt transfer
paper?), then dropped it face-down into a small puddle of TLS on a flat metal
or tile surface. The trick seems to be to get the liquid to be the same thickness
all over the wings - it also helps to have the photo weighted down
a little (I use small brass pieces) - it stops the paper curling in the heat.
....There is, at present quite a high failure rate with the TLS
only ones - bubbles will develop easily....
using a sheet of Premo seems to reduce the bubbles, but the wings are less lifelike.
Alan
Patricia suggests using thin mesh fabric, or "silk"
petals or leaves, or real dried leaves
...she then uses liquid
clay on both sides of the wing, and a wire across the top (glued seaprately)...
bake and cool
.. shape wire as desired... of trim if desired to change
shape, etc....can singe edges(?)
.. can paint a bit (if heatset
paint, bake again)... add coat of acrylic finish ...and can sprinkle in
some glitter.
You could also consider encorporating fabrics or threads into petals or wings - make sure the sort you use doesn't melt at baking temperatures of course. After my success with (real, not synthetic) silk pongee (normally bleached and is sold to silk painters) in the TLS transferred wings, I even tried teasing/chopping up scrap bits of the silk and encorporating them in ordinary clays for strength. It does work quite well as long as you don't overdo it and add so much that it can be seen (actually, the texturing can quite be a pleasing effect). Alan
Could also singe holes through here and there, as with some wings??
TRANSLUCENT CLAY
I
haven't done it yet, but am also thinking of putting curtain net between
two thin layers of translucent clay
......to give a veined
look and run through pasta machine..could be plain or patterned I guess...and
cook sllllooow. Flyte
..see also Alan's photo transfers just above... he sometimes
uses bleached translucent and liquid clay
NOT POLYMER:
.....I have had tremendous work results
with Shrinky Dinks shrink plastic. Because it comes in white as well as
the roughened. I can go over the frosted with as fine a pen
as I can get and after they are shrunk, the teeny veins in the wings
look very realistic. I use an emery board to file the square tips after they shrink,
and then cover them with irridescent clear nail polish. It makes the frosted
parts clear again, and the sparkles in the nail polish look perfect. Pamsamom
....
i make my wings from a sort of plastic sheet . i cut some wings out the
sheet and now you can put some 3d paint {scribbles glitter} on it to give
it some effect or you can also paint them with glasspaint and than put
some 3d paint{scribbles glitter} on it . but there are many things you can do
with these wings if you use the plastic sheets as basic material. Brigitta
...These
wings a sooooo simple. It's just plastic. I save it when I get packages or
food in a clear hard plastic. ...All I do is cut out the wings. I score
veins into it. (You have to be careful not to cut all the way through the
plastic. It takes a light touch.) Brush on a little varnish , sprinkle
a very fine glitter on it when its still wet. A very light sprikle. let
it dry put a coat of varnish over it to keep the glitter from shedding.
let that dry. BINGO beautiful glasslike wings.. Joyce
(see more on
shrink plastics in Mixing Media > Misc.)
mica
tiles & dragonfly wings, fairies
... I bought the mica tiles at a
rubber stamp store, but you can order them from USArtQuest ...(see more on these
in Mica > Tiles).
....I know
it looks like wire in my wings, but I don't use wire
... after
stamping the wings with the permanent ink, I cut the wings
out... then I separate them by putting my nail between the compressed layers of
the tile and splitting the layers apart
..... I mix some (interference)
Pearl Ex powders (Duo yellow-green and Duo pink-blue) with some Perfect
Paper Adhesive, and spread a small amount of the mixture between the
mica wing layers
........mix the colors separately before applying...
and use only a small amount of the mica powders with the adhesive
.....Put
the layers back together... stick them into the clay body of the dragonfly, and
bake.
......After baking, I used a gold leaf pen to outline
the wings for gold edging. Matilda Colf
....fairy with wing make
from single mica plate http://www.minidolls.com/Doll-Make/Mica/Mica_wings.jpg
Angela's lesson on making flame-type fairy wings from
5-6 sections of color-washed filmy fabric, glued onto mostly 26
g florist wires (central wire left extending)
... more "veins"
added on fabric with glue gun.. another color wash if wanted + some
Pearl Ex
...all glue and wires covered with Krylon silver
leafing pen ink
.. sections gathered at bottom and wrapped together with
wire.
.. spray both sides with satin acrylic sealer (can add fine glitter
on it)... she also adds a clear bead to the end of each extending
wire
http://www.emilysfairies.com/home.htm
(a pdf file... click under
"Artist's Hints")
... or use
this URL http://www.emilysfairies.com/hints/Wing_L1.pdf
and change the L1 to L2, L3, L4 for each of the pages
use "fusible web" from the fabric store, which you can see through..... transfer a wing drawing to it with a pencil.... then fuse 2 together ...then paint. (get a good butterfly book out of the library to go by). Mary
I've
experimented with the possibilities TLS offers as well as all kinds of
cellophanes and acetates, tried intricate wire forms dipped in "Dip-It", and a
similar thin film used to make ultra light wings for precision model gliders
(model planes as light as feathers). I tried cicada wings but found that tiny
mites were eating away at them
..... I still prefer my original solution (for
making my own wings)-- wet media acetate
(a clear acetate film available
at art and craft stores, this product is made to accept all water based media
--you can paint it, dye it, or draw on it with water based products)
...LATER
DESCRIPTION: I begin by drawing the veins in permanent India Ink.
.......after
the ink dries, I emboss (impress) the veins in the fairy wings...
and glue on a fine, but strong wire
.......then dye the
wings, or paint with acrylics.
..........I use an air brush for painting
(see Finishes for more on air brushes), but
a sponge pouncer will work as well.
......... if you want clear wings with
a hint of color, fabric dye is the answer. ...for darker tints soak
the wings in repeated dye baths, but let the wings dry in between each bath.
......when the wings are finished, I insert each one (see piano wire below)
into a small pierced hole in the fairy's back. The fairy is finished before the
wings are added, and it is the very last step, because the acetate
can't really handle the heat of baking. That's
how I make my wings, but I urge you to explore the possibilities offered by TLS.
Katherine Dewey
...EARLIER DESCRIPTION: With a Rapidograph 000 tip
(and India Ink), I draw the venatia by tracing wing patterns (slightly modified)
taken from an insect field guide. I use a french curve modified for ink drawing
to prevent smearing, and waiting three or four minutes between each line. To fill
the time I draw about ten sets of wings at a time.
...When the venatia are
finished, I cut out the wing and lay it on a soft rubber mat, but a folded paper
towel will do.
.......With a ball stylus, trace the venatia, pressing
down firmly enough to create a groove in the acetate, but not so
hard that you cut through it (this step curls
the acetate, so flip it over and use a larger stylus to impress the broad
unveined areas of the wing)
....The transparent wings are then dyed
a pale green or brown, sometimes vareigated... I use an alcohol based,
salt free silk fabric paint called Dupont.
...The insertion point of
the wing is then glued to a shorth length of fine piano wire with super
glue. ...over the super glue, I place a tiny bead of vinyl glue
(white glue ) to hide the wire.
... A spritz of black paint with
an airbrush over this same spot finishes the wing. The wings are inserted into
the fairy's back after the fairy is baked.
(...I use the same technique
for butterfly type wings, but paint those with an airbrush.)
Wet media
acetate can also be impressed to make leaves, fish and mermaid
fins as well. Katherine Dewey
MISC.
Some
of the wings I have purchased have a nice area between
the two wings ... I put a coordinating piece of clay over the wing
and bake it to adhere it to the angel. Mary J.
vein lines in wings can be incised (before or after baking). DB
real dragonflies
(photos for inspiration)
http://www.dragonflies.org/catalog.htm
Marilyn
Radzat's fantasy sculptures (fairies, angels, elves, and also
bases)
http://www.marilynradzat.com/galleryVII.html
Animals
I make lots of elephants, complete with floppy ears, toenail & tusks but I consider anything over 1" tall huge. My trick to making it look "unjointed" is to make head, body & trunk from one piece of clay except for eyelids, eyes, tusks & tongue. Legs, tail & ears are started as separate pieces. I start out with a smooth egg shaped mass & draw out from that enough mass for head & trunk, almost like siamese twin eggs wiht the head part smaller. The trunk is then drawn out of the "head" egg. This is easier to show than to tell, but it works. Linda J.
(see many animals in Sculpting > Websites, and books in Books & Videos)
There
are lots of methods for sculpting scales, and there are a lot of different types
of scale textures.
... look at the scale patterns
on a horned lizard, a snake, a fish and an alligator
to see just how diverse scales types and patterns can be. Dan Perez
Simulations of scales or wrinkly-rough skin can be dimensional or flat (some flat ones just look dimensional, but aren't).
Barbara's
various shapes of scales for different animals (balls, teardrops,
"leaves," etc. ... some overlapping, some butted)
http://home.att.net/~ntwadumela/how5.html
For all you dragon fans, there is a whole bunch of wonderful illustrations of dragon anatomy! Look for (the newsgroup) alt.binaries.clip-art (news:alt.binaries.clip-art ?? --through http://groups.google.com or see Online Groups/Newsgroups) and then "neato dragonz" ... well worth a look! -- Kelly
DIMENSIONAL SKIN
One
simple way to convey a scaled pattern is with wavy crosshatching
......take
a spatula tool or X-Acto knife and incise a series of parallel
lines into the skin surface...then draw a perpendicular set of parallel
lines, creating a diamond pattern
.......then soften up the pattern
by brushing with Turpenoid or 91% alcohol. (K. Dewey)
...lesson
uses major crosshatched lines, then minor lines in other directions,
in clay for skin, then softens with mineral spirits, at paint-sculpt.com
........create
the major crosshatches where the skin folds or strreches the most ...the "tertiary"
minor lines will be the texture of the skin itself
http://www.paint-sculpt.com/tutorials/sculpting-tutorial/sculpting-skin-texture.html
........lesson
on making heavily textured skin (less crosshatching)
http://www.paint-sculpt.com/tutorials/sculpting-tutorial/Texturing-Your-Sculpture.html
...polymerclayfan's
lesson on doing this to make his wrinkly skin, using a U shape
of floral wire to create the uneven crosshatching, for "monster"
skin (...for smoother lines, use tool over a sheet of plastic wrap laid
on the skin)
http://www.polymerclayfan.com/sculpting-skin.htm
Julianne's
dragon has thick butted "tiles" of scales, as well as
impressed? scales (metallic)
http://www.mysticalis.com/galleryall/dragons/dragonotw1/index.html
I've
made a few textures that work quite well. .....I started by rolling a thin
sheet of clay and cut it into a square base
.... I then made a bunch
of small balls of clay and pinched them into a teardrop shape, then
flattened the teardrops to form slightly rounded scales.
........
I layered the scales on the base sheet, overlapping slightly, until the
base was covered, then baked.
.....Then I also made a
dragonskin stamp and a texture sheet
from the baked scale piece as a negative.
.........I have
ended up using the stamp much more than then texture sheet though, as I found
it was a bit difficult to get a good impression from the full sheet
..........
I just press the stamp randomly all over an item, overlapping the
edges
..........You could also use the stamp to cover up seams or touch
up areas of the sheet that don't impress completely. Vicki
Dan's
texturing stamp lump made by forming a 3/4" ball of clay into a football
shape, and then indenting it with varied sizes of ball tip tools
(or paintbrush ends, etc.)... he textures one end all the way around, as well
as over the long edges too, so he can get into tight spots with the texture,
etc.
http://home.houston.rr.com/dpstudios/workshoppages/detail.htm
That reminds me of a weird *tool* that I used to create mermaid scales....*the back-end of a large glass eye!!*...works great!!
there
is a cardboard roll which iscovered with dimensional square bumps
(pyradmidal squares) from some kind of paper (cash register? don't remember
on this one....) which will texture little indents on the clay
...
if you fold two thin pieces, with the indents inside together, and run thru the
pasta roller, it looks like alligator/crocodile skin where the bumps are
pocketed. Sarajane H
Alexandra's
light green dragon with bumpy skin, highlighted with gold
http://www.alexandrablythe.co.uk/photogallery/halloween/halloween-pics/bBirdtable.jpg
Plankspanker's
fabulous wrinkly and leather-like skins for dragons, dinosaurs and
other creatures
... he makes a mold of texture
with "Mountains in Minutes," a latex rubber mold compound found
in hobby stores, then presses the completed texture plates into
his skins (for mold textures, he uses guitar cases, amiplifiers, book covers,
a toy lizard, a dryer and other cases/holders),.
...... "Mix some of the
latex with water so that it is thin enough to fill all the recesses of
your texture sample. Put the sample in as level a position as possible,
and pour the latex over it, using a popsicle stick or similar device to
work it onto the surface. .
...... When wet, the latex is a sky-blue color.
As it drys, it turns a translucent dark blue. It is completely dry when all the
milkiness has gone out of it. When the first application is dry, apply a second
undiluted coat to strengthen the "stamp. This second coat usually takes longer
to dry-a hairdryer can help.
......When dry, peel the latex off the sample,
moisten with water or spit, press into soft clay . . ."
"http://www.geocities.com/Area51/Shire/6883/photos.html
...and
horny protuberances on head http://www.geocities.com/Area51/Shire/6883/detail2.html
One way to create slightly
overlapping scales is to lay down a row of small clay disks (butted
tightly together) on a base or your sculpt (beginning at the bottom layer)
...then
cut off the top third of the whole row ... repeat with the next
highest row
...I've discovered that I can make really neat scales for the
spine out of a triangle pinched up and nestled, tip to base, with
the next one. Gillian
...Skygrazer's "pinecone" kaleidoscope, showing
"scales" made with partially overlapping cane slices (in
this case, they are Skinner Blend cane slices)
http://www.skygrazer.com/polymerclay/gallery/kscope1a.htm
... Jane Zhao uses "leaf" cane slices
for her dragons: as free standing "plates" on back
or at end of tail, and overlapped for "beard"
*the jellyroll cane technique (translucent or a color plus a sheet of metallic composition foil, rolled into a spiral cane then sliced) makes FABULOUS scales!!! Pat
NoraJean's fish scales made by
using a Skinner blend, wrapped around a center log of another color,
yielding a spiral cane; the jellyroll log is then cut lengthwise into 4
wedges which are nestled-stacked together in a clamshell pattern, creating
a 1-2-1 pattern (top to bottom); this new cane can be cut into lengths and combined
repeatedly for as large a pattern as needed (this beauty is light green to gold
Skinner blend wrapped around a gold log)
http://www.norajean.com/Faux/FishScale/fs-017.htm
Cindy P's rows (of cross-cut striped canes --Skinner blend) separated by
solid color clay line)... would make good fish or other scales?
http://www.cindysartandsoul.com/images/canes/P1010068.jpg
...see Canes-Instr > Animal Skins
for more possibilities?
individual scale slices can be bent back at top, then have back of that "tab" glued onto fabric with liquid clay in rows, creating a flexible fabric of scales http://www.pbase.com/jody/image/175465
Peter
Konig's excellent and thorough lesson on making a creature with
very wrinkled and rough skin
http://www.conceptart.org/forums/showt)hread.php?t=18287
(5 pages)
(also see Dan Perez' website http://www.danperezstudios.com for more (look esp. in Workshop and Model Shop)
Katherine Dewey's realistic alligator skin (head) http://www.polymercafe.com/feat_of_clay/dewey.html
see also above in Skin
"FLAT" SKIN
Nora Jean's
clamshells cane (fish scales) ...using a wrapped cane or
Skinner blend bullseye cane, which is cut into 4 long wedges...
each wedge is cut into 4 lengths, then lengths are stacked and nested together
(all with points down, alternating rows) ...yields trianglular or diamond
shaped canes... large cane slices are cut and flattened then butted together for
the overall pattern
http://albums.photo.epson.com/j/ViewPhoto?u=1751108&a=30044634&p=60183894
......lesson on same clamshell, but with silver clay on outside for depth
(could use pearl or translucent)
http://www.norajean.com/Biz-Archive/Faux/FishScale/fs-001.htm
(also click on 2 and 3)
..These
could also be stretched to change shape of shells in cane or sheet
For
a smooth skin that looks firey for your dragon:
marble
some clay colors together
Or begin with strips or ropes of
yellow, red and orange (and possibly white or blue) .... & place bits
of those on the dragon by hand
.... or roll out a larger sheet of it
and apply that ... pleat excess up and cut off... then smooth with fingers (over
a piece of plastic wrap can help avoid smudging)
....... sanding after
baking (and buffing or applying a glossy or matte finish to) it will also get
rid of the top layer of smudges
....(look at similar descriptions for making
faux wood in Faux-Turq&Wood, but substitute
firey colors for the browns)
Or stack together diff. size ropes and flattish lengths of the different colors.... roll into a log ...then cut the log in half lengthwise in long slabs and use the patterns that were inside the logs (...more streaky effect)
or
use slices from a flame "cane," slightly overlapped all over the
dragon, to create a scaley flame effect, see Canes
> Flame-Zigzag
optical illusion bumpy
skin... for dragons, snakes, other scaley animals can be made with a variation
of "texture sheet mokume gane"
...(finished
pattern is actually flat since it's been shaved or sanded-- but
looks really dimensional
Dotty's lesson: You could
take three colors of clay, one of them light and bright. I love to use
black, metallic gold, and cadmium hue red. Roll all three colors out on the #1
setting of the pasta machine. Stack together, putting the gold or lightest,
brightest color in the middle.
......Run the stack through the
pasta machine on the #1 setting.
......Cut in half and stack. Do this
two more times.
......Take one of the plastic texture sheets (dots-in-a-grid)
(or find something similar to use) and spray it with water. Lay the sheet of clay
against it and run both through the pasta machine on the #1 setting. Be sure you
put the concave side of the texture sheet next to the clay so you will
have little bump-outs all over the clay. ...Use a very sharp blade to shave
off the tops of these little bumps. Keep your blade almost parallel
to the clay with just a tiny bend in the middle of it.
......once you shave
the piece, you can use as is leaving it as a slightly bumpy textured
sheet
......or you can put some waste clay behind it (for thickness)
and run it through the pasta machine again ...that opens up the pattern
and expands the dots some, and also smooths the surface.
DottyinCA
http://www.pcpolyzine.com/0309september/tools.htm
Kathy
W's texture sheet mokume gane pattern (on an inro)
http://www.polymerclaycentral.com/chall_may03.html
(click on Details)
Desiree's
lesson on making "honeycomb" or faux snakeskin texture
this way with a stack make from a Skinner blend stack
...she uses thick-gold, red pearl, burgundy)... plus a thin layer of
dark maroon on the gold side and and coordinating mid-tone (very thick) on the
other side
...uses hobnail glass as the texturing tool ...(Desiree says
that twisting the hobnail slightly as you impress the clay will
create minor distortions of cell shape, which can help make the pattern
look more like a snake skin).
http://desiredcreations.com/howTo_CAReptSkinMG.htm
When
I got Dottie's Snake Skin Tutorial from her a couple of years back, I used the
plastic honeycomb texture sheet from Shadetex . Valerie
...I
recently discovered the bottoms of children's running shoes....
one of those claying maniac moments :-) Adria
...while shopping at a local
dollar store, I came across this neon pink plastic dog chew toy tube with
all kinds of different shaped bumpies on it. Desiree
For
those who don't have hobnail glass or a suitable texture or plastic texture sheet
lying around, bumpy texture sheets (or rollers) could also
be made
......that would also allow a variety of different
shapes for the "cells"
...for round cells like those made by the
hobnail, texture sheets could be created with baked balls of clay pressed
onto a clay sheet (then baked)
....the balls could even be positioned evenly
on the clay by placing a removable grid of some kind on top of the sheet
first (like hardware cloth, plastic mesh, light fixture plastic grid covers, or
even stretched threads) ... then each ball might be dipped in a pool of liquid
clay, and centered in its own little square of the grid material (or just eyeball
it) ... round balls make nice deep impressions for texture sheets too compared
to a lot of the plastic texture sheets
... other shapes could also be
rolled and baked for the texture sheet cell shapes...like teardrops, short
rods, squiggles, etc.
....or clay gun extrusions could be
baked and thickly sliced, then put onto the raw clay sheets --flat
slices wouldn't have those nice rounded areas on the bottom that look good for
mokume though.
...hexagons might be a little harder if wanting
an actual honeycomb ... maybe could make and lengthen a triangle log, then
slice off the top of the triangle all along its length, before cutting in half
and joining two lengths together to get a hexagon and baking?
.....or would
it work to just stamp into the mokume stack with a single hexagon clay "stamp"
(with a rounded bottom) using the grid?
.....(real-honeycomb patterns might
be good using gold mica clay with the ghost image technique too). Diane
B.
SHAVING: It's easiest to shave bits off
a textured clay sheet if you drape it over a large jar. (I like
the big straight-sided Safeway salsa jars; they also make good forms for cuff
bracelets and bracelet beads). The outward curve means you don't have to flex
your blade while slicing. You can stick your nondominant hand in the jar for even
more control. Really helps with ghost-image metallic effects as well as mokume
gane. -- Georgia
...And don't forget to flip the shaved pieces over
onto a slice of scrap clay or a contrasting color to use for other things later!
Jean/PA
...these shaved
sheets can also be sanded after baking to reveal the dots
(see
more on this technique in Mokume
Gane >Texture Sheet)
Texturing
and shaving also works this way with mica-based metallic clays ("Ghost
Image")
...Jeanne R's lesson
on use of a plastic canvas as texture sheet before shaving ... using
gold and Pearl
http://www.heartofclay.com/pc/fauxfabrics.htm
......plastic canvas---There are even diamond-shape grids now and this
makes a really nice scaley look. Just experiment with different thicknesses and
different colors of clay and shave off some of the top layer. I made the most
perfect snake skin by doing that.
.......And about the stickiness. I usually
use the second from the thickest setting on one pasta machine for the thickness
of the clay and then powder the canvas with cornstarch or baby powder.
(I use baby powder most of the time.) Then I dust the layer of clay on the side
that is going to touch the plastic canvas. Run through the pasta machine on the
thickest setting. I have no trouble separating the clay from the canvas
with this technique. The clay will go spread up on the canvas as the canvas takes
up space so dust your canvas several inches past where the clay lays on
it.
......When you go to shave off the little squares, stick the smooth
side of the sheet of clay down to a piece of glass (or another smooth surface)so
that it does not slip while shaving. Jeanne R.
(see more on this
technique in Mica
> Ghost Effects)
fiber fur
Kerri Pajutee's fabulous but time-consuming
lesson for putting fur on bodies of dogs/cats/etc, then putting
flocking on faces, etc.
http://www.kerripajutee.com/default3.asp
(click on Techniques)
(...remember
to sculpt the animal's body thinner than it looks since the
fur will make it bigger)
fur: ...match type of fiber to type
of fur as much as possible (smooth, wavy, fine or course, etc.) to the animal
you are creating.
...she prefers to comb out natural fibers-- alpaca,
kid mohair, silk and wool from knitting shops,etc, but can also
use fiber "rovings"
...make a knot in a number of strands of yarn/etc to hold
together
...use fine-tooth metal eyebrow comb (e.g., Chanel 9) to comb
out a short length of the ends
...cut off 1/2" length and place aside...
repeat combing and cutting till is enough for the entire animal
...beginning
at bottom of animal (legs), apply tacky white glue with paintbrush then press
ends of small bits of fur onto glue with tweezers
...apply more fur above previous
fur, overlapping and moving upward on body
...let glue dry as you go, and scissor
clip excess... give final haircut when done
flocking for faces,
paws, legs, ears, or all over
...after combing fiber, cut the shortest lengths
possible (almost powderlike) into a container
...apply glue as above to small
areas with paintbrush, beginning with legs
...moisten finger on damp towel,
then press into flocking ...press flocking lightly onto glue and repeat with more
flocking till glue covered...face last
(...when using non-white flocking,
she adds a bit of acrylic paint of the same color to the glue)
(see more ideas above in Hair > Clay Hair...and in Beards)
for tails and manes especially:
1... some people "make a
central hole in the middle of the back of head, bake the figure,
then glue the hair into place, then style.
2....wrap a piece of
raw clay over the ends of the hair and place into the hole, baking
again, then separating the hair around head as they style.
3... "rooting"
process that embeds the hair into the clay. Usually the entire figure and the
front of the face with ears are completed (to the hairline) and baked so details
are preserved. ...Then the back of the head is added as a ball of raw clay, and
beginning at the outer hairline the strands of hair are pushed deep into clay
and hair is added towards center." Linda Douglas
Linda's lesson
on embedding a mane hair on a horse-like animal
with mohair with 2 flattened logs of clay (+ tail?)
http://www.pcpolyzine.com/2005winter/justask.html
...sculpts
up the neck to head/ears (skipping both sides of neck just below the mane area),
and bakes
...rolls 2 ropes of clay, then flattens
...first clay log has
mohair pressed into it (at ends?), then it's turned over and rolled over with
a brayer to flatten more and somewhat embed fiber ends
...haired-log applied
to left side of horses spine (horse on its side)... other log added on other side
of spine and worked toward 1st log
...entire sculpt wrapped in fiberfill for
baking the 2 logs (to avoid burning the mohair, etc)
for feathers or flocking, see Mixing Media > Feathers & Flocking
sculpted-clay fur
Jill Willich's fabulous textured fur on wolf http://www.studiowillich.com/images/Grrr.gif
"
stamps"
...coarse (60 grit) sandpaper, or textured leather,
or roughly woven fabric like linen. Irene NC
...make yourself a
texture "stamp" out of scrap clay--cure it-- and then stamp
the impression into your uncured, pieces. For the "stamp" you could make it as
large or small as you want, and make "fur" marks across the top of it using a
large needle or some other sculpting tool. Fayette
...you
can use the circle part of a safety pin for indenting clay.
If you do a bunch of overlapping little circles, it can look like a curly
beard or curly fur. -Laurie
Maureen Carlson's
book (Making Clay Characters)... and Katherine Dewey's book (Creating Lifelike
Animals) both use the same technique.
...Basically you first make a "naked
animal" with eyes ... bake it ... add (a layer of raw?) clay...
then make it furry by stroking with a sharp knife. Pat
One
fascinating tool of Katherine Dewey's is 3 small needles sticking out of
the handle, used as a supplementary furring tool. Don't use two, don't use four!
Katherine Dewey presented workshop demos on achieving realism and on making sculptured
mice. She has a fantastic littel instruction booklet which was selling for a mere
five dollars.
http://www.elvenwork.com/index.html
...Cecilia's
had the 3 needle ends placed tightly together (in triangle shape)... same
as Katherine?
http://i96.photobucket.com/albums/l163/DianeBB/tools/641a.jpg
(bottom tool--can see only 2)
Cecelia
Determan made a fur tool with 20 or so straight pins (cut really
short) embedded randomly in the end of a long clay handle 3/4" wide
by half that width... some pins had sharp ends, and some were rougher since they
were cut ends (wire cutters)
http://i96.photobucket.com/albums/l163/DianeBB/tools/tools_handles_CeliaW.jpg
(bottom tool)
Garie
made a tool using a bunch of short pieces of wire (what kind) bundled,
then embedded in the end of a long clay handle
http://www.garieinternational.com.sg/clay/shop/handmade_recycle.htm
(sev. photos)
One thing I would like
to buy or make is the tool Laura Reynolds uses to make her eye-popping animal
fur.
... It's 3-4 sharp, short, springy loops of piano wire
set into the end of handle with a ferrule of some sort. I think she said
she made it herself, but just pouncing that against the surface of the
clay makes a very convincing fur texture... and you can control the grain of the
fur and scale it to the size you're working, by how much you work the surface
and in what directions. Halla Fleischer
...I
did some black eyed susans last week and used a small plastic potato cleaning
brush. It has hundreds of little bristles and the effect really looked like
fur. Karen
...I
used the curved back of a dental scraper to stroke a fur/hair texture into
the clay. Halla
...Katherine Dewey also
makes needle tools using long tapestry needles and things like that with
clay handles.
...how
about a metal comb ..... then use it to "back tease" a
bit, like they used to do with hair. cindy
Sculpting
fur:
1. The main thing is to follow the natural growth pattern of the
fur or hair. Start at the cowlick areas when grouping locks of hair.
2. DETAILING FUR or HAIR:
A: the first and best way
is to sculpt it outright, starting with the major hair groups and then
refining the smaller lock areas and then "spliting hairs as they say.
B:
You may speed up this process a little by creating a texture stamp of the finished
detail and pressing that in some areas. Then you can touch it up to blend
everything together.
C: Make a fine hair detailing tool. Use small
tubing and insert as many fine (I use beading wire) wires
as will fit. You can either glue them in with thin super glue or crimp
the tube handle to fasten the wires. . . . Trim the wires off at an
angle to reach tight corners. While working with this tool, you can
adjust the flow of the wires. . . . Use a dragging motion with the tips
and a pressing motion with the entire wire group. ...But you will still
need to design the the lock groupings for a realistic layered look in about two
rougher stages.
D: Thin plastic wrap can be used to rough in the several
hair group (lock) stages and even for almost fine detail fur strands. You will
be placing the plastic between your tool and the clay and lifting the plastic
between each tool stroke for maximum sharpness. Lastly go back and split these
plastic wrap hairs into finer starnds. Note: Clay balls may result and can be
"flicked" carefully off the hair after you are done. with a tipped brush. That's
my tech on hair sculpting. SOME SUGGESTED TOOL SHAPES:
1. spear
shaped dental tool
2. the side edge of a tool
3. a needle
file or needle
4. Smallest size clay conical shape tool (silicone
rubber paint erasers with the brush handles) The Dane
(see more ideas above in Hair > Clay Hair...and in Beards)
for feathers or more on flocking, see Mixing Media > Feathers & Flocking
there is much more inspiration for clothed figures in Sculpting > Websites >> Dolls & figures
Clothing
for clay figures, dolls, abstract figures, etc, can be made with:
... plain
fabric alone
....clay or liquid clay (or other stiffener)
embedded into the fabric
... 100% clay that has been created
to look like fabric (could be patterned, textured, or plain fabric, etc)
FABRIC ALONE:
lesson on making shirt and overalls from simple
patterns (fabric only , but could be clay)
http://www.diynetwork.com/diy/cr_dolls/article/0,2025,DIY_13753_2268309,00.html
MarthaStewart
clothes and patterns for cylindrical figures
http://www.marthastewart.com/page.jhtml?type=content&id=tvs5349
....(click
on Clothespin Ornaments link
near bottom for actual patterns --pdf)
examples of clothing structure
http://www.thumbprintkids.com/
(all kinds of clothes)
http://www.katopolyclay.com/gallery/art_cloth.jpg
Donna Kato's skirts, blouse, jacket, long & short
neck scarf (realistic)
http://members.shaw.ca/gera/new_page_1.htm
*Cheryl's fabulous figures (art
dolls) with caned clothing, hats, and lots of mixed media
http://www.glassattic.com/imagesOBJ_SEAS_MISC/Hallow+/Joanne_Dia.htm
Joanne B's skeleton ladies, beautifully dressed)
http://www.norajean.addr.com/Faux/abalone/What2Wear/DressingRoom.htm
NoraJean's lesson on "dressing" a mermaid
http://pcpolyzine.com/0301january/0301fantasyart3.html
http://www.pennydolls.com
(Pennydolls' simple clothing, hats --some made from leaves, etc.) must
click on English flag, then on Fimo Workshop, then on each photo for lessons
http://members.tripod.com/~ctrottier/clay2.html
Cheryl's skirts and pants made from clam shell mold
ALL WEBSITES
GONE: (notice how
Tracie has created the look of multiple-piece clothing by
using piping on the elf, etc.)... ("wild
women" swap --lots of simpler clothes, also hair)... (*Jenny P's many wonderful
draped clothes, incl. clowns, Santas,etc.)... Nf's santa on bottle...
pattern for jacket
ALSO,
from Sculpting websites:
*wire+ armature for sm. figure plus & head,
hands, clothing, etc. (Astralos')
http://members.tripod.com/~Astralos/clay-base.htm
Donna Kato's lesson
on robes (etc.)
http://www.sculpey.com/Projects/projects_nativity.htm
Maureen's lesson on pattern for robe, etc.
http://www.weefolk.com//santa.htm
Marie's
cloaks and robes on figures (with dog-like faces)
http://www.marieidraghi.it/snipperi.htm
WEBSITES
GONE:
*Spooky's lesson on making a small simple wizard (beard/face,robe,
etc.)...Margie's troll face, body, clothing lesson...
Nora Jean's visual
lesson on alum.foil armature, old man in robe, and
how to make leg/foot and shoes (norajean.com?)
*Sculpey's many lessons (look around)
http://www.sculpey.com/projects.asp
*Dawn S's figures with accessories, clothing, hair, nursery rhyme figures,
etc.
http://www.thumbprintkids.com/pages/gallery.htm
Diana's cowboy clothes
http://www.picturetrail.com/gallery/view?username=dwolls
football clothing,
& helmets
http://www.mhpcg.org/clayDays/claydays01/jan2001/January2001/pages/eileen_jpg.htm
*Pat-nipntuck's
tiny clothed figures (pigs, etc.) (website
gone)
(look in Sculpture >
Websites for many more)
Emi Fukusima's lesson on making a small figure from twigs and
yarn, then dressing it in layered, solid polymer clothes
http://www.hgtv.com/hgtv/crafting/article/0,,HGTV_3352_2014206,00.html
ETHNIC
& HISTORICAL polymer clothing
Sarajane's
lace, and gauzy and embroidered effects on
"sleeve" fabric over hands (Renaissance, Victorian, etc.), created
with various inclusions in translucent clay ...and opaque-trans. canes...
& Pearl clay
http://www.polyclay.com/beads.htm
and
http://www.polyclay.com/hands.htm
Dotty's
high decorative clothing & hair (metallic) on attitude-woman
(misc. layers... neck ruff gone?)
http://pcpolyzine.com/0301january/0301fantasyart2.html
& http://pcpolyzine.com/0301january/0301fantasyart3.html
(click on Dotty's)
Molly's
simple "Elizabethan"? gowns
http://www.polymerclaycentral.com/swap_angel.html
Dinko's many various clothing & headwear, footwear, etc....(including
old Roman, etc.)...click on NEW,and all, galleries, etc.
http://www.dinkos.com
Tracy's
Amish figures, old-fashioned clothing, hats/bonnets and accessories
http://www.doveceramics.com/amish.html
Tallmouse's
simple West African figures dressed in rectangle of fabric
(small diamond shape cut out in center for head to slip through, then
tied around waist and neck, turban) ...these figures often carry
everyday items like baskets with fruits/ vegetables/ straw/ fish, buckets,
jugs, beautiful boxes, lanterns and filled sacks as well (made
with dowel through bead (head), doubled pipe cleaner arms)
http://www.tallmouse.com/projects/kids/african/index.htm
Debbie
Jackson's African clothing on small figures
http://colspolyclay.org/Debbiejackson/djdolls.jpg
Gwen
P's kimono and other clothing (see more kimonos by doing a "search"
for kimono or Japanese from home page)
http://www.mhpcg.org/clayDays/claydays03/jun2003/jun2003.html
Egyptian,
Greek, Byzantine, Oriental, Hindu, Pre-Columbian costume & jewelry,
etc.(non-polymer, Treasures of Ancients)
http://www.egypt-greek-gifts.com
Applying clothing ....Patterns-templates
It is a good idea to get as much of the
clothing on as you can before putting on the arms and
the sleeves. For example if my figure is going to have pants,I put them
on first, one leg at a time. Then the shirt, I put on the back, one side of the
front, then the other. I add the pocket, the collar, the belt adding my details
along the way. NOW I am ready for the arms and the sleeves, I put the arms into
the sleeve. Leave the shoulder holes open, fix the cuffs, bend them into the right
position, now slide them on the armature wire. If I don't have wires for the arms,
I slip the handle of a paintbrush down into the sleeve, and press the arms only
to the elbow, against the unbaked shirt. This gives the strength. After that I
finish the seam around the upper arm.
..."Harry the clown" in his case I made
the armature with no arms, no head (just the wire) and his legs with his bare
feet. I didn't add wires for the arms because I was going to have them close in,
and the clay for the clothing would be attached to the sleeves, I felt this would
be strength enough. Otherwise would put one wire all the way through the torso,
but with no clay on it. I baked my form. I added his shoes stockings and baked
again. After that I made the head and added it to the armature and baked again.
Now while working on his clothing I could hold him by his head and his feet and
not mess up my work. He looked like a little naked man, really skinny with bony
knees and his shoes and socks on! Next came the clothing, and after them the arms,
I baked again. Very last I painted the face, and added the hair and the hat. Jenny
P.
if you want to figure out what
pattern shapes you need for a particular piece of clothing for
your figure, or at least to see the general shape it might require
...look
at real patterns (Butterick, McCalls, Simplicity...etc)
for the piece you want, either at a fabric sewing store or online .....or buy
them
.........then make a photocopy of the instruction drawings
of the small pattern pieces, enlarging them to close to the size you need for
your figure (take meas. with you)
...you may be able to combine some
of the individual pieces into larger pieces first for simplicity
...the
pieces can then be pressed together, rather than sewn together
........(overlapped
or butted, and smoothed ... or just overlapped, with or without faux stitching,
piping, hidden in folds, etc.)
...Barb's
lessons on using patterns to make doll clothing, plus more... http://www.dollmakersite.com/tutorials.htm
...all you need is just a basic knowledge of how garments are constructed
to make your own custom patterns from paper towels (these
can be cut and glued like fabric and tried on the doll... the main alterations
can then be made to the paper towel pattern and you can snip it apart to
use as a pattern to cut the fabric. I'm no seamstress, believe me - it's been
years since I did any sewing, but it was still pretty simple. Elizabeth
...or
sometimes you can use aluminum foil
... wrap the area the way you want the clothing piece to fit, and smooth
the foil down... cover all over with strips of masking tape to hold
the shape ...then cut off the alulm.foil-tpae with an Xacto, etc., and
press the pattern flat ... then use that piece as your pattern
...the rest of the clothing was "stitched" together with Fabri-Tac glue... Elizabeth
Lisa’s skirt/dresses (for angel
or other) –loosely fan-fold (don’t crease) a sheet of clay; gather at top
and place around body or as a substitute for body
....you're trying to work
with a rectangle so all you will get is those kind of folds. Roll out a
large circle instead. Cut out a circle in the middle a bit smaller than
the waist size. You'll have what looks like an old 45 record. The distance from
the inner hole to the outer is the length of the skirt. (this is much like sewing)
You'll have to experiment with the thickness of the clay. The thinner it is the
easier to get smaller folds but you sacrifice strength. A small slit from the
inner hole will allow the skirt to slide on the figure.You will need to have
the arm that holds the skirt already in place and baked so you can place the skirt
in the hand and adjust the folds. The round shape of the skirt will give
you much more "fabric" to work with and allow you to achieve that natural look.
Dawn S.
Tracie created the look of multiple-piece clothing by using piping on her figure
Generally you sculpt clothing
after you've formed a basic body mass. This body mass doesn't need to be anatomically
perfect if the clothing isn't skintight or clingy, but the proportions do need
to be there. To sculpt clothing, I highly recommend you look into Burne Hogarth's
book Dynamic Wrinkles and Drapery, sold at major bookstores and art supply
stores. This book shows how all sorts of clothing bunches up, hangs and wrinkles,
and if you follow Hogarth's advice you'll be sculpting realistic clothing. For
sculpting armor and weapons, check out any of a number of books on the subject
at the bookstore or library.
...see also Shane's angels for magnificient
polymer "fabric" draping
http://www.shanesangels.com
(click esp. on Gallery at top of page, as well as on Products)
...Lee
R's simple choir robes with draping http://www.rmpcg.org/lee.html
While baking, I use one spot of (cornstarch) biodegradable
packing peanuts up the skirts of each one (to keep that form intact). Janey
....use aluminum foil or fiberfill stuffing to position pieces
that are likely to droop in the oven…Elizabeth
...you
might have to leach the Premo in order to get the sleeves to billow
out like that... the stuff I was using is pretty "stiff" for Premo.
Eliz.
my faux fur is a non-woven felt fleece... no raveling, short nap, and you don't have to worry about cutting only the backing as you do when cutting faux furs. Elizabeth
Joann's has the most wonderful new fabric ... the burgundy is one called "moleskin," and it looks like velvet at this scale. ...It would make a beautiful ball gown for a dollhouse scale doll, because it's got such a low profile, plus it comes in lots of great colors. Elizabeth
For
only real fabric clothing for figures, I cut out the pattern peices from
my old clothing so that I used only the finished hems
from the original garment... those finished hem areas look nicer than I
could currently do on my own since really nice professional looking hems are tricky.
Lori K.
...Now you,ve got my ol' brain agoing. Could hit the thrift shops
with a completely new eye... Annette
... sometimes at garage sales,
you can get an item that is stained but still completely usable for doll purposes...
bady stained or torn velvet dress, or item of kids clothes, or heck wedding dress,
are cheap.... I hoard my treasures and keep them until I find a use. Lori K.
There
are many, MANY ways to make faux fabric completely from clay:
...simply texturing clay can create a woven look, cane slices can be used to make
patterned faux fabric in sev. ways, and bits or shreds can be onlaid on sheets
of clay (or collages created), inclusions mixed into clay can simulate various
fabrics, mica clays can be manipulated, paints and inks can be used, mokume gane
techniques used, etc.
few examples using various techniques:http://www.mdpag.org/clay%20day.htm (middle of page)
texturing
Kathy Dewey uses crumpled aluminum foil in a dabbing motion to create
the look of fabric wrinkles, etc.
I
then textured my cane slice sheet with a piece of sheer chiffon...
gives the little quilt a "fabric" look and camouflages fingerprints,
too. :-) Elizabeth
.....Marlene's shoe fabric created by using a texture
sheet (over background with roses) (website gone)
...Donna Kato's faux brocade ("Brokato")
appears gold-outlined because after impressing raw clay with texture sheets
or stampings, she then antiques-backfills the impressions with gold
acrylic paint by wiping the raw clay pattern until the
high gold areas are mostly removed
.........or
a flattened variation of the "brocade can be made by
first completely covering the texture thickly with gold paint and drying,
then applying a (different) color of acrylic paint to top surfaces
(tapping on with finger) and drying... then roll over the clay gently
to flatten the texture and to spread out the pattern (hand-rolling may be gentler
than pasta machining to avoid actual crackling)
(...see
much more on using texture sheets --plastic & others--- to texture
sheets of clay for clothing in Textures)
using
a (Kemper or other) small cutter will cut the clay without cutting through
a layer of Saran or other plastic wrap which has been placed on top; this
bevels the edge nicely --and then you can lift the wrap off. (Cathy Johnston showed
me this) .Becky
..... The heavier
the plastic, the smoother and rounder the edges. Sally
..... I also used it when cutting tiles for a quilt, since
the beveled edges make it look "quilted." Becky
....or how about
pressing an exact-same-size tiny cutter into a sheet of quilt "squares"around
each "block" to do the same thing?...even if it were done over a bunch
of tiny wrapped canes (lg.lace cane), it would probably create the look of quilted
"blocks"... DB
a good way to make the really
fancy reticulated /granulated armor pieces . . . . try making a
deep impression in clay, bake it, and then give it a coat of flecto
making sure its a good thick coat and gets down in the impression. Wipe off the
top of the piece, removing (any?) raised area (wet?) flecto , leaving it in the
grooves.
.... pour some Beedz (tiny, glass, holeless orbs...see
Mixing Media) (into the impressed areas),
wipe off strays, allow to dry. Very cool effect, especially the metallic
(clays?). . . Sarajane
for stitches ... MicroMark has
a set of three tiny pounce wheels: http://www.dxmarket.com/micromark/products/15200.html
- the wheels are much smaller than a seamstress' pounce wheel, (which really *is*
a neat tool to have around) and the "dots" it makes are closer together,
which you might like better for small scale figures. Elizabeth I have that same
set, only I got it at a woodworkers store.... it's used to transfer a pattern
to wood. Joanie
(see also Alan Vernall's rotary marking tools made with miniature
modelmaker's circular-saw blades mounted on a handle, in Stamping
> Miscellaneous)
inclusions, translucents
Inclusions
of various types, often mixed into translucent or partly translucent clay)
can give many good fabric effects too
...blue denim Levis, with
sparklies (I used Fimo's Lapis clay-- a very blackish blue, with inclusions
of very fine glitter. Kim2 (discontinued color; see Faux-Many
> Lapis for mixing lapis yourself)
...I've
been getting some really interesting effects using colored play sand
mixed into the primary colors(yellow, red & blue) . . .because the particle
size is so large, there is optical mixing going on and the resultant color
mixes look like heathered yarns after sanding and buffing
...(see
more on the possibilities in Inclusions
and in Fauxs)
You
can tint some translucent clay (add a tiny bit of colored clay to
the trans.) then press it out super thin on your pasta machine. that will
give you semi-see-through clothing for fairies ...this adds a very
delicate touch to them. .
Lorie's Annabella fairy, wearing translucent dress
with flecks of gold leaf
http://www.sculpturefromtheheart.com/polymer_clay.htm
sheets
of "fabric"
can be made from cane slices in various ways (slices cut crosswise or even
lengthwise):
....slices butted together tightly or slightly overlapped
(on top a sheet of paper for easy removal), then rolled totally flat
....butted
or overlapped on a base sheet, then rolled totally flat
....laid here
and there on a base sheet (spaces between), then rolled
(can
also use slices from different canes on one base sheet --randomly
or ordered)
.......(for lots more info
on these technique, see Canes-gen.info
> Making Sheets from Slices)
Many of these canes will look especially fabric-like when repeated if the canes are reduced really small
Faux
fabrics created with canes could result in abstract patterns, or have
pictorial slices, or even be completed "paintings"
created from various "component" canes (as with Donna Kato's slice paintings...for
those, see Canes-Instr>Overall> Slice
Painting)
Individual slices can also be added to a pre-shaped clay area, especially if just here and there...(if the area is small, use a knitting needle or pen barrel as a small roller)
For my "lace" on the dress, I first made a cane made with about
a 1" log of Premo translucent, wrapped with a thin sheet of Premo
white pearl.
.....reduced it ... cut in 6 or 8 lengths...combined
together... reduced and cut again.... reassembled and reduced... cut in half...
put the two pieces together... reduced to a square cane
....then
to make the lace fabric, I then cut slices and
put the squares close together on a sheet of paper (or a base
clay sheet), and then rolled over them with a rolling pin or brayer
to blend the edges together. Then run it through your pasta machine to get it
thinner. Elizabeth
...Sarajane's lace
effects, created with either inclusions in translucent clay ... opaque-trans.
canes... textured or sculpted Pearl clay
http://www.polyclay.com/beads.htm
and
http://www.polyclay.com/hands.htm
to
simulate Hawaiian muu muu-type dress fabrics, Cat
uses ("floating canes" ) made from an opaque clay (white) and
translucent clay for flower and leaf canes, etc.on top of
a colored background (often on a narrow Skinner blend)
....often
canes are silhouette images of flowers like hibiscus or jasmine, and/or
banana leaves
(see more on floating canes in Canes-Instr.
> Translucent Canes)
brocade
..Sarajane uses many canes (different patterns, but similar colors)
to create her rich, brocade type fabric (gone)
Martywil also impressed
her cane-slice sheet (with a fine texture) for a pr.
of faux fabric shoes (website gone)
Dora's
lesson for making millefiori fabric
(for crazy quilt simulation, on diagonal)
... each shape differs in cane pattern
http://members.shaw.ca/clayquilt/crazy1
...Anna's
fabulous crazy patch sheet .. many shapes of clay, fitted together
...each clay shape differs in texture, surface
technique, and/or cane pattern (website gone)
James L's many wonderful sheets of pattern
... created with all kinds of cane slices (stripes, random layered,etc.,
often combined and repeated) and possibly strips from marbled sheets,
etc. (can't describe all these... have to see to believe). . . some fabric
-like
http://www.akrobiz.com/polymer_clay/i_20.html
Lisa used a basketweave configuration
for her striped canes(wedges of Skinner blend bullseye canes)
.... these resemble
busy woven fabrics (less busy if more similar colors/shade chosen)
http://www.polkadotcreations.com/books/article.php?id=pdclrc01
bargello ... offset.
rows of logs or canes could look like bargello if colors are
stepped up or down
....Elizabeth's bargello swap photos
http://thepolyparrot.com/bargello2.html
...see more examples and lessons
forclay bargello made in various waysin Onlay
> Bargello and Canes-Instr.
> Bargello)
...(another lesson)...make a number of different
canes or logs ( plain or wrapped or Skinnered, or any
other)... place them together to make a row
...cut across all the logs, creating
many segment lengths (at least 3)...reassemble segments by staggering one
color (either up or down)... continue offsetting (again either up or down) till
you have a pattern you like (the resulting pattern can then be cut again and added
to the first to form a larger repeat of the pattern)
...other patterned canes
can be used as above as long as the colors and patterns have some contrast
to the ones next to them
...using small pattern canes, e.g.,
may look like various (different) fabrics
Marcia
B's lesson on making a tiny wire body with head of wrapped wire,
hair of 7 loops of embroidery floss cut, and a polymer cane slice wrapped
around it (square orientation) for a dress
http://www.rubberart.com/classes/class6_people.html
...Susan
B's lesson on making a tiny wire figure and clothing it (partly)
with caned clay (spirals)
http://www.sculpey.com/Projects/projects_wiredwomen.htm
many
MORE possibilities for creating caned patterns of clay which
resemble fabric, see Canes-Instr.
> Ikat ...ikat-type woven fabrics, Guatemalan-type
fabrics, and others made in rows
......Susan Hyde's clay figure with
clay dress and turban made from her "faux fabric" technque
http://homepage.mac.com/stanleyjp/polymerclay/PhotoAlbum39.html
..... Desiree's version of Guatemalan faux fabric made with ikat (bright reds,
blues)
http://desiredcreations.com/images/miscImages/miscPCCmplxCanes/fauxFabricCane1.jpg
.....Mia's lesson on "squashed" ikat http://pcpolyzine.com/april2001/monet.html
> Stripes
> Repetition ... for any patterns
repeated in grids & rows
> Plaid... for plaids
and gingham, etc
> Checkerboard and Gear (dots, etc )
>
Basketweave (can look woven)
shreds, bits... random & collage
Emi's
lesson for making "fabric" by placing random torn bits
of several colored clays (somewhat widely-spaced) on
a black backing sheet (later adding a bit of
metallic leaf here and there), then running through the pasta machine on
progressively thinner settings... she then put this through the pm backed
with another sheet of black clay to get back to the thickness she wanted for making
a sculptural kimono pendant
http://www.hgtv.com/hgtv/cr_clay_jewelry/article/0,,HGTV_3238_1390604,00.html
....(see
more on making collage sheets in Canes-Instr >
Collage)
fabric
could be made from "torn"
bits of a thin Skinner blend (or other sheets of layers --some
called "watercolor"
bead effect when applied to scrap base)
...for more,
see Sheets > Flattened Shreds &
Bits)
http://cgpcyOfPendants.jpg
and
http://www.desiredcreations.com/images/galleryFivePics/WCB2.jpg
random
dense patterns can be made with shreds or gratings or chopped
bits or even tiny
snakes/clay gun extrusions
of other clay colors(or canes or scraps), or
perhaps shavings from ghost image or other mokume gane?...
lesson:
......dump, or carefully place the bits where you want, on
a base sheet of clay (... the base clay could itself be a solid
color, marbled, Skinnered, whatever)
......then flatten the sheet....
(base sheet will show through as a background color if some space is left between
the shreds... and/or one of the colors used in the shreds could be the same as
the base sheet to add more "background")
Lindly's
"collage" fabric sheets made from various other bits like (separated)
strips of other pattern sheets, or slices..or combinations
of various canes, etc.. all flattened on a base sheet
....I
learned from Lindly Haunani this summer about making a color wheel, choosing
colors from it (or choosing colors from appealing bits of magazine
photos), and then making many individual 'swatches' of clay put together
to see how they interacted; colors then duplicated in clay and placed on a
base sheet. It was a fantastic, eye-opening experience! No longer am I stuck
with the idea that I must use on or two canes to cover an object! Anna
http://www.npcg.org/milehigh/lindly.html
(bottom) (see more in Sheets
of Pattern > Flattened Patterns)
some
of these are examples
of shreds on a base sheet (middle of the page,
and also lower in Barbara's McGuire's class)
http://www.mdpag.org/clay%20day.htm
mica clays
Jeanne R's lesson on simulating
a woven fabric using a mica clay sheet and ghost impression technique...
produces a coarse to fine (depending on texture sheet), even-weave,
grid-like pattern
...put mica clay through pasta machine with a sheet of plastic
canvas... shave off upraised nubs ... flatten in pasta machine
...don't
use sticky clay (leach if necessary) and dust clay
sheet with powder before impressing
...plastic canvas also comes in non-square
grid patterns---circles, heart, stars, diamonds
...can make nubs into
diamond shapes if sheet is put through pasta machine from one corner, repeatedly
...for miniatures esp, may want to flatten gridded sheet in pasta machine
thinner and thinner to create less definition
...(or if using two
stacked sheets of color, the result will more resemble gingham)
(...can
also place the shaved nubs on a base clay sheet, then flatten, for a non-regular
look)
http://www.heartofclay.com/pc/fauxfabrics.htm
texture sheets can also be used to create fabrics...either with the "ghost impression" technique (using mica clays), or by using two layers of contrasting (opaque) clay in thin sheets (....see more on this tech. in Mica >Ghost Impression)
more info
more non-polymer fabric patterns,
for inspiration:
tapa (geometric) designs from
Polynesia...could be caned or onlaid)
http://www.art-e-zine.co.uk/contents.html
mudcloth
(geometric) designs from Africa (Mali)
http://www.eshopafrica.com/acatalog/eShopAfrica_com_Mali_Mudcloth_1.html
http://www.culturedexpressions.com/quilting.html
kente
(geometric) cloth from Africa
http://www.eshopafrica.com/acatalog/eShopAfrica_com_Kente_cloth_46.html
http://www.marshall.edu/akanart/cloth_kente.html
for
even more ways on creating faux fabrics, with all-polymer, and
more details on above techniques, see:
....Mokume
Gane (esp. Texture Sheet m.g.)
...Stamping
...and Texturing
....Mica
clays
...Paints
... Lettering & Inks
REAL FABRIC embedded with clay & fabric stiffening + other fabrics
Synthetic
fabrics cannot tolerate high
temperatures (sewers can't use high temperature wash cycles and hot irons
when pre-treating their synthetic fabrics or else the fibers will melt - at best
you'll create a shinny spot on the fabric, at worst a hole). Cheri
...(so you'll
need to use natural fabrics and fibers
when baking with clay)
(...for most information on making clay-fabric, see Mixing Media > Fabric)
raw clay
Directly to fabric ....polymer clay
can mesh right into the weave of many fabrics
(...this gives you a flexible
piece of clay with fabric showing on one side)
Translucent clay
can be applied to the fabric from the top or back side , but white or
colored clay is usually applied to the back side)
...run a sheet
of clay through the pasta machine (I usually
start with # 3-4)
......then
put the clay sheet under the fabric... I run
over the fabric a couple of times with my hand, or an acrylic
roller
......then put that thru the pasta machine on the same
setting
......you can then cut it with scissors ... bake
like you usually do. Karen
http://pcpolyzine.com/0205may/fabric.html
(here she cuts out a shape, applies to something, then
often adds a clay rope or other frame around it)
...if
you're using a dark fabric, use dark clay..... light fabric,
light clay.
...if the fabric has really
tight weave, it might not work as
easily ....as long as the clay can get into the weave, it'll work
.....I've
used various fabrics... cotton, homespun, polyester (which
stretches so could be really interesting if you used that as part of your
design... (though some synthetics may not be as good?)
......Velveteen
is really bad... it has all those little specks of fabric
floating around...but works great for lining the inside of a box.
SOME USES: ....on boxes, or inside them... skirts for
miniature tables... sculpting dresses for characters are easier
to handle
... if you butt together 2 fabric-covered
clay sheets, their edge sides will bond together
.... (sewing seams
on 2 fabric covered clay sheets, which are laid on top of each
other)....the clay on the back bonds with other clay making the sewing of the
seams faster. Karen R.
....Shelly C's lesson on attaching clay
and fabric with just a pasta machine; then you can cut the fabric-clay
sheet into any pattern shapes needed with scissors (she rolls
base clay to # 5, then through the pasta machine with the fabric on
# 6; she cuts small squares also for pockets, patches.
http://www.sculpey.com/Projects/projects_littleangel.htm
....Marcia B's lesson on really embedding clay (usually
translucent clay on top of the clay, in order not to change
the color of the fabric) into fabric for roll-up beads, pins, clothing..
she uses fine cotton cloth (sometimes with metallic threads) ... condition the
clay with the pasta machine until about half the size of the cloth at almost
the thinnest setting...then put clay and cloth (on back side?) through the
pasta machine twice more at the same setting, then on the thinnest
couple more times.
http://www.jewelrycraftsmag.com/articles/bondedclay.shtml
white glues, liquid clays, special stiffeners
I liked Sobo (white
glue) and fabric technique the best (...did all this before Fimo Gel was released,
so can't speak to that)
....the glue didn't dull the fabric whether
it was lightly brushed on the back, or completely soaked the fabric -- thought
that the (TLS) did slightly deaden the crispness of the fabric patterns
...rub
Sobo on the fabric back or on the raw clay... lay
fabric on clay...bake together
...different fabrics may be treated differently
......so
for a thick Chinese brocade (you can just coat one side of it with
a "gluing" liquid) ...but for something sheer like silk organza, you are
automatically soaking the entire cloth. Cassy
You
can instead apply liquid clay to fabric, then bake, to bond them.
....these
can be sewn (easily on the sewing machine or by hand) ?
... can cut
into pieces to make a garment (for you or a figure/doll), used as a journal
cover, made into a cosmetic bag, phone bag, coin purse or totebag,
etc. Patty B.
If the fabric piece is too big or you just don't want to put it in the oven, a heat gun can also be used to bake it. Jody
liquid
clay does very well with draping.... jenny patterson uses it to make her
fairy clothes to good effect
.... like dotty, i dilute it first
with Sculpey Diluent... saturate the cloth... squeegee
off the excess with my fingers, drape... and bake. sunni
I
use either 100% cotton or a cotton/polyester blend (I prefer
the cotton... lightweight, sheer fabrics wrinkle
more). I would use what I think of as shirt weight of bed sheet weight
fabric......fabrics which have a lot of white or
light colored background don't look quite
as nice.
.... iron the cloth until their are no wrinkles.
....spread
a layer of TLS (this is the only brand of liquid clay I've tried so far)
onto a sheet of tempered glass (I use glass cutting boards..... place the
inside or outside of the fabric against the TLS coated glass depending
on which side you want shiny (I prefer the shiny side to be inside
so I place the fabric face up...that side will have a smooth slick feel which
is great because it can easily be wiped off making it great for a cosmetic
bag)
.... then I apply a slight layer of TLS on top and smooth the
fabric/TLS until it is as smooth as possible(If it is not smooth and in
good contact with the glass, you will see an air pocket
in the fabric (press from the center out to the edges to help eliminate
these, and look underneath to check... fix bubbles now or you will have a non-shiny
spot after baking)
....Bake at 275º for 30 minutes..... Let cool.
.....Peel from the glass.
......I made one purse by selecting colors from
the fabric and added a clay flap to the top edge than folded over the bag to close
it. I could have added a magnetic or toggle closure if I wanted to. I reinforced
the bottom of the bag by making a fabric covered board to fit in the base of the
purse. I used some of the same coated fabric as the purse. Then I braided a cord
to coordinate and attached it with heavy duty spring rings such as are on key
rings.
...My next project already in design is a roll-up fabric tool pouch
much like what is often made for paint brushes. It will have either a tie
or Velcro closure. It will have an assortment of pockets for various tools I always
use. Actually the design will have two layers of pockets, with the top one shorter
than the back one. Patty B.
You can also
make the clothing of plain fabric, and then stiffen it with
Aleene's Fabric Stiffener and Draping Liquid, or any brand of
stiffener.
...... can be brushed onto the material after the clothes
are on the doll, or soaked into it before they're dressed.
......
dries hard (not
flexible) and clear, and can be wiped off before it dries on
the clay.
...ClothClay (by LaDoll) . . . same thing? http://www.miniworlddolls.com/Goodstuff/TipsClothClay.htm
(...see more details on making clay-fabric in Mixing Media > Fabric)
clothing Accessories ... shoes, hats, purses, & other
hats
& headware
...definitions of hat types: http://www.biltmorehats.com/descriptions/terminology.htm
hats
& other headgear http://encyclopedia.thefreedictionary.com/List%20of%20hats%20and%20headgear
http://www.sillyjokes.co.uk/dress-up/acc/hats/index.html
http://www.cynthiahoweminiatures.com/hatmaking1.htm
(lessons ...click on subsequent pages too)
Fayette's
many miniature hats, often for polymer figures (not polymer themselves, but inspirational)
http://www.picturetrail.com/gallery/view?p=999&gid=8807918&uid=492837
...the
cowboy hats I made were for 3 1/2" finger puppets. I simply took a ball
of clay and cut it in two hemispheres, then pressed a marble into the bottom of
one half to create a crown with a small depression for the head. I placed that
over a disc of clay cut with a small cutter (which had a smaller disc cut out
from the middle, flat donut style). I think I used some kind of brass rod or thin
knitting needle to press the crease in the top of the hat. Then I curved up the
side edges of the brim. For finishing, I wrapped a small band of contrasting clay
around the join, then added a small feather sticking out of it (I had trimmed
it way down from a *real* black and brown feather). Looked pretty realistic, if
I do say so myself
Another possibility would be to get a book from the
library on hat making and create one the same way you would with
expensive felt, etc. (I remember seeing books like that in with the costume books,
as well as with the theater books, both in adult and kids' depts.) Actually, there
should be some things on the Web like that too. Diane B.
...the Creagers feel
the proper type of felt to buy for blocking doll-size hats is "fur
felt" (from beavers, raccoons or rabbits), which has a good texture &
doesn't become fuzzy.. as thin as possible. 100% premium virgin wool felt
(avoid lesser quality wool felt) is also good but
lacks the smooth finish and density of fur felt; handle carefully or it will become
fuzzy. Craft store felt from synthetic fibers is
not dense enough to stretch over hat blocks. ...Try buying old hats at vintage
clothing shops, antique and thrift shops and using its material. http://www.niada.org/arch_dollmaking_8-99.html
I
did a top hat once for Elmer Fudd and a Ranger hat for Smokey Bear.
I don't know if I can explain the method in print but I'll try. All the pieces
were made with PC rolled out to the right thickness for the size of the hat.
For the crown of both hats I started by making a tube of the proper size for the
head. Of course the top hat was easy. All I had to do was flare out tue top end
of the tube slightly and cut a disck to fit. to shape the ranger (cowboy type)
hat I cut darts out of the top edge of the tube so I could bend the top over and
shape it, weld it together and pres the dimples (creases) into it. I baked this
part. The brims were cut (looked kinda like a washer) and attached to the bottom
of the crown with liquid sculpey. The hat band was a ribbon of really thin PC
which actually helped weld the crown to the brim. Then you just shape the brim
and bake the whole thing. You probably already know that you can bake your pieces
on polyfoam filling so they don't deform during baking. If you don't have any
liquid sculpey to use for glue you can make a paste of PC and diluent. I have
put a couple of pics up on the web...http://www.frogart.com/Hats.html
Robert
lesson on making a (non-3D) red hat (fedora?
hat) with flowers
http://www.sculpey.com/Projects/projects_RedHatPin.htm
Marcy's
red hats and hats http://www.marcysclaypen.com/redhats/redhats.html
http://polyclay.com/beads.htm
Sarajane H's hats/bonnets & headwear (on buttons)
http://www.sculpey.com/Projects/projects_nativity.htm
(Donna Kato's lessons on fez type hat, turban, crown,
halo)
(for more headwear, crowns, Middle Eastern, etc., see nativity
figures listed on Christmas page (do Ctrl+F
search)
http://www.doveceramics.com/amish.html
Tracy's Amish figures, old-fashioned clothing, hats/bonnets
and accessories
http://www.mindspring.com/~janruh/clay/b3.jpg
simple hats and other head wear on little people, Jan's page
(website gone) Marlene's jesters with ruffled
collars, hats, etc.
http://www.parrishrelics.com/crowns1.html
old-style crowns & headwear
http://www.pennydolls.com
(Pennydolls' simple clothing, hats --some made from leaves, etc.)
must click on English flag, then on Fimo Workshop, then on each photo for lessons
...lesson ...many kinds of hats to
make by shrinking foam cups in the oven, then embellishing, see Sculpting-Bodies
> Other Accessories, Not Necessarily All-Polymer
....for
more hats, see below in Other Accessories, Not Necessarily All-Polymer
Maureen's
online video lesson on making various small boots
with the mold she designed/sells
(mold has separate areas for making
the boot, sole, and laced area)
...also turns into pointed
shoe for elf, etc., by pulling toe area outward)
http://www.youtube.com/watch?v=2-RcsXKomSU
(at 4:00, shows how to put wire and clay into boot for leg --Santa,
etc.)
Maureen's lesson on using molds to make boots, pattern
for robe, etc.
http://www.weefolk.com//santa.htm
Diana's cowboy hat, cowboy
boots & clothes dumped on chair
http://www.picturetrail.com/gallery/view?username=dwolls
Nora Jean’s lesson on how to make
leg/foot and shoes (website gone)
Susan
's lesson on making lace-up type leather "saddle"
shoes?
http://www.cdhm.org/tutorials/making-miniature-leather-shoes.html
catbyte's
(Hazel) fat Maryjane-type shoes and socks on ladybug (website
gone)
Ricky B's (real metal) shoes of various
types
http://www.lunaparc.com/miniatur.htm
many, many shoes --all types (ethnic, romantic, Christmas,
etc., etc.)
http://www.schuh.at/ (very slow
website??)
Katie created the (flesh-colored)
feet of her sculpt shaped as shoes, so that after baking the
shoes can be made by simply covering the "feet"
http://tutorials.theclaystore.com/techniques/firing-a-standing-polymer-clay-doll
Marika's lesson on making foot and ankle, then
making elf-type shoes (with pointy turned-up toes) from them by adding
an ankel cuff and pointing the "foot"
http://members.home.nl/asrai/cursus-en.htm
(click on Boots at top)
most
info on miniature shoes
(used as jewelry, etc.) like flip flops
or reg. shoes (+ miniature
purses), plus more hats, saddles, etc.,
is in Miniatures >
Other Mini Items
Lucy A's 2-4" fancifully shaped
shoes, larger than miniature...she makes hers with white p.clay... bakes...paints
with gesso ... paints w/ sev.layers of acrylic ink, pearlescent ink, or nail
polish (applied last, for sparkle)...sometimes glittered nail polish? (be
careful to use only acrylic nail polishes)
.....however, she could also use
metallic acrylic paints instead of the inks,
and doesn't really need gesso if using several layers
of acrylics
.... she could save herself many steps by just using one of the
Premo pearl clays for the basic color of her shoe... after
baking, she could mix Jones Tones or Art Institute glitters into
either gloss Varathane or Future then paint
those onto areas she wants the sparkle.. Patty B.
http://www.lucyarnold.com/miniature_shoes.htm
....for some removable shoes (see
SuperFlex clay in Characteristics)
........regular-size
shoes --pumps mostly (made from clay and/or with scenes, embellishments),
for Feat of Clay Challenge: http://www.polymercafe.com/feat_of_clay/feat_of_clay.htm
Miracle Mold (a silicone mold material--see
Molds) is great
for making molds for the heels, and also for making a little last-like
shaped tool for poking in and holding the toespace, etc. Sarajane
...a "last" is the wooden foot form form of a foot which is used
by shoemakers to form the shoe over
lesson for making a last
from polymer clay (and then leather shoes) --modifiable in part for
making polymer shoes or shoe parts as well? (Repel Gel or just cornstarch might
be useful for making the shoes and not have them stick to the form... see Glues
> Repel Gel)
http://www.cely.com/doll/shoe.html
more styles of shoes (& diff. ages/ cultures), patterns,
etc. which could be inspirational
http://www.personal.utulsa.edu/~marc-carlson/shoe/SHOEHOM3.HTM
http://www.museumreplicas.com
/webstore/homepage.asp
I've made some larger shoes
myself ("fairy slippers" and "elf boots") by covering real baby shoes with
canes. Then I use fabric stiffener on a real baby sock, put it in the shoe (after
curing, sanding, etc.), fill it with styrofoam and put a little floral arrangement
in it. They're really cute for baby showers and that sort of thing. If you use
a boy's high-top baby shoe, you don't need the sock. I buy the shoes at Goodwill
and test-bake before covering to make sure they won't melt. Suzanne
http://www.picturetrail.com/gallery/view?p=999&gid=286292&uid=149408
for miniature .purses & shirts (often used as jewelry), see Miniatures > Other Miniature Items
Shane's accessories
held in the arms of her angels ...Christmas and non-Christmas
items
http://www.shanesangels.com
(click on Products and Gallery)
Caroline's clay seascape painting "framed" by flowered clay curtains (website gone)
Real clothing and costumes/accessories
(some have supplies for making them too)
The Costumer's Manifesto (all
kinds of stuff!!!) http://www.costumes.org
Costumer's Quarterly catalog
http://www.costumersquarterly.com/
fabrics, hats, wigs, show costumes, Christmas supplies & costumes... character
costumes, makeup, gloves, trims, accessories, ...wide selection of theatrical
costumes, character costumes, period costumes, Halloween costumes, etc.
the
costume webring (list of sites); searchable
http://www.marquise.de/webring/sitelist.html
extensive site for examples of English dress from 55 (B.C.)...
to 1982 (A.D.)
http://www.costumecavalcade.co.uk/contents.htm
extensive European times & categories
http://www.siue.edu/COSTUMES/TEXT_INDEX.HTML
none of this (including the clothes) is polymer, but is inspirational
http://www.akirastudios.com/
(see
paper dolls above too)
not-nec.-polymer accessories
very cool walking sticks for wizards could be made from Sunni's wildwood hairsticks with mixed media (polymer clay, beads, Austrian crystals, feathers, doeskin and found items) Kim2 http://sunnidee.tripod.com/jewelry.html
hats made from shrinking foam cups in oven...
place cup upsidedown on cookie sheet and bake in oven at 350, for 1
to 1 1/2 min. (different baking lengths = diff. results)
...scrunched
alum foil inside the hat will keep it larger (or in certain areas)...
pill bottle filled with weight can be placed inside for more stability
...options
(before baking): cut top band off cup, or cut with decorative scissors,
cut cup in half; paint or stamp with acrylic/water-based materials, glue on tiny
baked polymer flowers, etc.
...heads under hats: bake cup over rolled-up and
taped 3x4" cylinder of cardstock or construction paper with face drawn on it,
or paint face on an egg and do the same .. http://www.hgtv.com/hgtv/cr_paper_crafts_origami/article/0,,HGTV_3293_1370963,00.html
and http://www.hgtv.com/hgtv/crafting/article/0,1789,HGTV_3352_1396182,00.html
....hats
or other accessories made from Friendly Plastic
clothing Books
Katherine Dewey has a new workbook
available through her web site called "Costumes of Clay," which was
originally written for The Muse.. . . ."7 full-page illustrated workbook
-- $7.25...Katherine teaches how to plan, fashion, and create polymer clay clothing
...http://elvenwork.com/workbook.html
*Family and Friends in Polymer Clay: Techniques for Making Character Dolls
and Whimsical Figures from Polymer Clay, Maureen Carlson, 2000 (see review in
Books on Polymer Clay)
How to Make Clay Characters, Maureen Carlson,
1997
Making Miniature Dolls with Polymer Clay: How to Create and Dress
Period Dolls in 1/12 Scale, by Sue Heaser
How to Make Perfect Dollhouse
Figures, Kitty Mackey, 1998
many
faces, bodies, dragons, etc.
http://pcpolyzine.com/0301january/0301fantasyart2.html
(click on all pages)
As a trick I have taken my embossing gun (you can use a blow dryer) and on a thin piece of clay ...just heat the part and reposition (bend somewhat) and while holding this new position, quench it in cold water to set it to that position . Great for repositioning clay tails and thin limbs and fingers.
Do
you use nature products??? When i make a big dragon i alway's us a Kalebas
(dried hard squash ) from India and Afrika. The kalebas becomes the body
of the dragons because it has a really nice shape:) For those who think making
a dragon is really difficult this could be the sollution for your problems because
half the dragon is there already :) And you don't use that much clay because the
only clay items are legs,feet,arms,claws,head, tail and for some wings.(not all
have to have wings) And you can work in one color clay and paint the clay and
kalebas when they are baked. Ria
(example? http://pcpolyzine.com/0301january/rvs3.jpg)
(see more on gourds in Covering >
Wood > Gourds)
Support Stands ...for sculpting figures
Sculpting & Baking Stand, by Jay Dearborn (...was called "J-Clay
Station")
...2 sizes of stands for holding figures while
sculpting, and also while baking
......for whole figures (one large,
one small enough for toaster oven--Mini Sculpting & Baking Stand)... (2007
model has rotating smaller disk on pedastal? disk)
...the large complex
stand has a rotating base with holes... various
dowels act as pegs which can be placed into them... the smaller dowels can also
function as crosspieces .....base
can also hold various tools
...can
accommodate miniature size sculpts, up to 24" sculpts (or even
cloth dolls) by strategically connecting additional copper tubing
held in place by brass rods through various holes.... many different configurations
possible
...also
a Doll Head Sculpting Rooting Stand
http://www.arcticfantasy.com
(...click on Enter, then click on
"Sculpting Stands")
Jay
also sells at e-Bay: http://stores.ebay.com/Arctic-Fantasy
(click on Sculpting Stands)
...also sold by OneStopPolymerShop...
Make and Bake Sculpting Stand (and mini)
http://www.onestoppolymershop.com/page/939304
purchased Rubbery-tipped tools for sculpting
These are available at art supply stores, some craft stores (smaller selection maybe), and online.
The Clay Shapers
and Colour Shapers are made by Forsline and Starr in England, I believe.
The darker the color of the tip, the firmer it is - thus the white ones
are pretty soft, and the black ones stiff enough to carve into unbaked clay.
They are terrific for smoothing small areas that you can't get your fingers into,
and the variety of tip shapes available are pretty cool - I had no idea what I
would do with these tools until I got some, and I find I use them quite often,
in sometimes unexpected ways!
These come in a vast
array of sizes and about 3 different hardnesses (and
degree of flexibility)
....I prefer the tapered cone
shape myself. Nothing is better for roughing in a sculpt in super sculpey!
....I
have sizes and hardeness like this:
1. very hard, very small one
for detailing
2. a medium, large and extra large medium
hardness for tuning and smoothing broad surfaces and softening hard
edges.
3. my secret weapon for more refined surface smoothing
and edge softening is a medium very soft tip cone.
...When
used with water these work even better.
... The best motions are rolling
and a combo motion of rolling and dragging. Of course direct
pressing is always the king movemnet.
I have used these puppies very
successfully for working epoxy putties for kit customizing. Nothing beats
them for filling numerous small pin holes in resin castings! Wayne THE DANE
I think the grey and black tips are probably the same..it's a dark grey. I love the smallest #2 sized set...I do pretty smallish pieces though..the biggest full body was maybe 8-10" tall.
My favorite tip is the Taper Point~it is the only one I have in Soft and Ex~Firm. My other favorite shape is the Angle Chisel Ex~Firm. But I must admit I love them all. THey get into little nooks and crannies wonderfully. I like the soft tipped one for more of a final smoothing type fella. BTW~I have used these with paint as well and they are great and clean up beautifully!
making one's own rubbery shapers
So......why couldn't
one MAKE their own clay shapers out of a flexible polymer clay
like Superflex (now called Bake and Bend) or possibly Eraser Clay,
using wooden craft sticks or other rods/sticks underneath or as support
or longer handles? DB
...you could also make *really* tiny
shapers with over toothpicks.
...the size and rigidity
of the handle or support, as well as the length the rubbery material projects
out by itself, would make a difference in the flexibility of the finished
rubbery-tip tool (whether the material was silicone, flexible, clay, eraser, or
other). DB
....Japaya's rubbery-tipped (double-ended) tools with various rubbery
shapes... created by placing each shaped and baked tip that made with
Sculpey Moldmaker into the end of a baked clay rod handle --she
had also put a stiff metal rod inside the clay rod, and created a lengthwise hole
in each end largejust deep and enough to be able to hold a projecting Moldmaker
tip
...... (she cured the clay rods/handles first, applied a bit of liquid
clay into the holes, then inserted the rubbery tips and baked again)
http://i169.photobucket.com/albums/u232/meriporlared/herramientas.jpg
(see
also just above in Purchased Rubbery Tools for variations in size,
hardness, and flexibility and what each works well for doing..
and also tips on using rubbery tools in general)
2-part
silicone molding material
...I have made "clay shapers" from Alley Goop
(a 2-pt. silicone mold material... see Molds)
by using small amounts, and working it as it cures. Karen (see clayalley.com for
Alley Goop)
...You can make your own clay
shapers out of 2 part silicone modeling putty. I use MicroMark's it's fairly
soft.. . . Exaflex, a dental putty, is firmer, but twice the price. (see
Other Materials)... Both cure very quickly, so
there's not a lot of time to make them.
...I model my shapers over my homemade
tapestry needle tools. . .the result is a soft rubber tip that yields
only slightly because of the needle armature. If I want another type of tip,
I simply change to the one I want.
... I model the tip over a needle
smaller than the size I will actually use; this insures a snug fit when I
do put it on the larger needle. Katherine Dewey
I like to use erasers on pencils for blending
seams ... I cut them to the shape I want, and the length of the
pencil helps me reach inside places that my fingers are too wide to get
to easily. Steph
...erasers cut to shape certainly is a good idea. I imagine
they are much like the commercial clay shapers which come with a variety of shaped
tips and different sizes and degrees of firmness. Patty B.
...Sculpting
tiny 1" faces, I couldn't get into the tiny places to smooth. The hard
rubber tool I bought was too big.
.......I took the ridiculously narrow
(1/8" dia,, <1" long ) cylinder eraser from a
mechanical pencil ...then sliced the tip off at an angle (which
gives me an oval) with an xacto. Perfectomento! But too tiny to fit the
hand well. ....the eraser fits well into the wrong end of an eraser holder
of a larger mechanical pencil
...... removed the eraser, glued a toothpick
in for strength and made a clay handle and popped it in the oven. ...When
it's cooled, I'll stuff the little eraser cylinder into it. TA DAHHH....Do not
attempt to twist the little eraser into the holder with needle nose pliers. You
cannot hear it scream before it disintegrates.
I
also made the other end into a tool for pressing eye sockets into
clay...but I was greedy to get it done and made it too large.
I
recently discovered a product called Plasti Dip at Home Depot. It is in
a tennis ball type can in the Hardware section and also in the section with all
the different putty (it is a liquid and you use it to dip tool handles
in to give them a rubber grip).
.... Well, I dipped the tips of lots
of my tools in it --including some needle tools, dried out pens,
orange stick, nail with pc handle, etc. ...It worked great.
.....this
s a very simple proccess but the liquid can get a little
thick...just read instructions on the can and play around a bit. ClayLadyClay
I dipped the tip of thelarge carpet needle into melted candle wax
several times when I wanted something more blunt.
... you can
shape the warm wax to some degree too. I find it very useful.
miki.
More Found or Purchased sculpting tools
Metal knitting needles can be used for rolling over clay to smooth it, or the rounded point tips can be used for sculpting.
I also use the pick
end of a nut pick to open up a slit that was started with a #11 exacto
blade. The other end has a smooth acorn shape. this is what I use to continue
to open eyes and mouths and even make the eye socket dents, and
some nostrils.
...A trick i found
that I use to smooth cheeks is not to try to slide the tool over the surface but
instead take the smooth portion of the handle just behind the pick and roll
it across the surface. . . . this is also a way to move clay from one area
to another. after setting an eyeball I will use the same tool to pul down
the eyelid over the eye. This makes the eyelid very thin. practice you can even
put a ridge on the edge for eyelashes. Lysle?
I
also use the pick end of a nut pick to open up a
slit that was started with a #11 exacto blade (the other end has a
smooth acorn shape).... this is what I use to continue to open eyes and
mouths and even make the eye socket dents, and some nostrils.
...A
trick i found that I use to smooth cheeks is not to try to slide the tool over
the surface but instead take the smooth portion of the handle just behind the
pick and roll it across the surface. . . . this is also a way to move
clay from one area to another. after setting an eyeball I will use the same
tool to pul down the eyelid over the eye. This makes the eyelid very thin. practice
you can even put a ridge on the edge for eyelashes. Lysle?
...sunni's
realistic relief "paintings" (leached Premo; regular clay smeared
thinly with nutpick for shading; hints & instructions from Katherine
Dewey's workbook)
http://sunnisan.com/claypainting.html
For engraved art (scratch art) ..there is a little scraping tool which is great for all kinds of uses with clay. The end has a small round tip to use and the scraping end works great with sculpting a piece.. . .making evergreen trees...fur or feathers, makes great lines. . . .this tool I use on every project. Debbie
Kemper Tool Company makes a tool called a Lacing Tool ...actually it is made for working with porcelain...call them and get a catalog. Really a great tool...I show how I use it in our new Sculpting Video that we put out...I use it to make the hand sculpted eyes...Jodi Creager
(Katherine) also uses a few wax carving tools (jewelry suppliers) including one with a small flattened sort of ball on the end. . . . .Another is formed with wire loops of different sizes like maybe about a half inch across and a quarter inch across, attached thorugh a piece of small brass tubing from a model-hobby store, then witht he handle part of the tube covered with clay. . . .One thing this kind can be used for is forming nice eyelids.
If you are looking for really cheap and interesting sculpture tools check out your local scientific supply store or university bookstore. The basic tools that they sell to biology students are wonderful for details. Lana
The eye ends of those big needles also make great dip pens for TLS, paints and frisket. Halla
My favorite tools of all tools are these little screwdriver sets you get at computer stores.... They come in their own little case and everything. I love these things! I do more textures, smoothing, etc, with these things.... They are cheap, and usually you get alot of tools for your money. Lynda
We use the JASI slicer here in production. . . for the angels. . . we make this big log of clay and use the slicer to cut off equal amounts of clay that are just the right amount for parts of the angels. Before the JASI this was guess work with a lot of waste.
For
tools, I recently got a set of Perfect Touch Modeling and Sculpting Tools
that I simply adore!!! They're teeny-tiny tools made specifically for small-scale
figure sculpting in polymer clay. Walter Vaughn handcrafts each tool, and
the quality is superb. (I'm not affiliated in any way--just a very satisfied customer.)
The Perfect Touch website and phone #, by the way, are (now) Perfect Touch Modeling
& Sculpting Tools, P. O. Box 905, Sugar Land TX, 77487-0905, PH: 281-980-6498,
FAX 281-491-5498,
http://www.perfect-touch.com.
. . Leslie
The Compleat Sculptor,
Inc., http://www.sculpt.com/,
515 West 24th Street, New York, NY 10021, ( 212) 243-6074
This place is great for sculpting supplies. They have carving tools, sculpting
tools, shellac, moldmaking products, casting products, and marble, alabaster
and stone (which can be used for bases instead of corian). They have a nice looking
catalog.
Plankspanker’s sculpting
tools
http://www.geocities.com/Area51/Shire/6883/photos.html
(see also Suppply Sources)
Making More of Your Own Tools....various
(I
have a tool I made originally for carving rubber stamps.) It's a tapestry needle
inserted eye first into a polymer handle. ...the pointed end is cut
using pliers and the subsequent end filed on a whet stone to a bevel.
....I use it for very fine lines where I want the edges to be a little wider,
or for carving already-baked clay. Rubymac
....the
large-round tipped #13 tapestry needle is handy for sculpting…. It makes
a nice hole for nostrils or anything else. . . It forms a nice simple fingernail-
by simply rolling the needle across the end of the finger. ...You can smooth the
clay in tight areas- by rolling the needle....with its round tip- it doesn't cut
into the clay. Kathndolls
tool tips
of clay... What I have done is to make a rod of clay about the thickness
of a pencil, I bake this.... I cut a piece of this the length I want, and
sharpen the end with a pencil sharpener.... then I shape the
end by either carving with my knife, or using sandpaper....
after I have the final shape, I smooth it with fine sandpaper and then
a coat of finish (I like to use the Fimo finish for this, but future might
work) ... I find the smooth finish doesn't catch the clay
....I can have a
different shape on each end, I can easily make a new one, and of
all the tools I have purchased these are the ones I go to for the final finishing.
Jenny P
tiny spatula for scultping tiny details -- anneal metal in flame, then pound tip flat and sand or grind into shape
Another thing I thought about doing is to use tumbled stones, inset into clay rods. If I can find them the right shape and size that is. I know of a dollmaker who uses the smooth stones and a little weak enzyme solution (aka: spit) to give her faces the final smoothing, she uses Super Sculpy, and her work sells for 4 digit prices. I haven't yet tried them myself though. Jenny P
knitting
needles can also be used as armatures for tool handles:
...aluminum
knitting needles sizes 10 and up are hollow so you can pack them
with clay and add some kind of tip, then bake (cut the knitting
needles into shorter lengths by rolling back and forth under a knife blade if
you don't have an inexpensive tube cutter)
...one tip or inserted bit might
be a wire loop to use as a gouging tool. Katherine Dewey
http://www.elvenwork.com/tips.html#two
...
I baked 3 needle tools according to your book (Creating Life Like Figures),
but when I took them out of the oven, the ends had popped
off...due to expanding clay. Jenn
...Oh
dear...moisture pockets of
plasticiser may have formed when you tamped
clay it into the cylinder...baking would have caused
the air to expand and pushed part of the clay outward.... try reheating
the tool and while it's warm, hold the handle with a hot pad and use another or
a pliers to push the needle and clay plug back into the tool. ...Secure
with instant glue. Sand and recap...... I suspect my habit of always working with
very firm leached clay (hence drier clay) prevents moisture
pockets from developing. Katherine
...When I tried it, the clay not only expanded
out of the tube at both ends, but it also cracked open
the end of the clay covering around the needle so I couldn't just
reinsert the popped out part...so I tried leaching
my clay overnight before packing the tubes,
but still the clay extruded from the end of the tubes during baking... what I
finally did was to pack the tubes alone (without covering),
bake, cut off the extruded clay while warm, then cover the
outside of the tube and insert the needle since it didn't expand farther
(...or cover and bake, then add needle)...a starter hole could be created
in the raw packed clay before baking, or the needle end could be heated red hot
over a flame and quickly inserted into the baked clay --don't
inhale the brief fume that emerges ...after cooling, remove and reinsert
with superglue). DB
(...see below in Toolmaking Processes for Wayne's
4" brass tubes used as handles)
(...see more ways of
making handles in Tools > Handles)
making & finding & using tools ...tips from The Dane
First, Boys & Girls, what shapes of tools are the best to make? AH! Here's where Uncle Dane knows the good stuff! I've been researching this info for many years, talking with other folks in the hobbies. (see above for purchasing these)
THE SPOON OR TEARDROP SHAPE: You will love this, because it is the most universal tasker in any sculptor/modeler's toolbox! the ones that are mass-produced these days are all too sharp edged for moldable clay shaping, and are not made in enough smaller sizes.
MAKING THE SPOON SHAPE: I'll say at the outset that you can make either wood or metal spoon ends from the different diameters of of wood and metal rod stock or wood boards (for large paddle type spoons). ...A range of sizes is very important for detail work. ...You can actually sculpt these spoons (at least the large ones) from epoxy putty, wood and/or metal material combinations.
METAL SPOONS with crimped
brass tube handles:
Step 1. Cut off the length you need to
make the spoon, its neck and enough to get a strong fit into your handle. Electrical
plier cutting blade will do the trick. I make my larger spoons from Copper
ground Ground Wire (comes in about 2 or 3 different diameters for varying
sizes). The romex house wire copper is good for some smaller spoons.
.......Here's
where you can make sure about your brass tubing handles ( I cut
off 4 inch tubing lengths for handles) fits to these copper rods. Use your
electrical plier/crimper blade for setting the handles to the spoons.
. . . use Super Glue Thin for final reinforcement of the fit.
Step
2. Holding the rod (soon to be a spoon) by a pair of pliers over a slightly
curved surface, (I use an auto lug wrench or a round corner of my table vise)
hammer the exposed rod end flat with angled blows evenly on each side of the
rod to leave a raised middle to the spoon. The curved surface you are hammering
on will create the concave side automatically with each blow, if you keep the
spoon sationary on the curved surface. Now tap the leading tip of the spoon a
little flatter to create the tapered tip of the spoon. Just visualize a poon in
your mind and you've got it! This is the rough stage. the smaller the spoon the
gentler the hammer blows.
Step 3. Using your belt sander, dremel or
sanding paper (220 or medium grit), create the oval edge of the spoon end
along your hammered spoon. Now carefully even out the hammer blows to an even
smooth surface on the toop and bottom of the spoon. Have a good light source just
as if you are sculpting, because you are! The smaller the spoon the lighter the
sanding process. This would be the first step for wooden spoons shapes or any
wood shape. If you are using already cured epoxy on your tool end, this would
be step 2. also.
Step 4. Metal Spoons and all sanded spoon stock must
now be sanded in finer grits (# 300 & 400). I use the medium and fine 3M 1/4 inch
thick flexi-pads here, since the curved surafces are all shaped an just need sanding
marks eliminated.
Step 5. metal tools only. You have collected a smooth
steel cylinder preferablely with a round end. This is the time to be a black smith
again. The process is called burnishing (rubbing of a harder material on
a softer material to polish the softer one). This removes all remaining sading
marks and creates a perfectly smooth shape, if you have sanded enough! You will
see a wonderful shine here!
Step 6. Fit your spoon to the 4 inch handle.
Crimp about 1/8th inch down on handle with electrical crimpers and super
glue the fit. you may want tpo prep your brass tubing ends by sanding them even
and rolling the leading edge on some sand paper to smooth over the sharp edge
left by sanding before fitting your finished spoon or whatever into it.
Step
7. Wooden paddle spoons are now completely sanded and ready for a sealer.
Vegtable oil works well with 2 or 3 three rubbing in sessions. Thin Super Glue
will do it too. just dip the tool in super glue thin and shake off the excess
onto and newspaper.
....large paddle spoons are useful for highly smooth broad
surface treatments as with large scale dolls and comic or cartoon or female characters
where good control of open surfaces and smoothness is of the essence. A rolling
and rocking motion works well with these paddles.
End Part 3. The DANE
Flea Markets...-Old Necklaces with ever tapering sizes of perfectly round
glass or plastic beads. ...old used Dental tools for shaping putty or clay! Kitchen
Supply Store -Bamboo skewers (they make two different diameters that I know of).
Hardware and/or Electrical Supply Stores -1/4 inch diameter Copper
Ground wire (there are various diameters of this type of wire and short lengths
of every size would be excellent for different tool sizes), short lengths of 10
& 12 gauge Romex Copper House wire and various diameters of birch dowel
rods, close grained hardwood (cherry, maple or birch not oak) board scraps
from their milling shop.
Hobby Shops -- various sizes of brass tubing
closely selected for inside diameters to use as handle stock for different
tools of metal shapers ..... solid brass rod with smaller diameters than
the copper wire rod stock for making even smaller tool ends
.... Very high
quality 2 part Epoxy Plumber's Putty (the 2 hour setting kind) for reinforcing
purposes and sculpting wierd tool end shapes.
...Tempered Steel
Wire or Guitar String wire for making different wire loop putty/clay
removal tools.
...SupefGlue Thin for coating wood tools and
reinforcing attached handle fits. The Dane
a very good crimping tool to crimp/attach very small metal ends to small brass handles (too small for electrical wire crimpers) is a round jawed jeweler's pliers for bending wire. The Dane
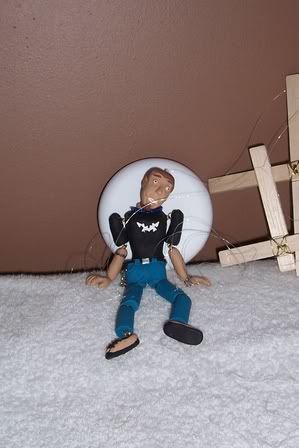
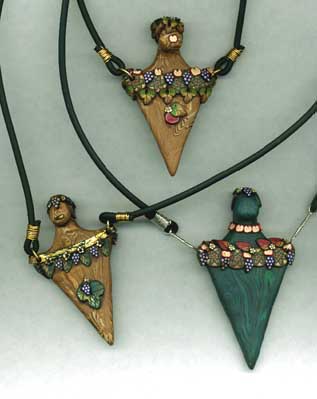
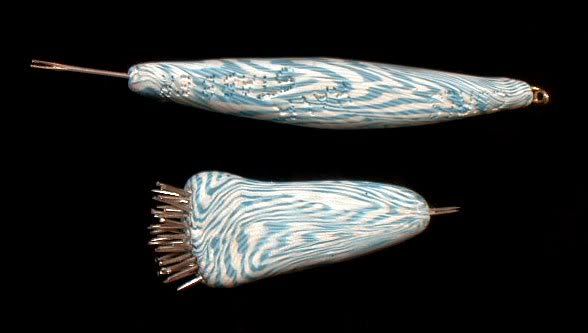
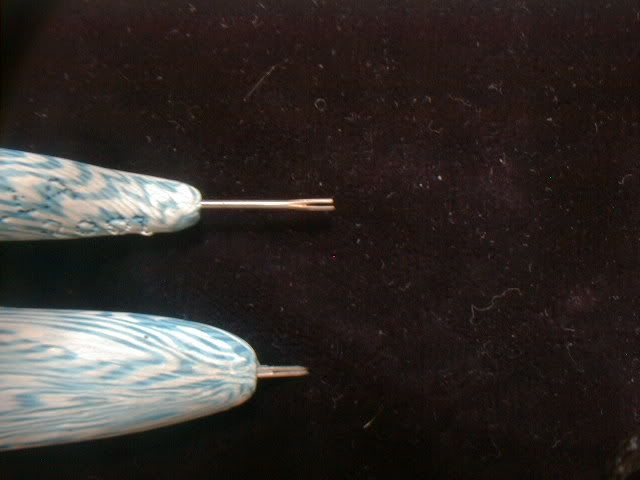
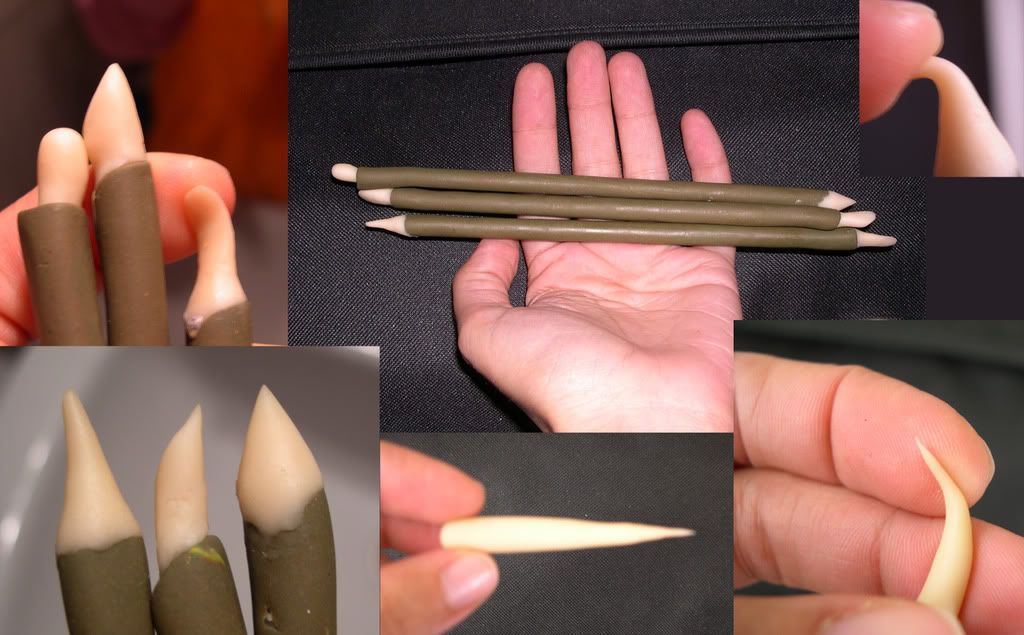